

Since I found my way back to model railways, I had the wish to build my own garden railway. When we moved back in 2015, a garden became available and this spring my father left me over some tracks. But it wasn’t until this autumn, that I could find enough time and money to actually start with construction.
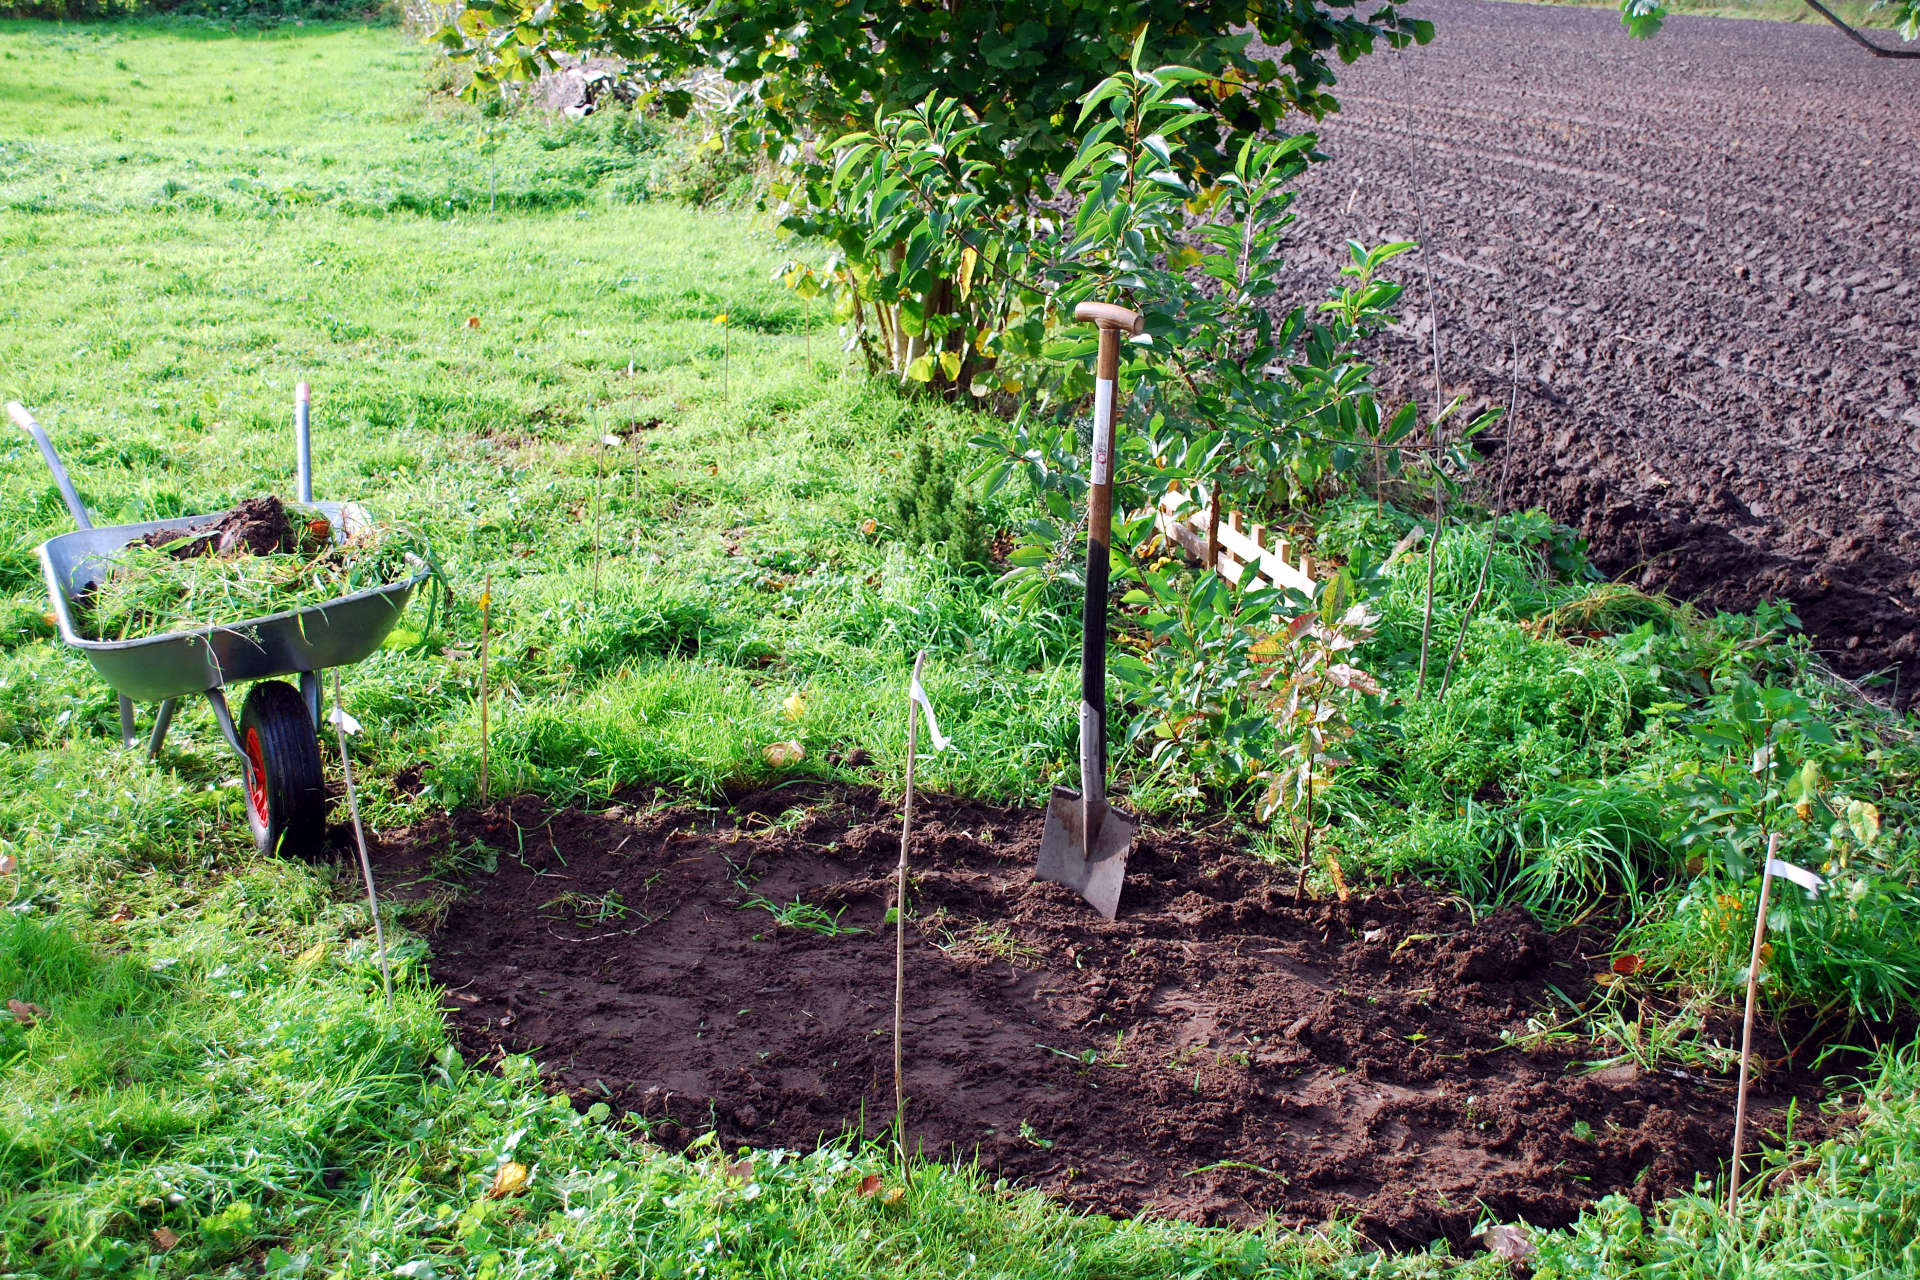
During spring my beloved and I had chosen an area on which the railway should come into being. Until I could actually kick of, this spot already served as a tree farm for some saplings and it saw some metres of provisional right-of-way, too. From that I learned that I’d like to engage in operations and shunting, but I also enjoy watching the trains go by.

The simple truth is, I can’t decide yet which operating mode is going to be my favourite – and I don’t want to, either. Because of that I’m going to run the construction of my railway like an agile project: plan and execute reasonably-sized stages – and then plan the next one based on the experience made. My vision is going to stay the same, which I already announced when I started to build my tender: a U.S. shortline in the early 20th century.
What I’m not showing in this article are all the thoughts and ideas concerning which possible industries might be served by my shortline. It’s simply not worthwhile since I don’t own neither buildings nor rolling stock and thus nothing can be regarded as final. I imagined this section of my railway to be a forest railway for over a year, but it could as well become some industrial railway for a mine.
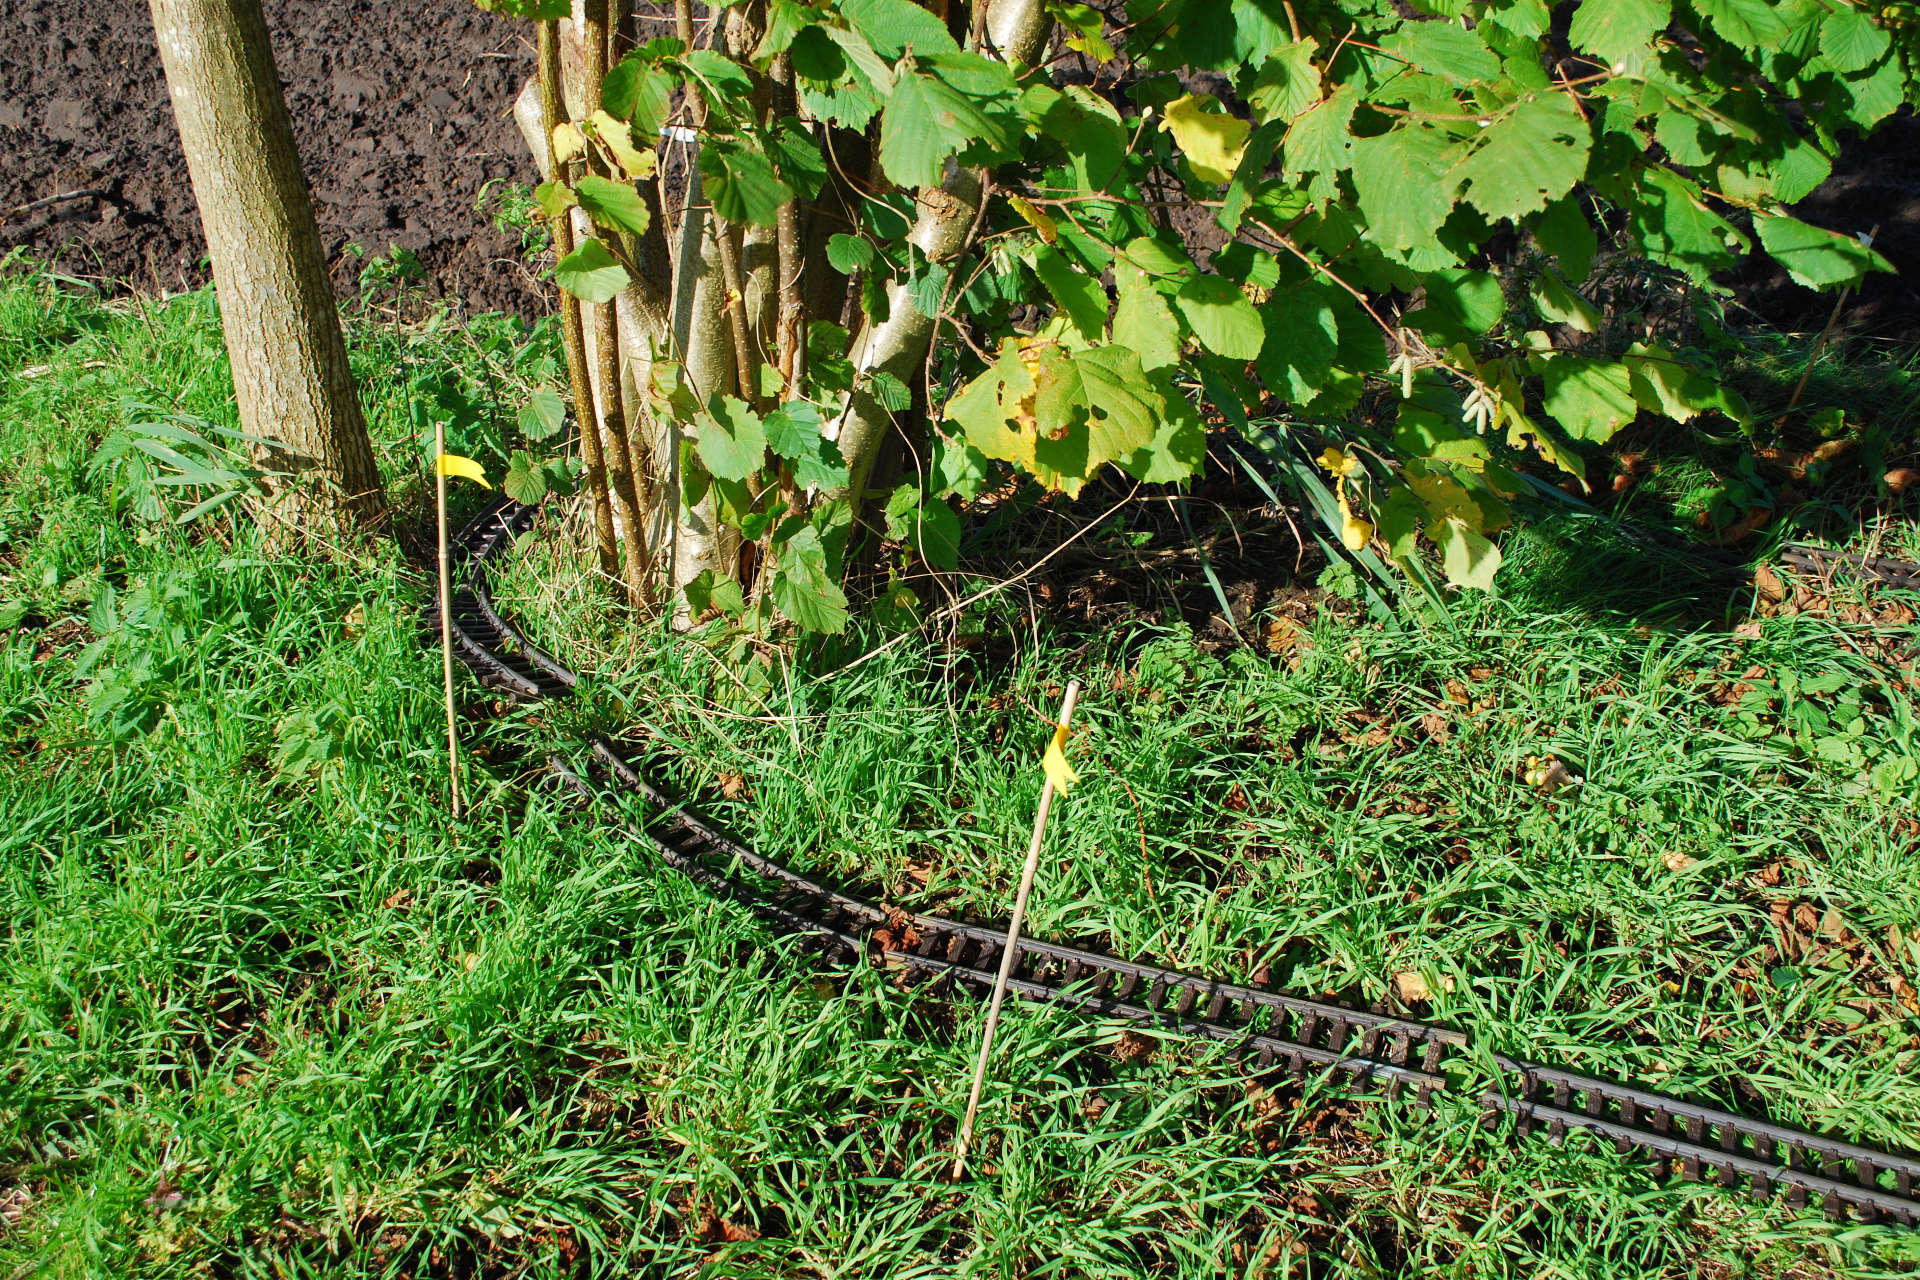
With these thoughts solidly anchored in the back of my mind, I tried possible track plans in situ. Those were supposed to be reliable, expandable, and I want to run unattended trains. It didn’t take me very long to chose a pear-shaped oval as the basic track plan, which I could break up and expand respectively. For the foreseeable future, the railway is going to expand westward, so the eastern curve is going to be a long-termed affair. The western curve is quite a different matter: it’s going to wind its way between a hazel and an oak, and I’m planning to turn it into an elevated track at a later stage.
My method of construction for the track foundations is derived from Family Garden Trains a U.S. site run by Paul Race. The naked soil is covered with a weed barrier, crushed gravel serves as a roadbed, and the remaining surface is covered with mulch. According to the article, one can get quite a durable result with low cost on both construction and maintenance. As a curious side-note, I don’t seem to be the only one who regards constructing a garden railway with an agile mindset…
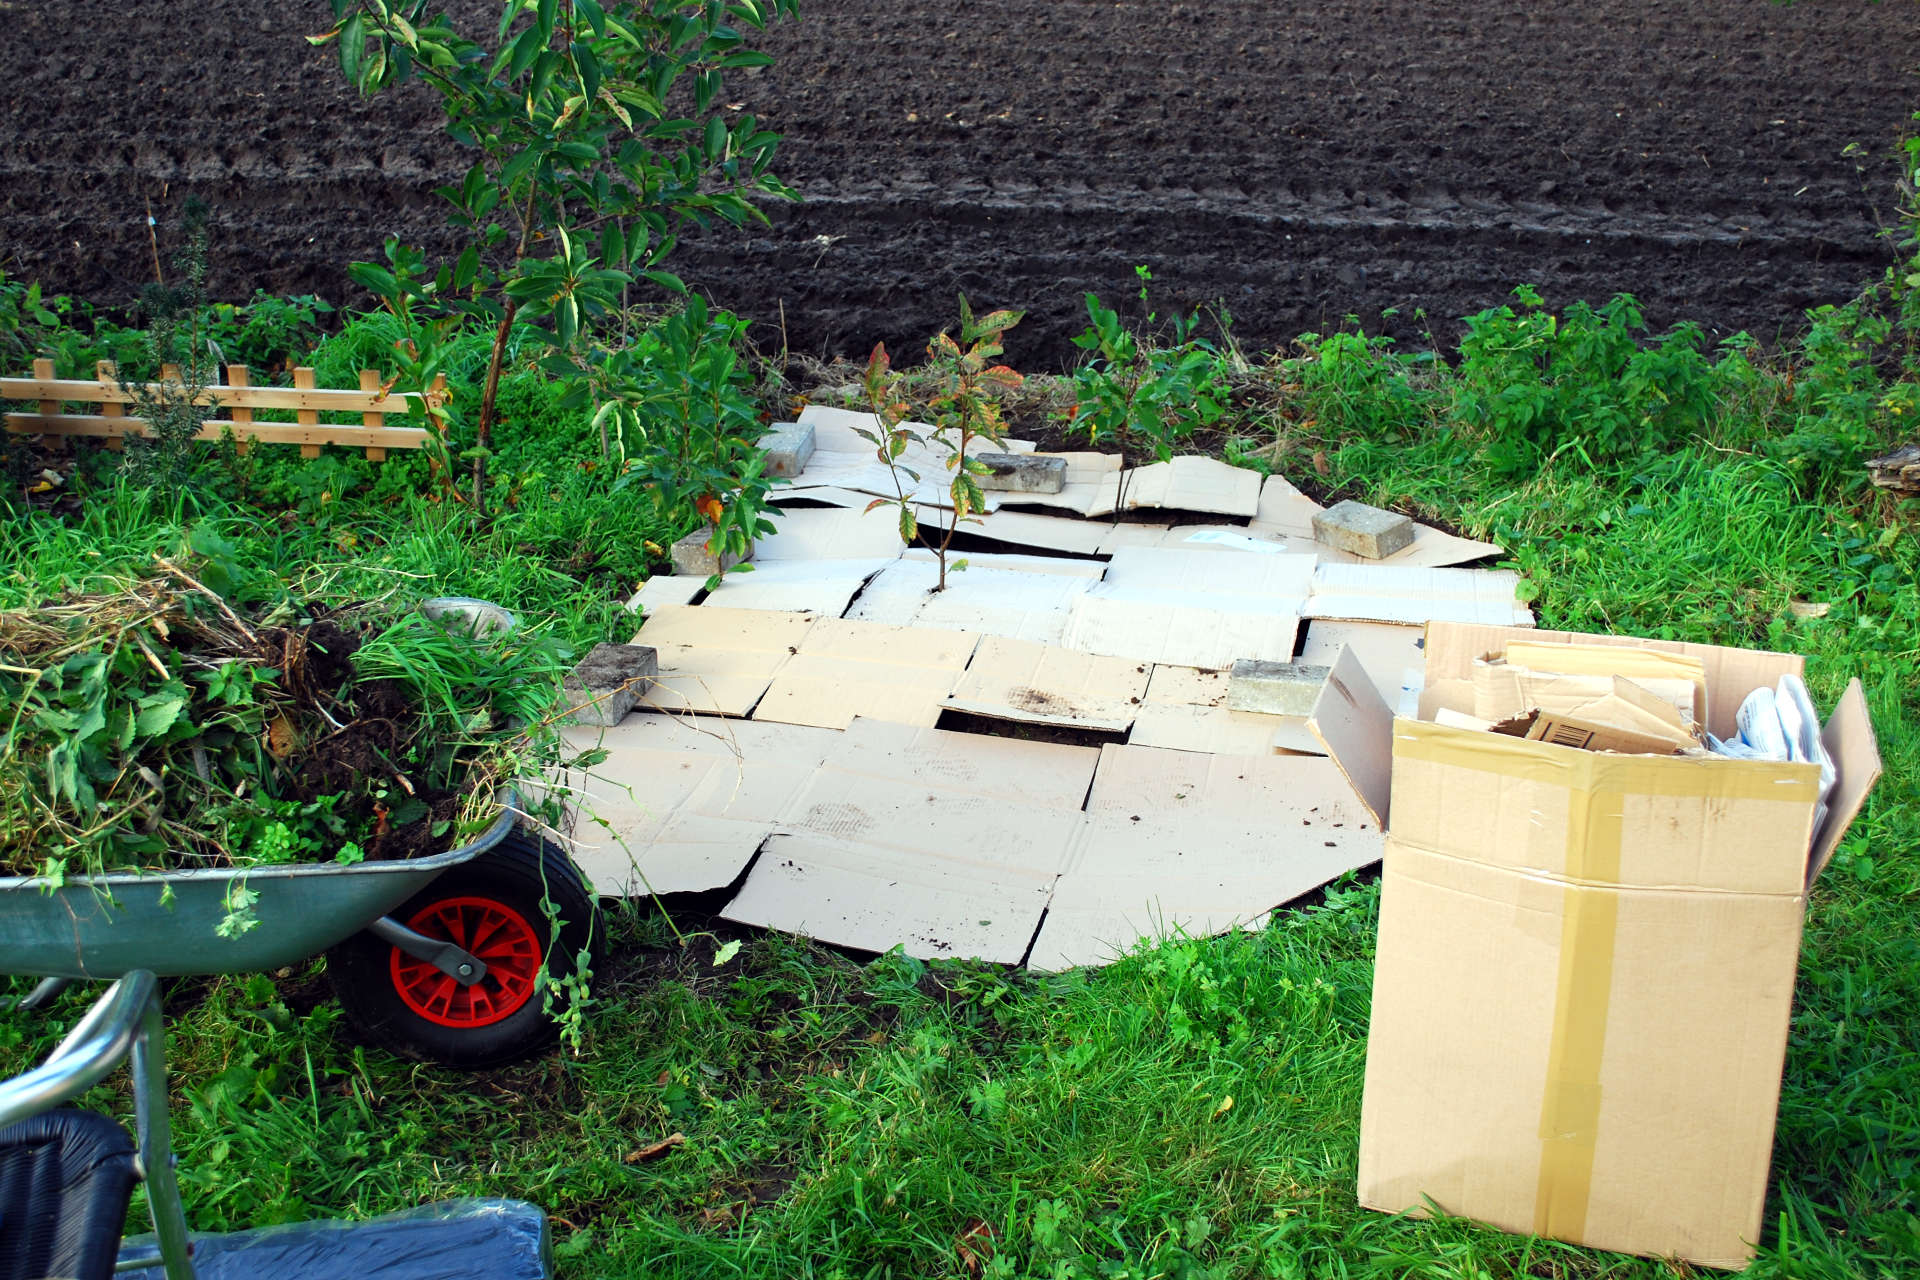
First off, the sod had to be removed. Keeping in mind that we’ve already got octobre and I can only find time for consctruction at the weekends (if any), I had to find a method which can be executed in small steps and sessions. Following Paul’s recommendations, the bare soil was covered with a layer of corrugated board because we have some very resilient plants on our premises which might simply pierce the weed barrier. The board should decay over the next one to two years without releasing anything toxic into the ground. The only thing one should keep in mind is to remove any traces of plastic or duct tape beforehand.
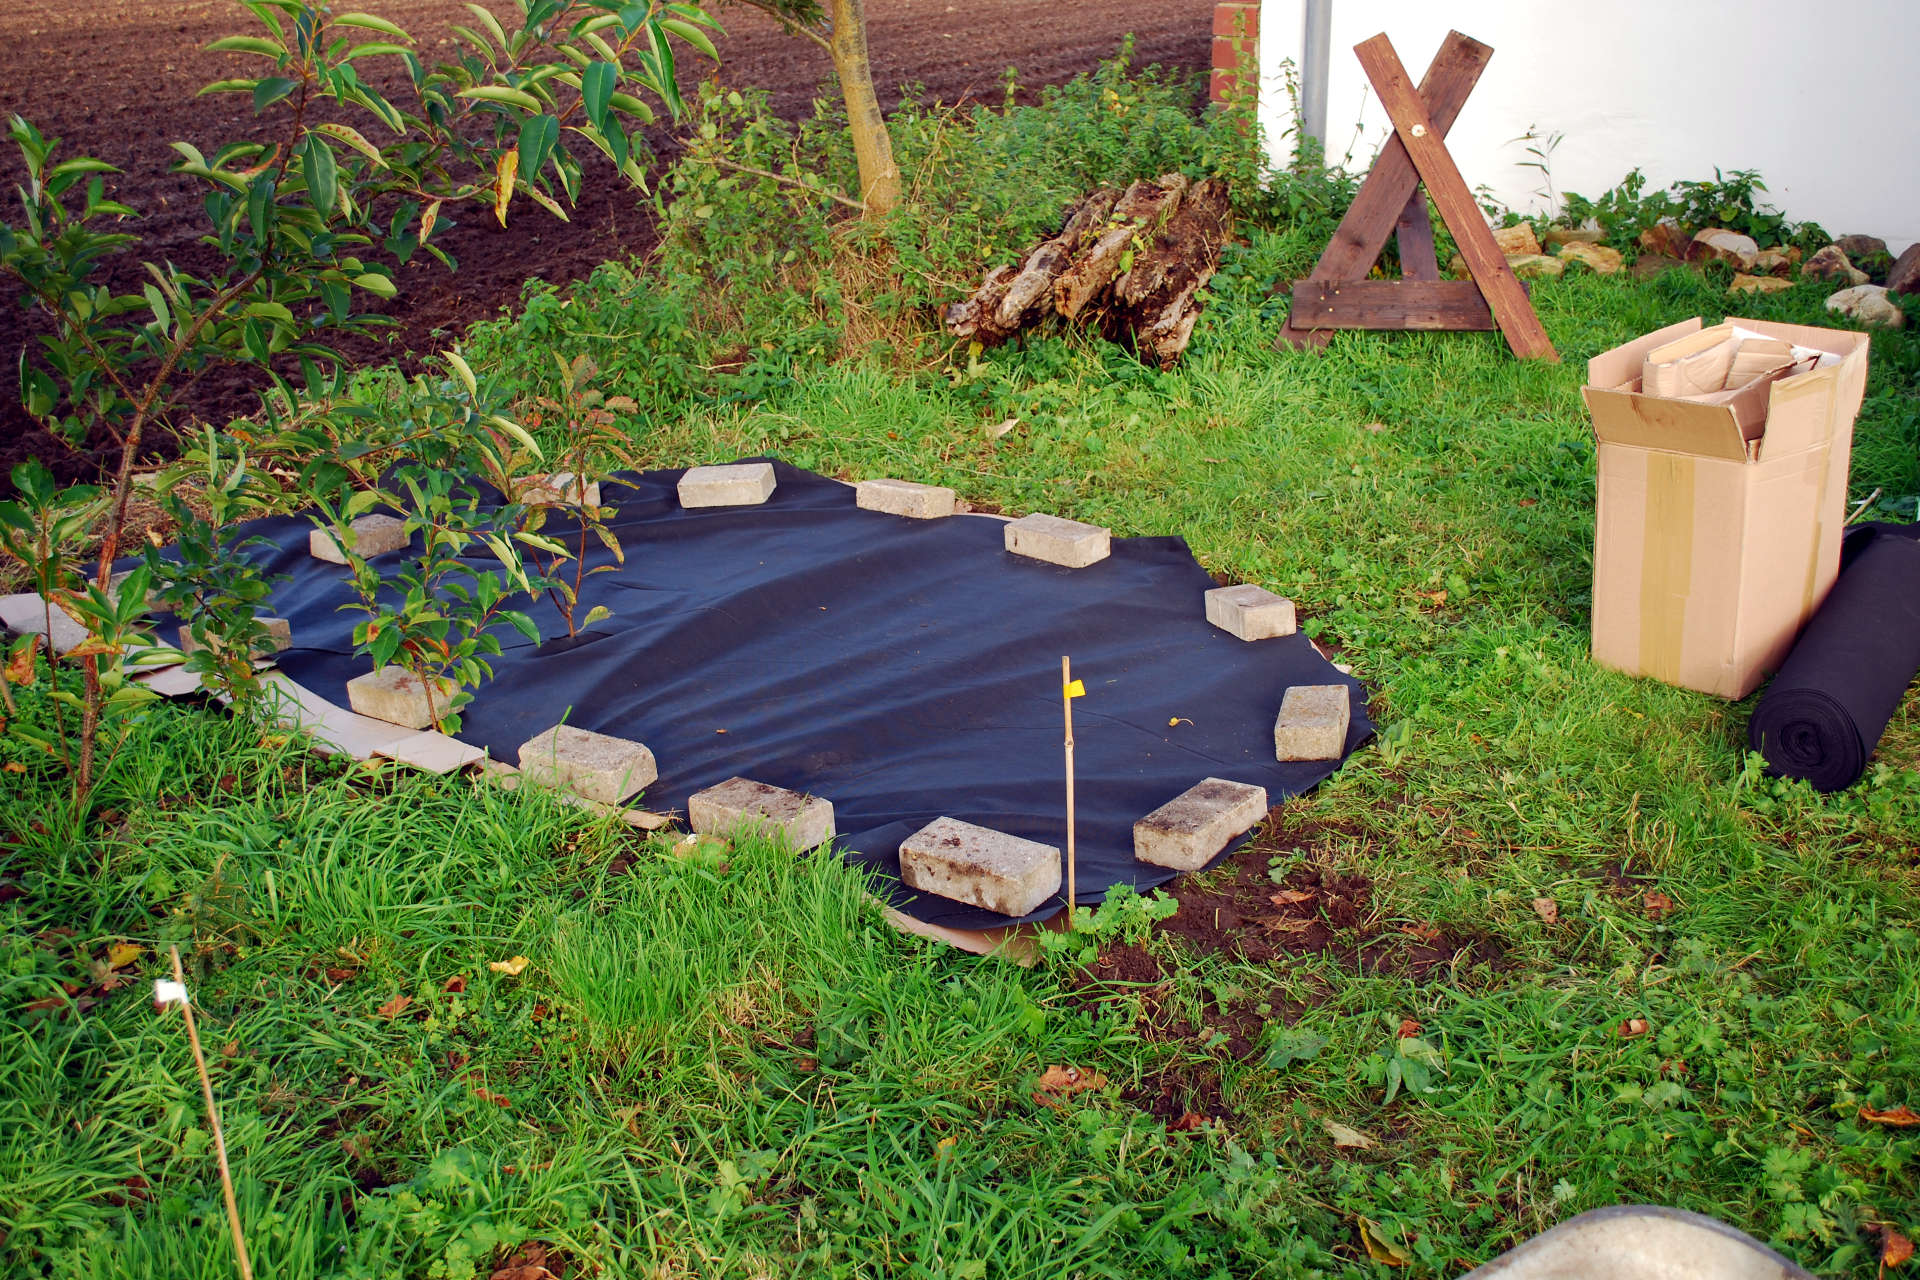
On top of this layer, I installed the weed barrier, which I’d got at a garden centre for a highly reduced price. It does pay off to buy construction materials for garden railways during autumn! The barrier was weighted down with some stones in order to keep it in place. I made some incisions in order to accomodate two saplings. From here on I deliberately deviated from Paul’s instructions. According to him, in order to build a durable railway, one should first dig out small trenches for the roadbed, then place the weed barrier over everything and fill the trenches up with gravel on which the track is going to be installed. But I wanted to know: Can I dig trenches after installing the weed barrier and with little effort? For only then I could build my railway in small steps.
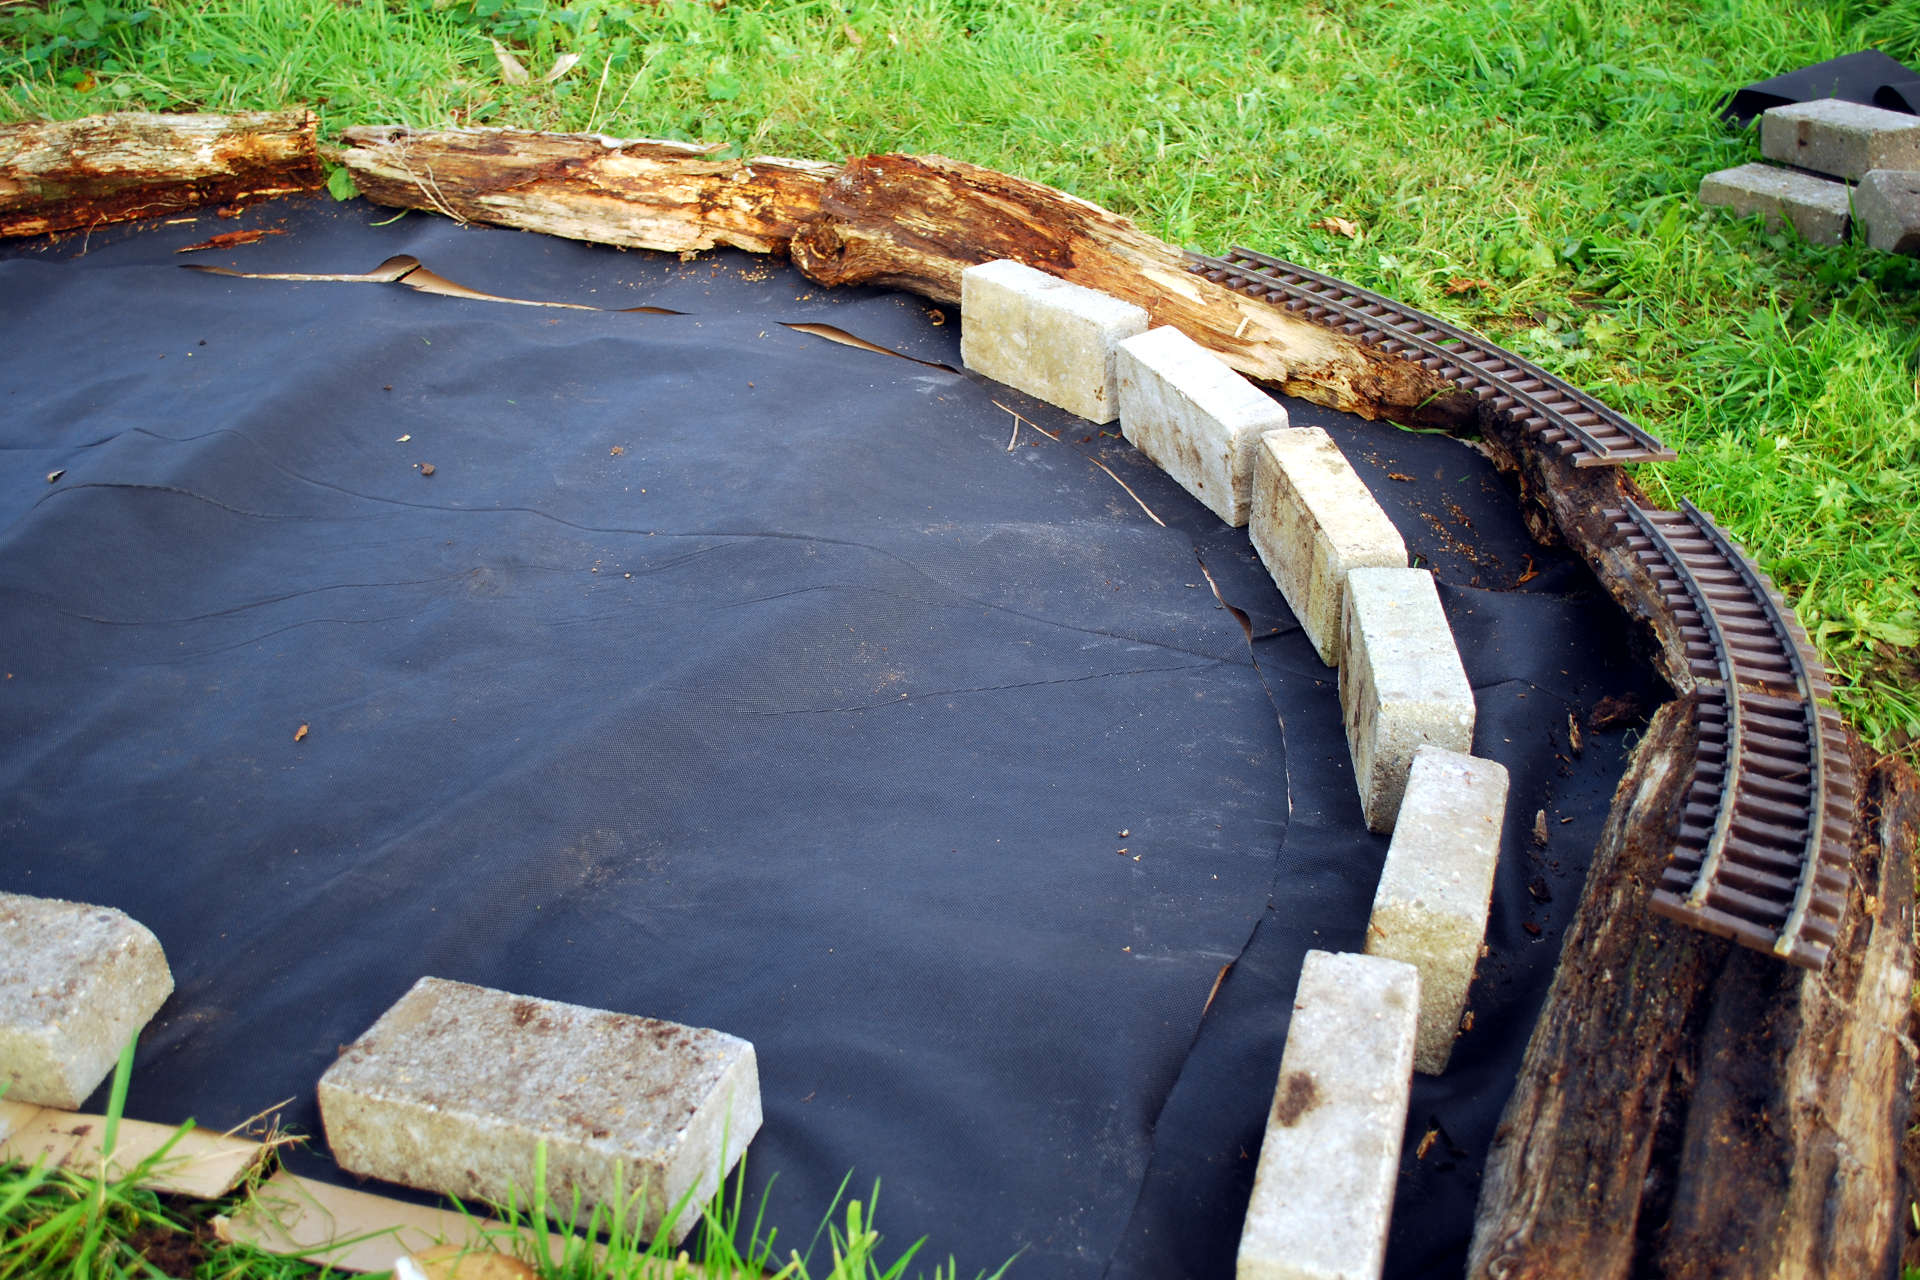
Well, it quickly became apparent, that it is possible, and easily so. There isn’t much to it. First one places the track and mark down the right-of-way, then the barrier is cut right along the middle axis. Some cross cuts make sure one can peel off the weed barrier bit by bit until there’s enough room to dig the roadbed’s trench. The picture to the right shows that I’m making my own choices on a second topic: Since paving stones are substancially cheaper around here than crushed gravel, my roadbed is constructed from stones on which I will place a layer of gravel.

Excavation is an easy task with our humus-rich soil, so I just picked up a gardening trowel. I didn’t bother with an extra layer of sand, but set the paving stones directly on the soil. This might lead to unwanted vegetation, but I folded the peeled-back weed barrier as well as the board into the trench before placing the stones. So the trenchs’ side-walls are protected just like the rest of the area and I dare say that there won’t be many plants which can pierce through the stones. The only problem might come from the curves where the stones are laid out at an angle to each other. If approximatley ten centimetres of gravel won’t keep the vegetation at bay, I might have to reinforce in a few year’s time with some cement. But time will tell.
For the time being, the border is going to be built from sawed-down wooden fenceposts. Of course they will give many plants a starting point, but in a worst-case-scenario they can be swiftly replaced with border stones. Until then they should help with a pretty, natural look.
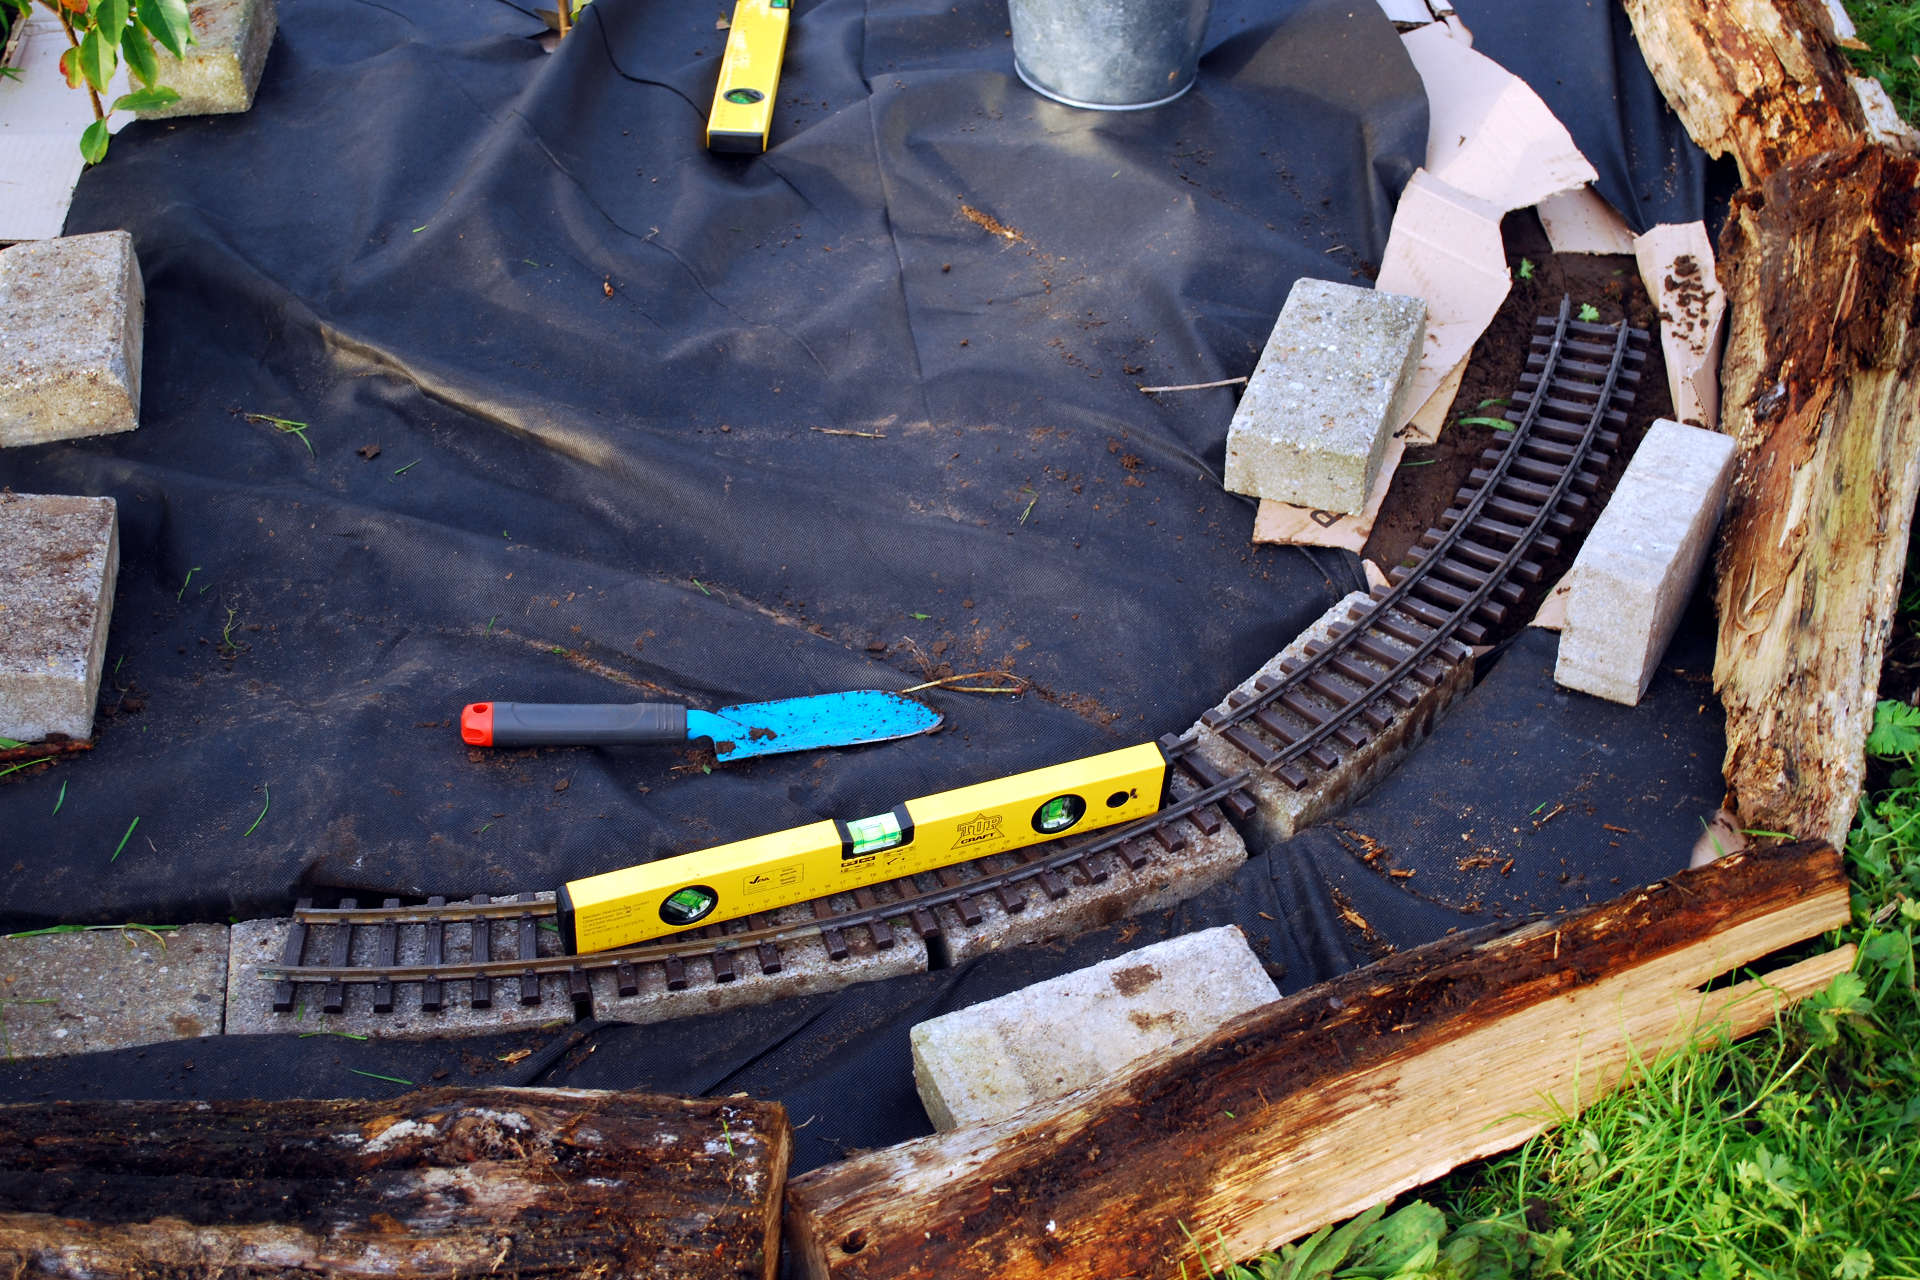
Naturally, the set stones had to be levelled, so I would have a solid base for the crushed gravel. It’s a lot of work, but I’m hoping to save time and effort when it comes to keeping the track level after one or two winters. This way, I got to placing a dozen stones before the daylight faded. To close the deal on this day’s work, the mulch was spread out and then I tested how much effort it would take to prepare the construction site for the next session. The very pleasing answer is: None at all. All you need is a hand broom which is no longer needed in the house and you can continue where you stopped the last time.

And thus day 1 of my garden railway’s construction came to an end. It didn’t involve hard labour except for removing the sod and the working steps readily fall in line. I can only recommend Paul’s method to anyone who want to build a small garden railyway in a short time without having an open construction site on his premises for several weeks. Next time I will make sure to take a final photo because right now the railway has turned into a curiously open-ended bed. It’s quite something!