
Since the first test run some time has passed by, but there have been only a few opportunities to make progress with the tender’s construction. Nevertheless I managed to slip into the shop now and then and today I’d like to summarize the progress.

The most important thing first: the tender’s got a knuckle coupler. On the one hand it seemed plausible to me, since I’m going to model a railroad at the beginning of the 20th century, as mentioned on creating the blueprints. On the other hand I’m hoping for easier operations. I’ve already got some experience with link and pin couplers and I find it quite cumbersome to pull and put the links and pins between the cars with a long set of tweezers. Knuckle couplers however allow for automatic coupling at the best of times, especially if you can set brakes on the cars. Decoupling is even easier if you have cut levers at the side of the cars or use an R/C-controlled servo to pull the pin.
At the beginning there was the spoil of choice: Which knuckle coupler should it be? Of course, you almost everywhere read about Kadee-Couplers (Yes, spelled with a “K”!) were the best when it comes to easy and safe operations. I’m inclined to believe that, but still I’m not fond of the Kadees for three reasons: First, I dislike the magnetic hook below the coupler, I’d be afraid all the time that it would catch something in the garden; second I’m not a fan of Kadee’s concept to move the couplers sideways for decoupling; and third, the Kadees lack a pin, so they can’t be connected to a cut lever.
At the end I chose a set of knuckle couplers by Accucraft, which I like best regarding looks and mechanics. I’ve been experimenting with these for a while now, and I have to say that there some fine-tuning will probably be in order, before they really live up to my hopes. It may well be that I’ll eventually switch to Kadee or some other brand. At any rate, I want to avoid LGB’s knuckle couplers, they simply are too clunky.
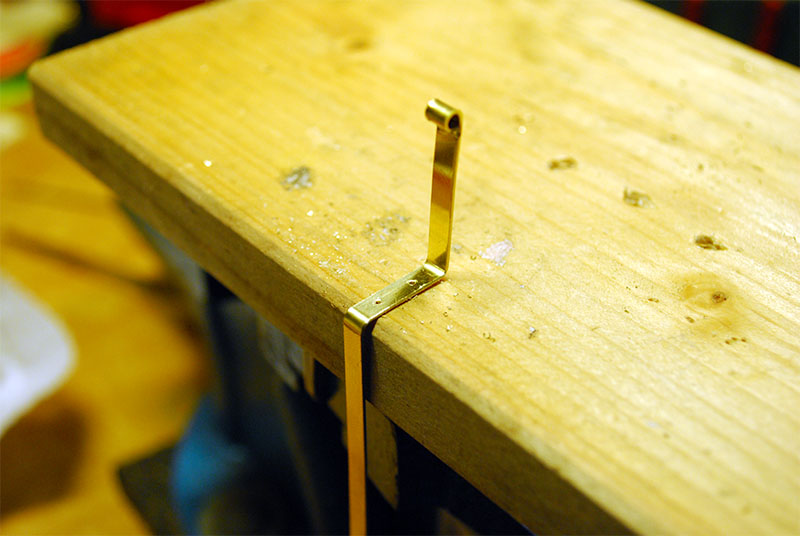
Concerning cutting operations, I’d like to proceed in stages and first build a cut lever as a functional part. I’m toying with an idea to actuate that lever at a later time via servo without hindering the original function. It remains to be seen whether that’s possible. Anyway I needed some loops to run the lever through. Those loops were cut and built from brass sheets of 0.5mm thickness, allowing a wire with a diameter of 2mm.
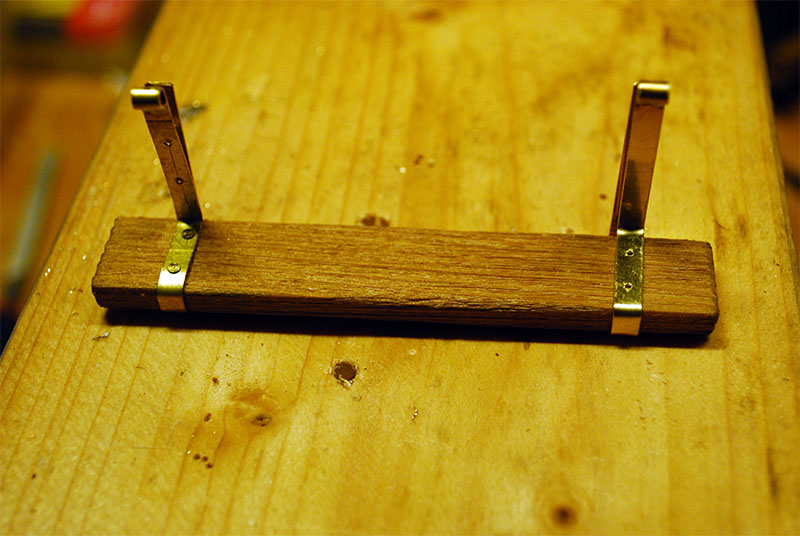
These loops doubled as fittings for a platform at the backside of the tener. While doing his daily duty, the conductor would surely be happy to hitch a ride on the tender now and then. The platform was made out of 5mm-thick red cedar, as usual processed with a brass brush to emphasize the grain. The fittings were set in place with two pins each, for which the wood had to be drilled first in order to prevent it from splitting.
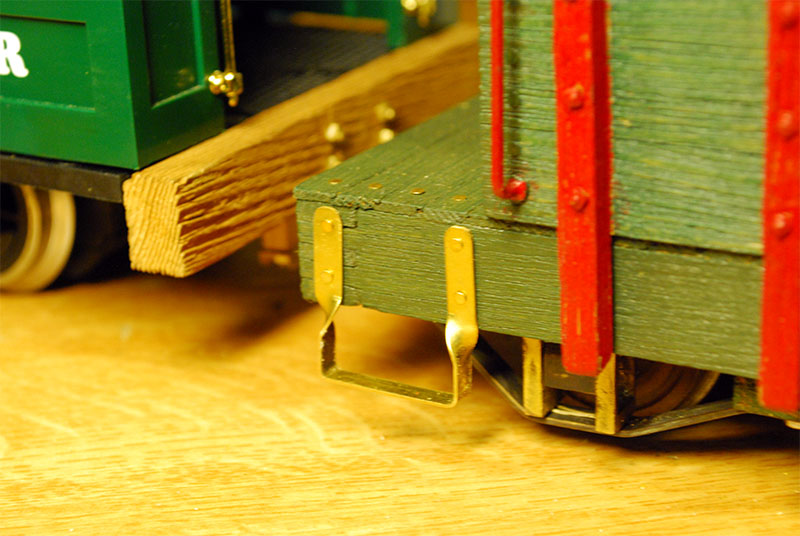
On top of that, two steps were added to the front of the tender, to facilitate access to the tender and the loco respectively. Those, too, were cut from 0.5mm thick brass, then drilled and bend into shape with the help of two pairs of pliers.
I also made some experiments with burnishing fluids, it might be a replacement to painting the brass parts. As of now I haven’t got the hang of it, the results are not very pretty, but one learns from one’s mistakes. Perhaps I will use it as a primer for some later painting, and it always is easily removable by polishing the parts.
Hopefully there will be more regular updates in the next weeks, but that remains to be seen.