
After the flatcar has got its turnbuckles, the next step will be… well, steps so the Lead Road Railways’ conductors don’t have to do so many pullups any more.
I’ve already built steps for my porter’s tender, so these are charted territories for a change. In fact I took the tender’s steps’ measurements and copied them as a small batch.
And since I didn’t show much about how I made those steps, this time I’d like to give a detailed report.
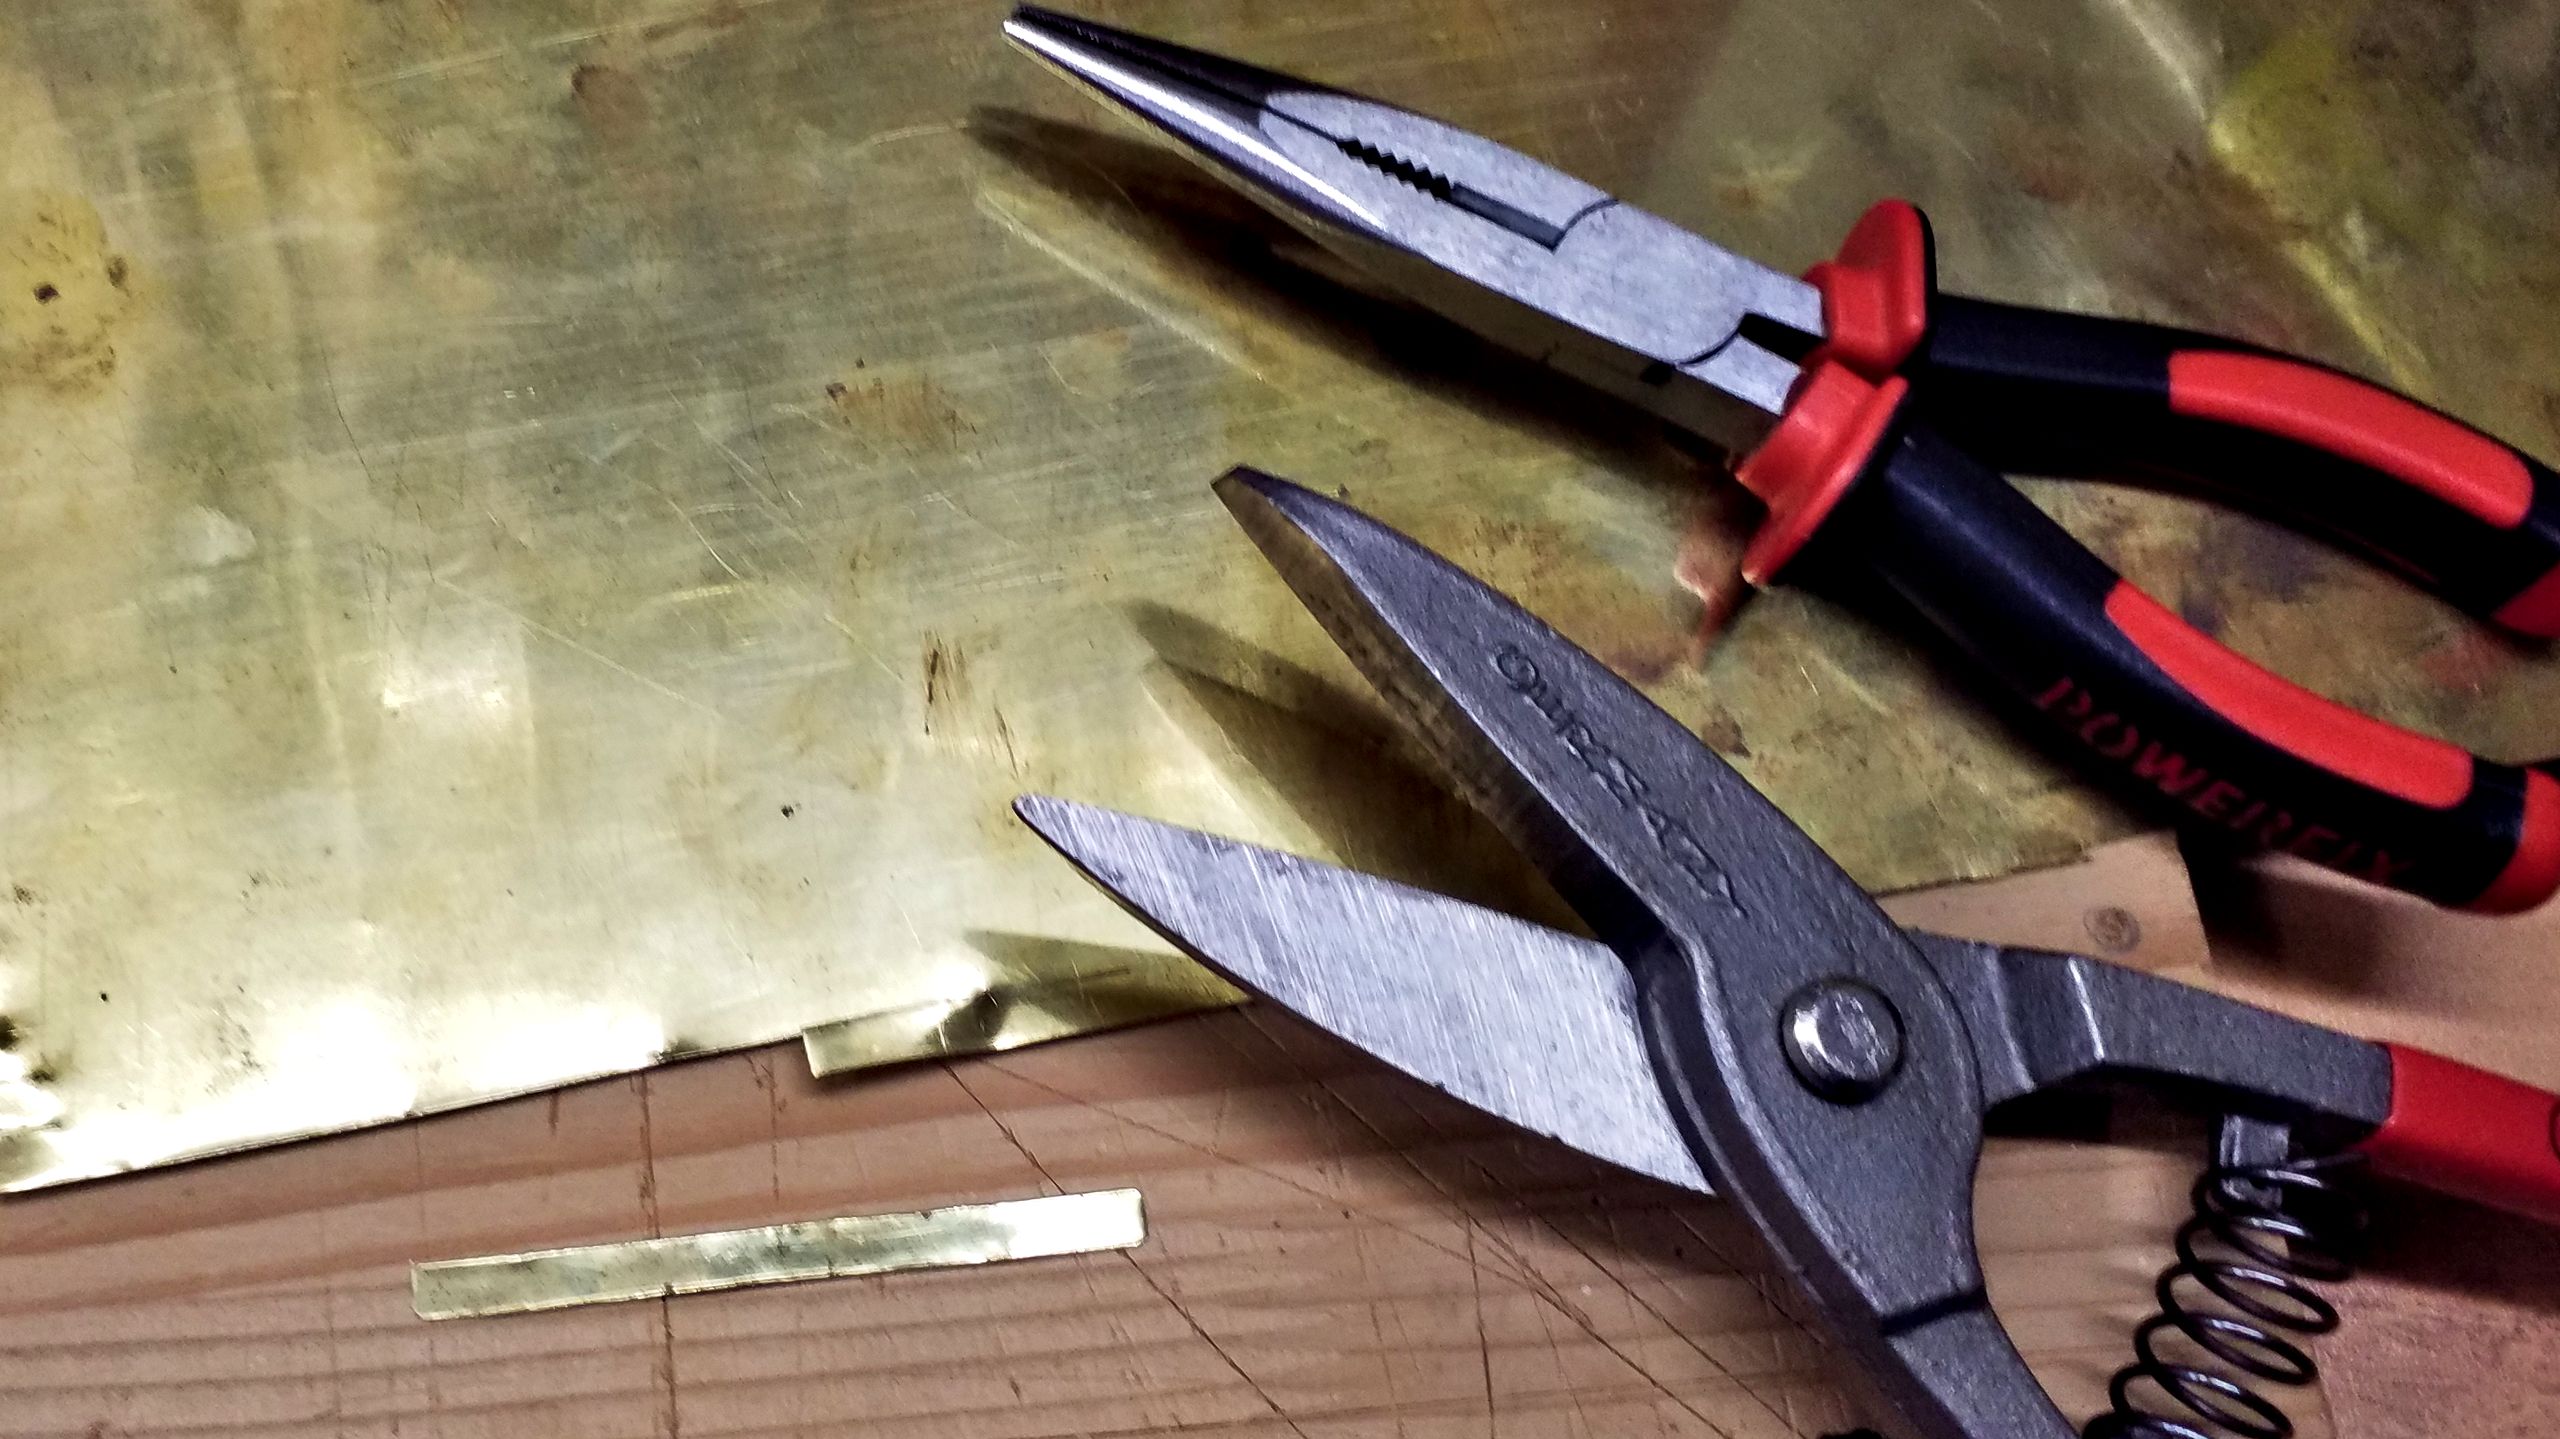
First, stripes of brass have to be cut from a sheet. The first time I used a mini circular tablesaw, however that’s noisy, tedious and such small stripes mean a lot of waste.
So this time I’m trying a pair of tinsnips. Of course the tradeoff is that the cuts leave razor-sharp burrs, so caution is advised.
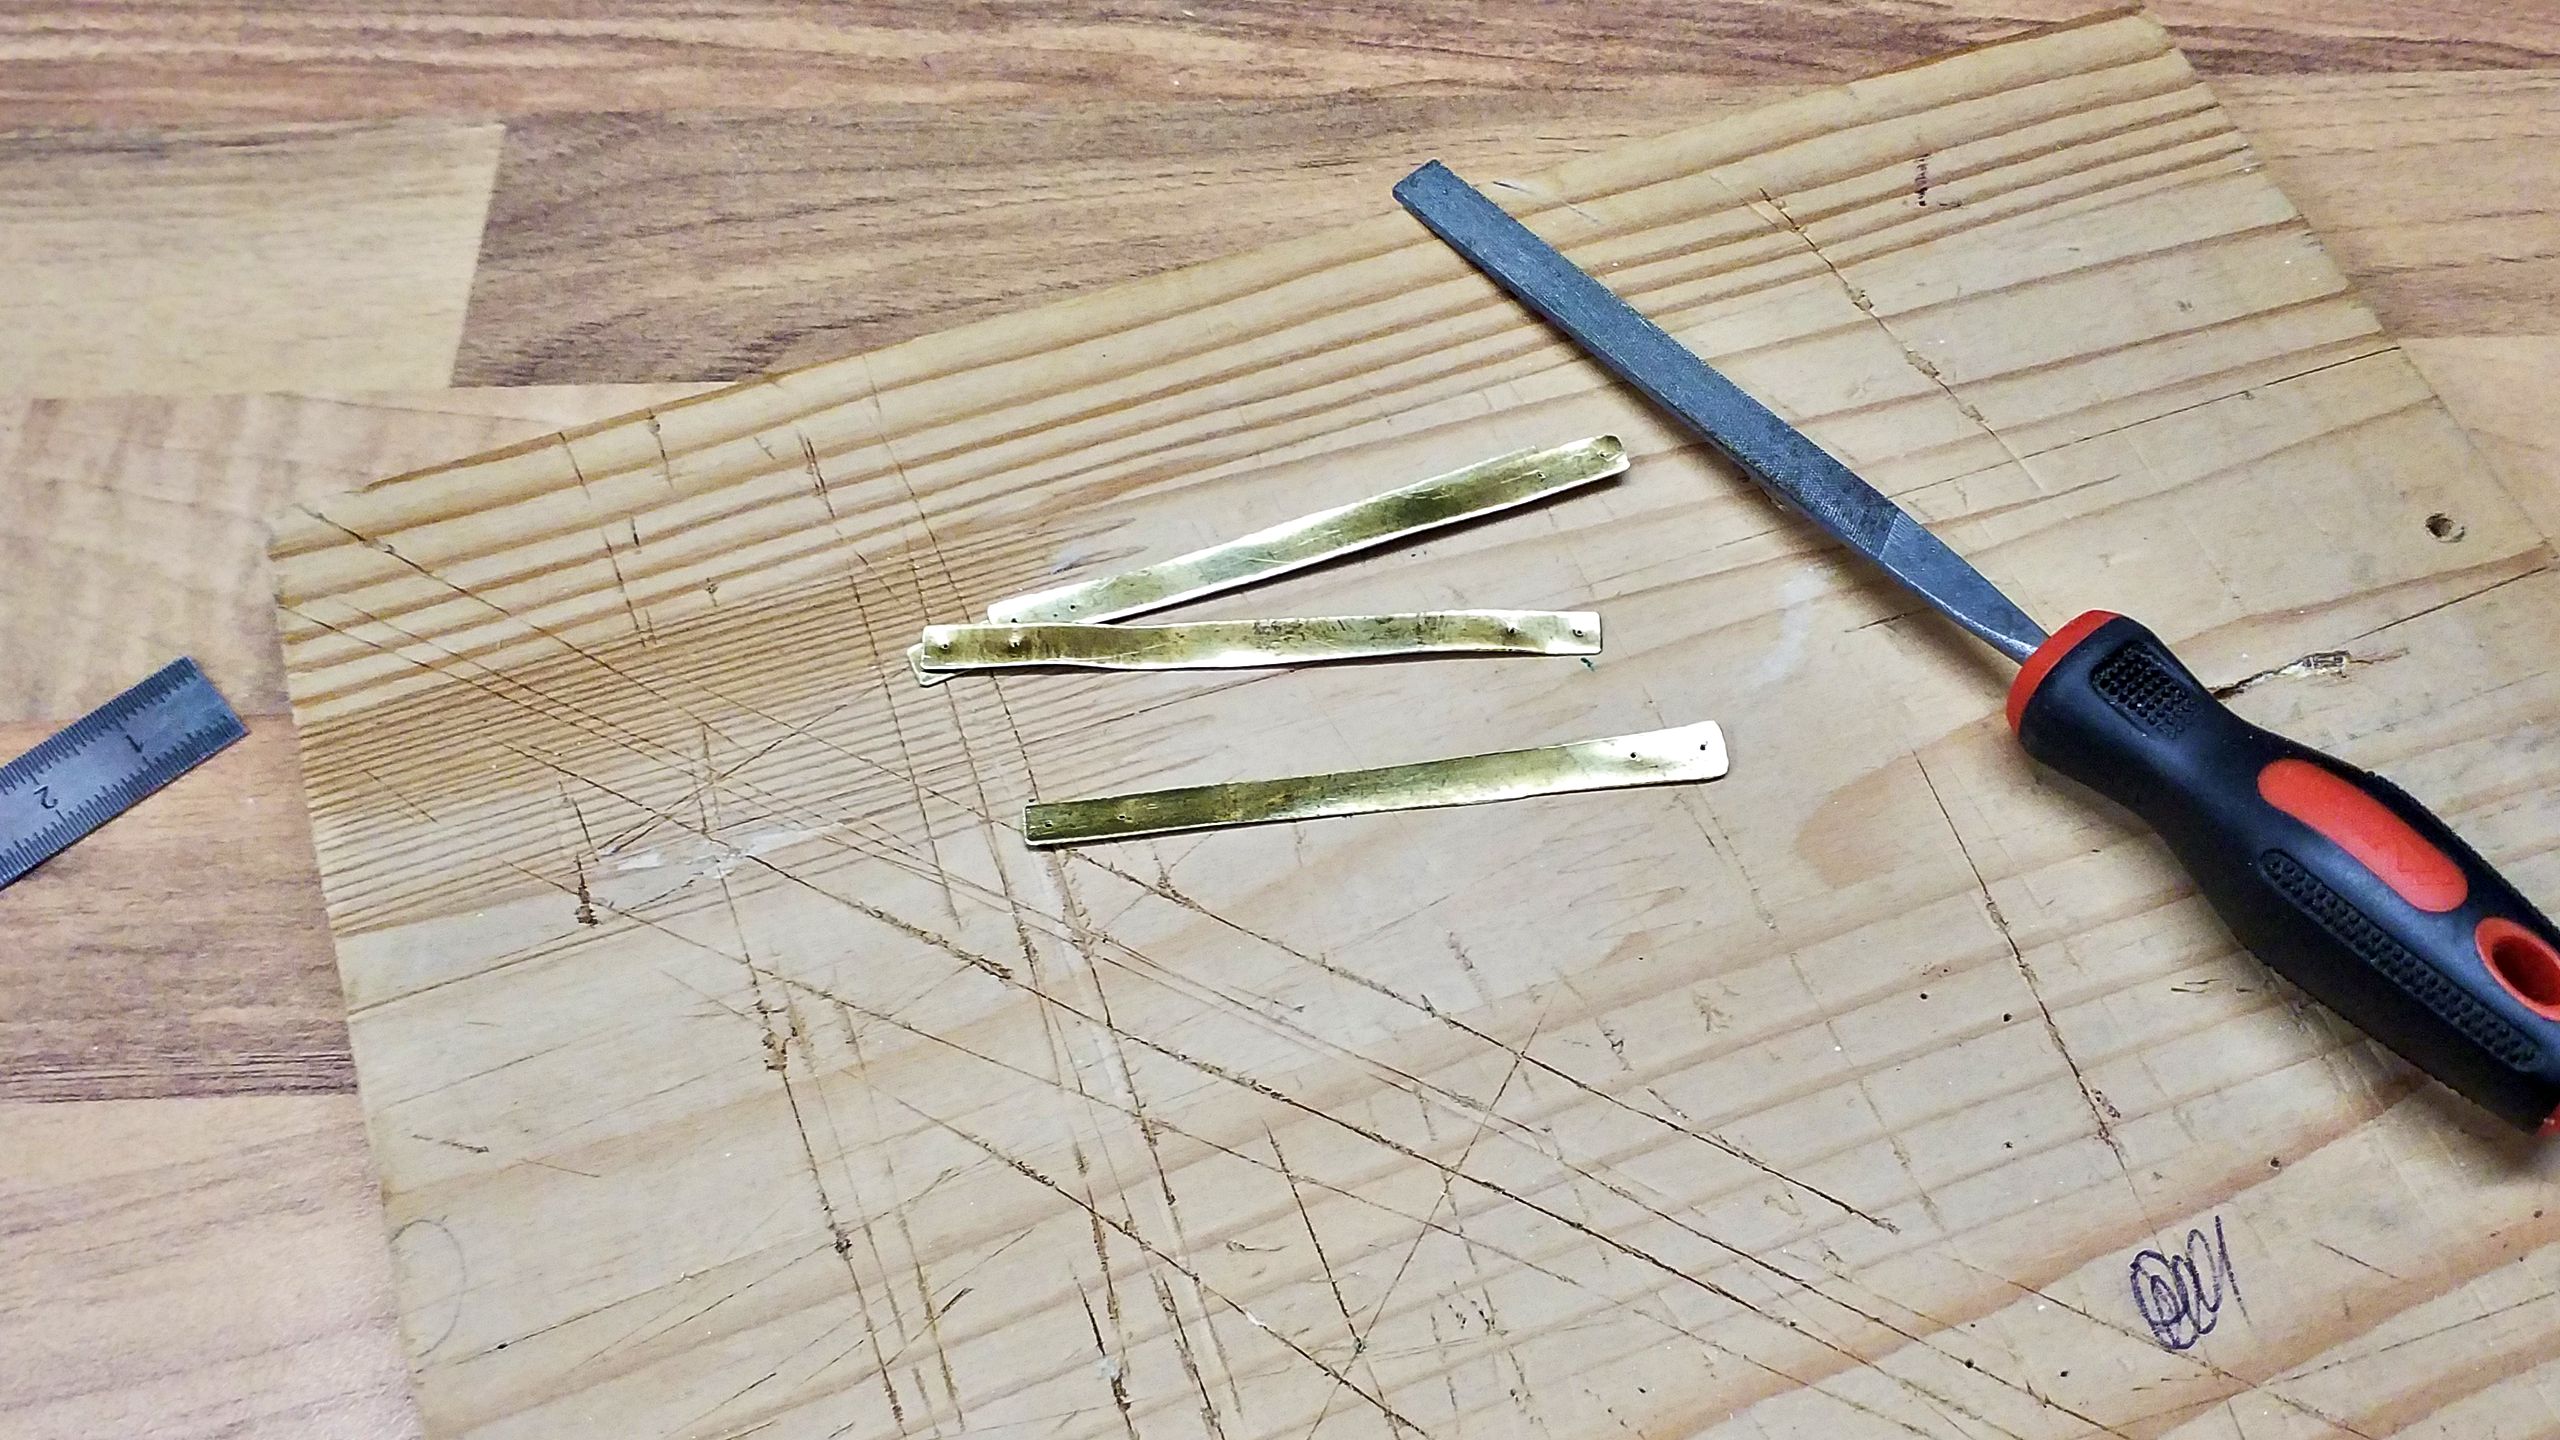
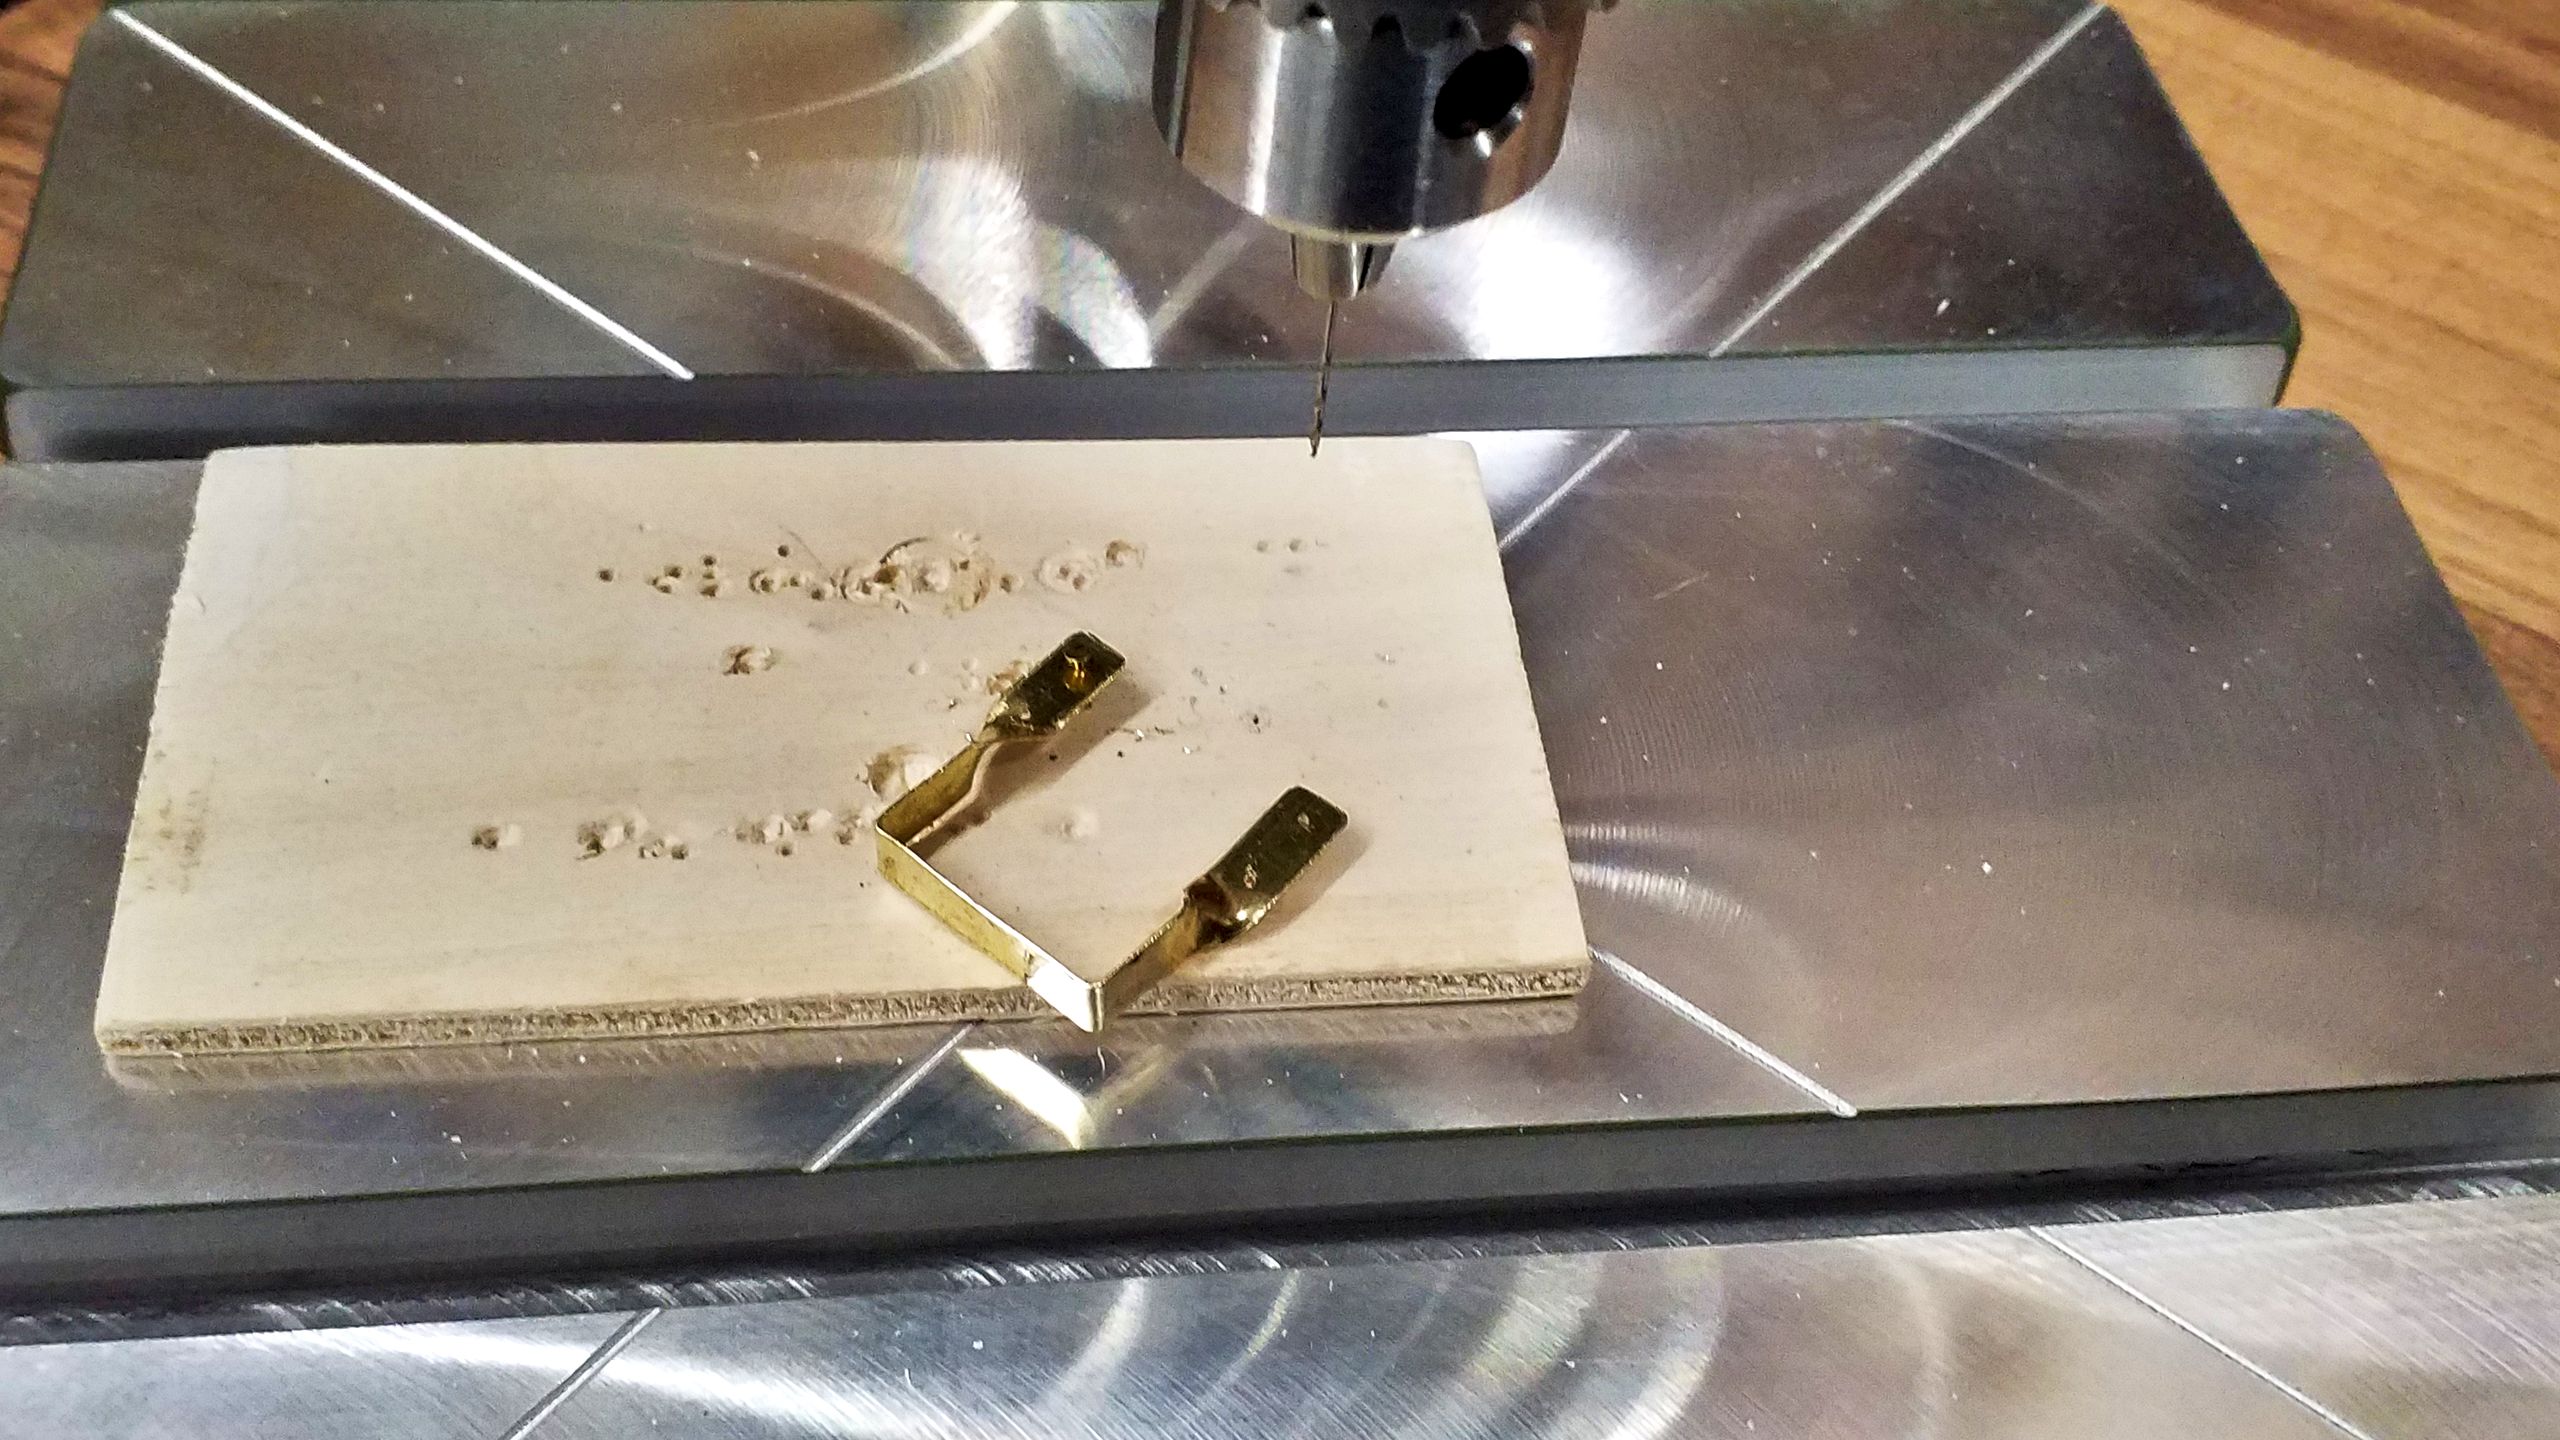
So the next step is to deburr the stripes using a key file. Then the mounting holes are scribed and drilled with a 0.7 mm bit. After that, the steps width is scribed in the middle of the stripe.
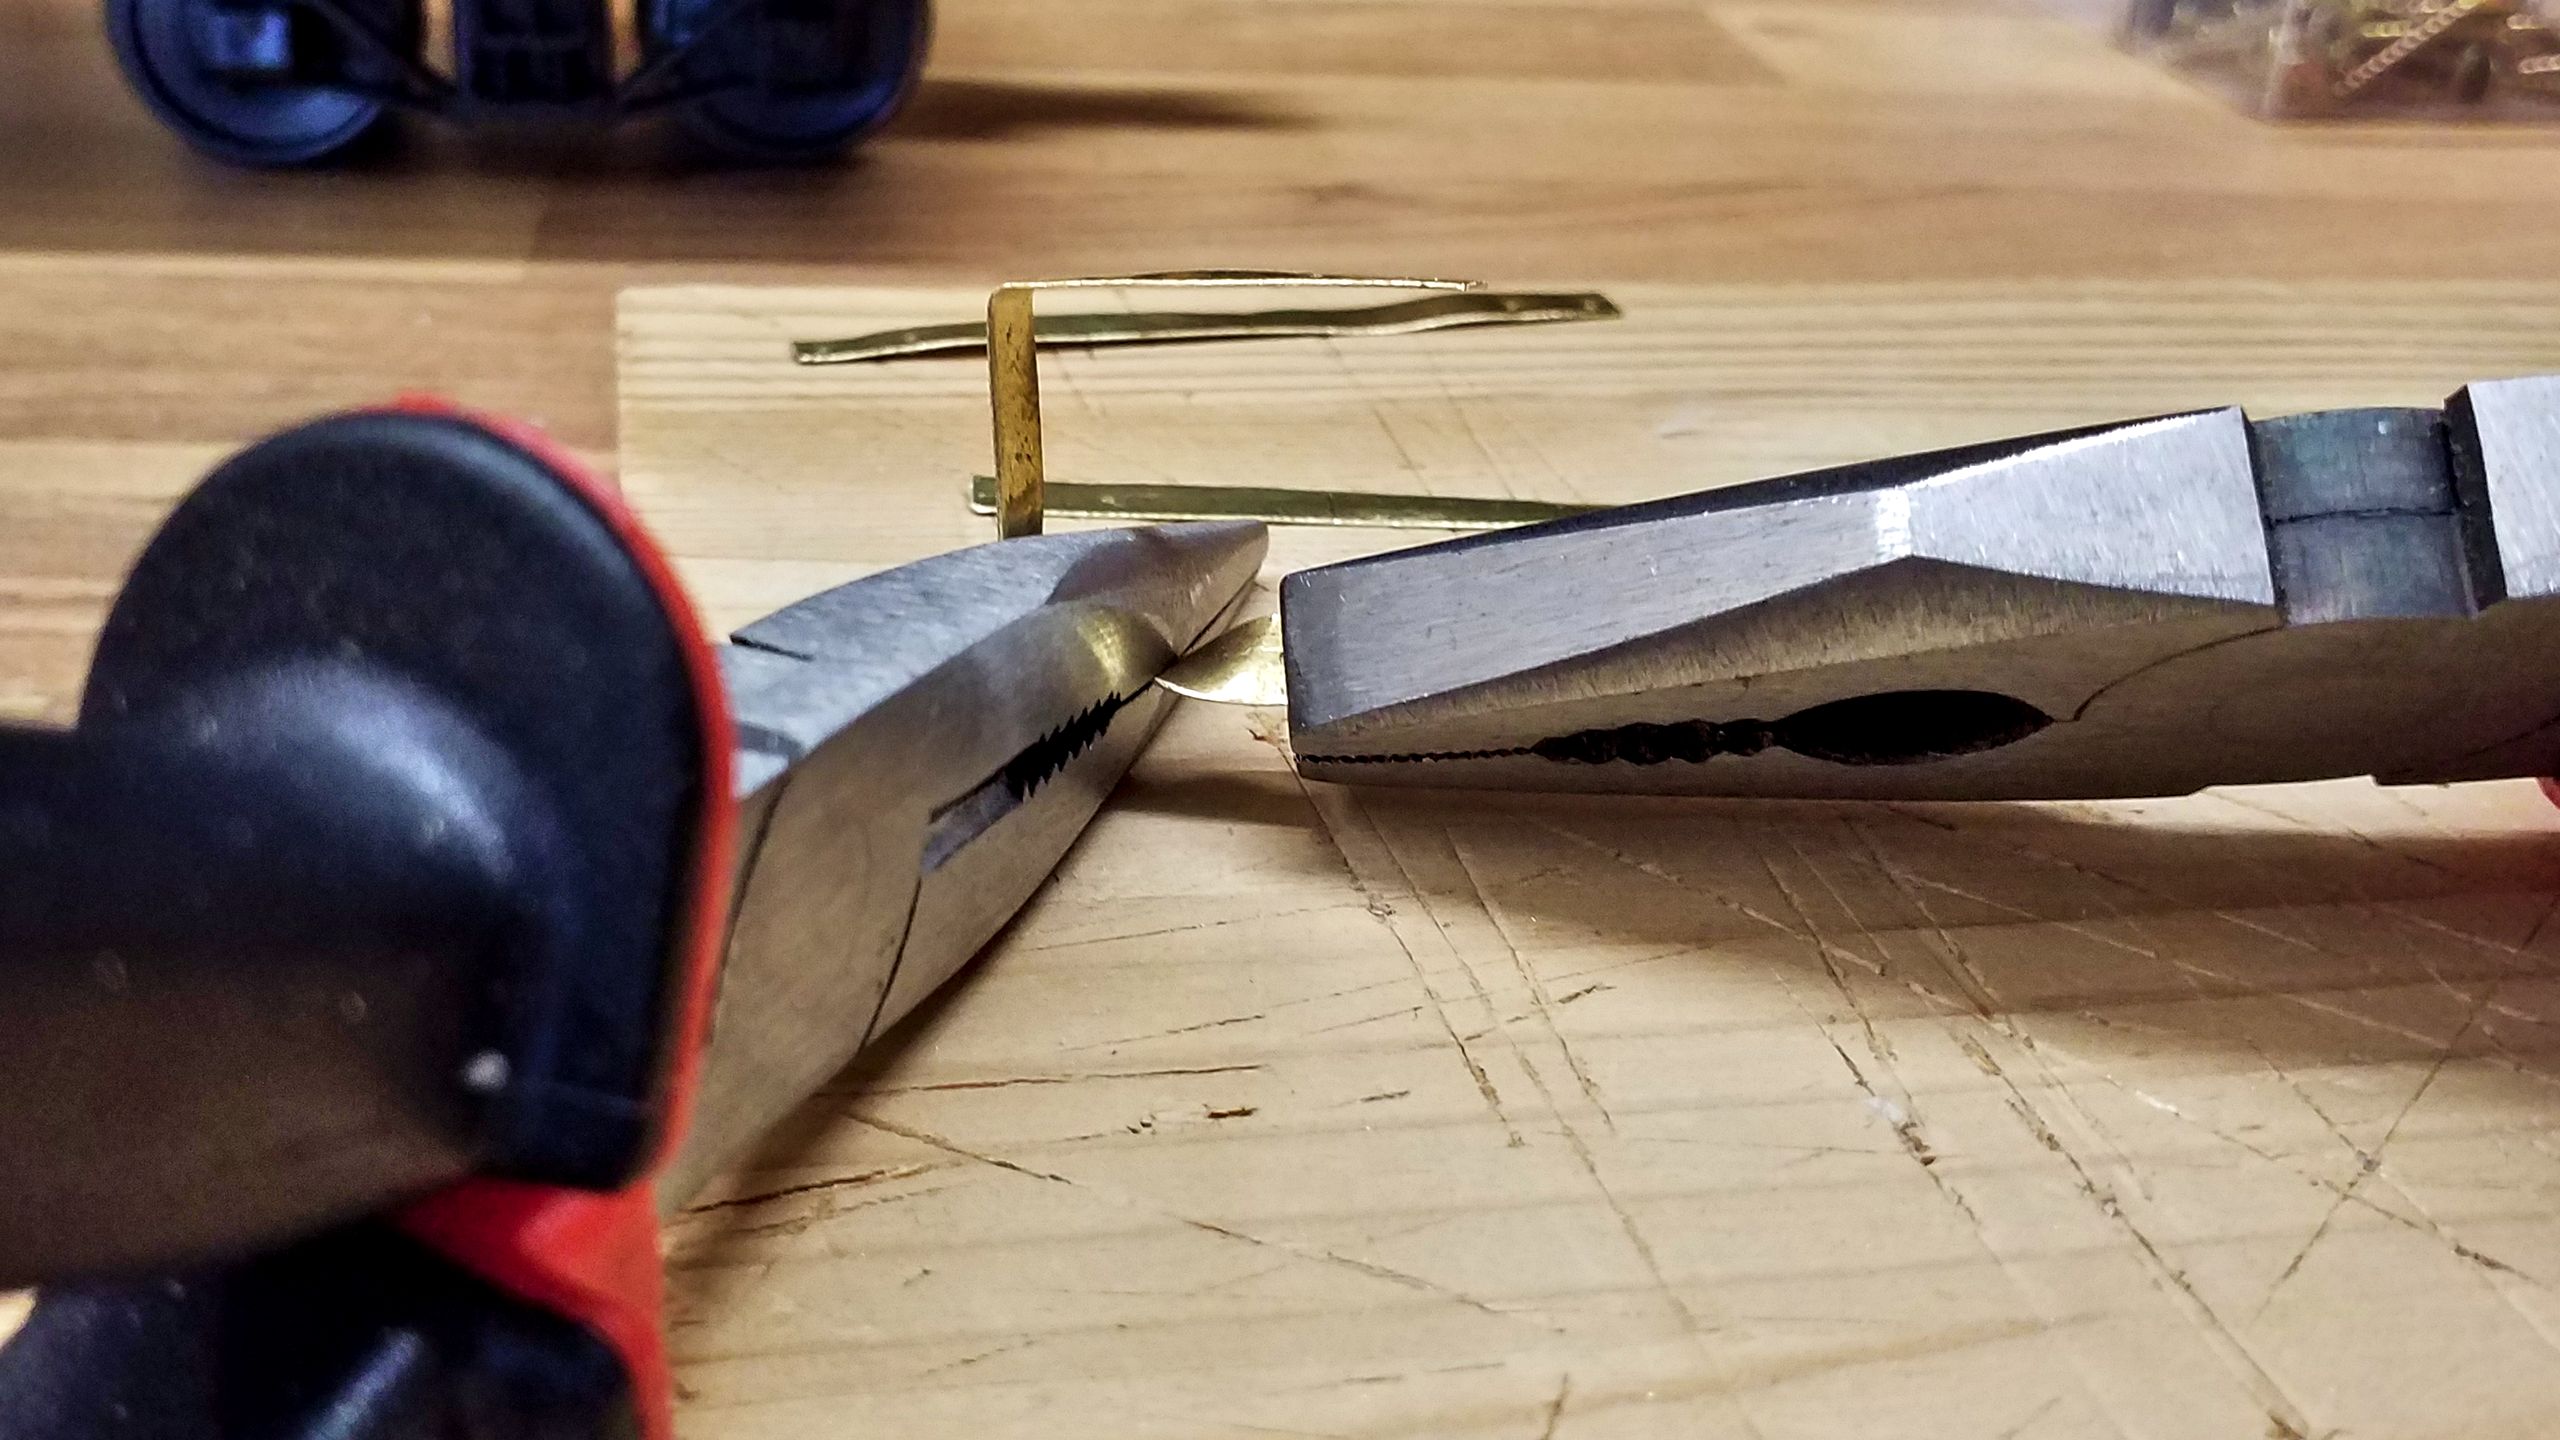
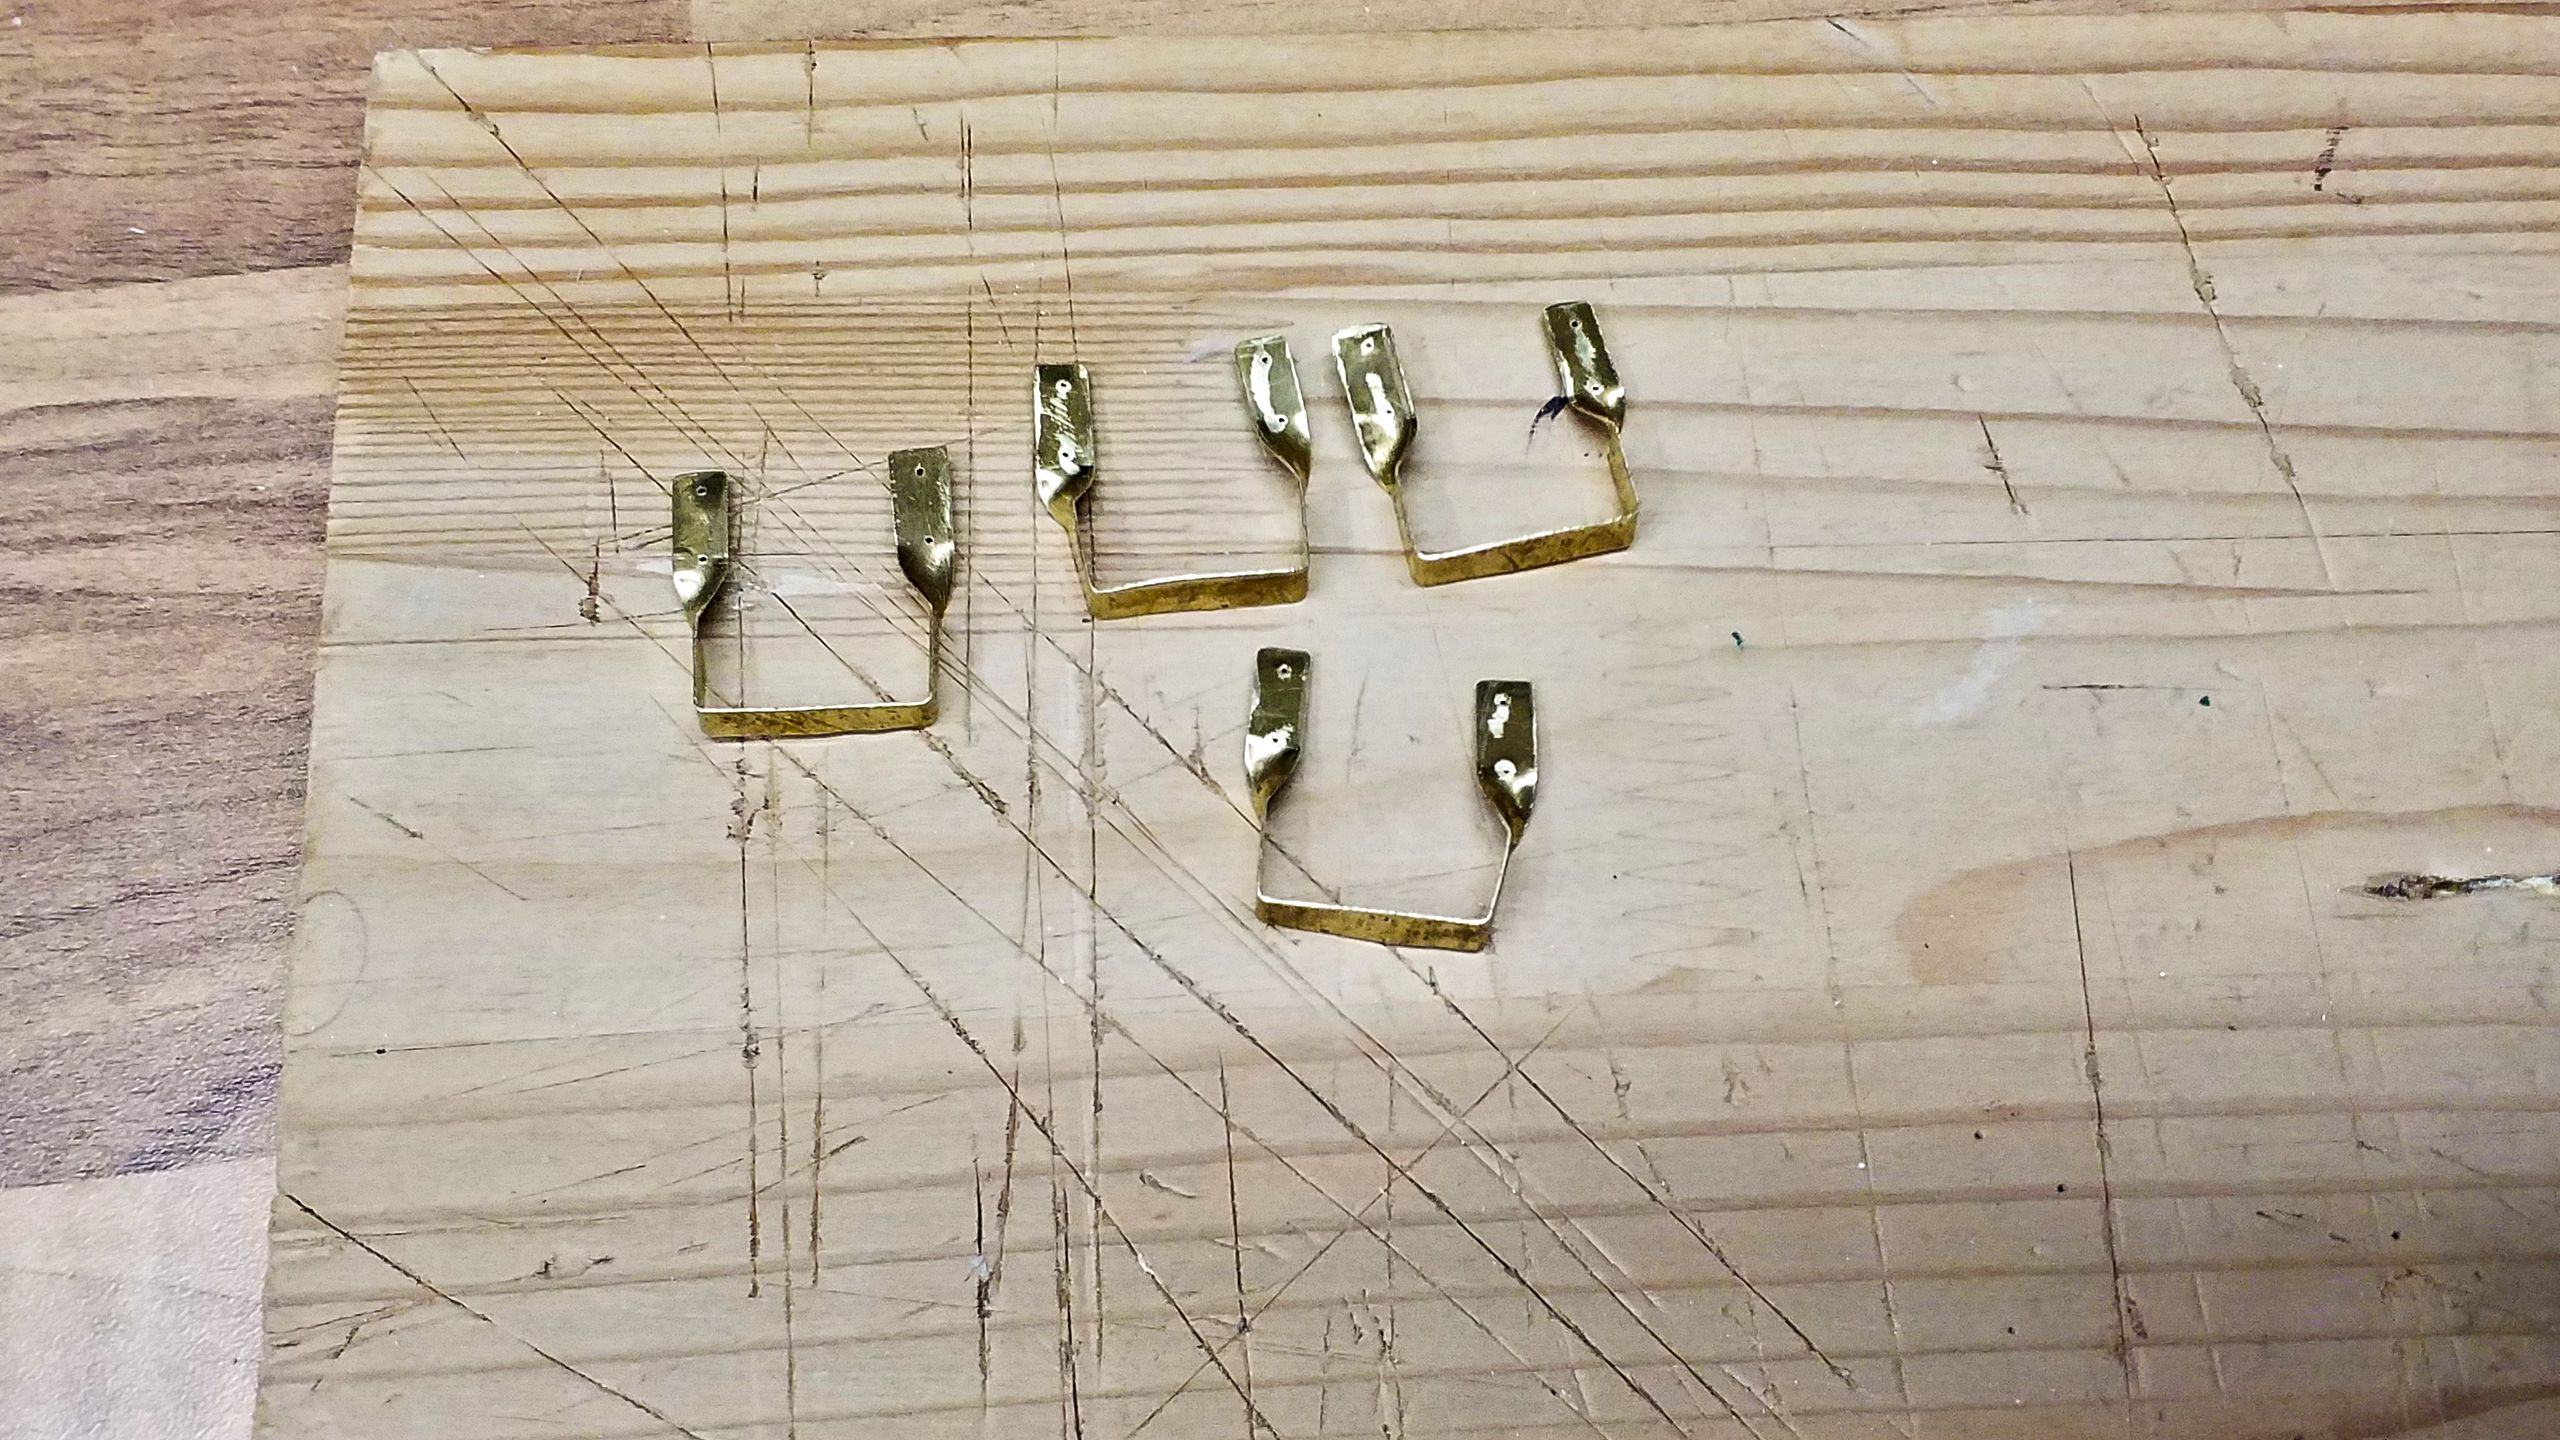
The stripes are then grabbed with a pair of pliers at the ends and bent through 90°.

Now, a second pair of pliers is needed to twist the ends through 90° so they stand in parallel to the flatcar’s side sills. Care needs to be taken to leave a wide enough gap between the two pairs of pliers, or else the brass easily tears.
Sadly I only afterwards realized that I used the wrong drill bit. Fortunately the bent steps can still be worked with the drill press. So it’s annoying rather than critical.
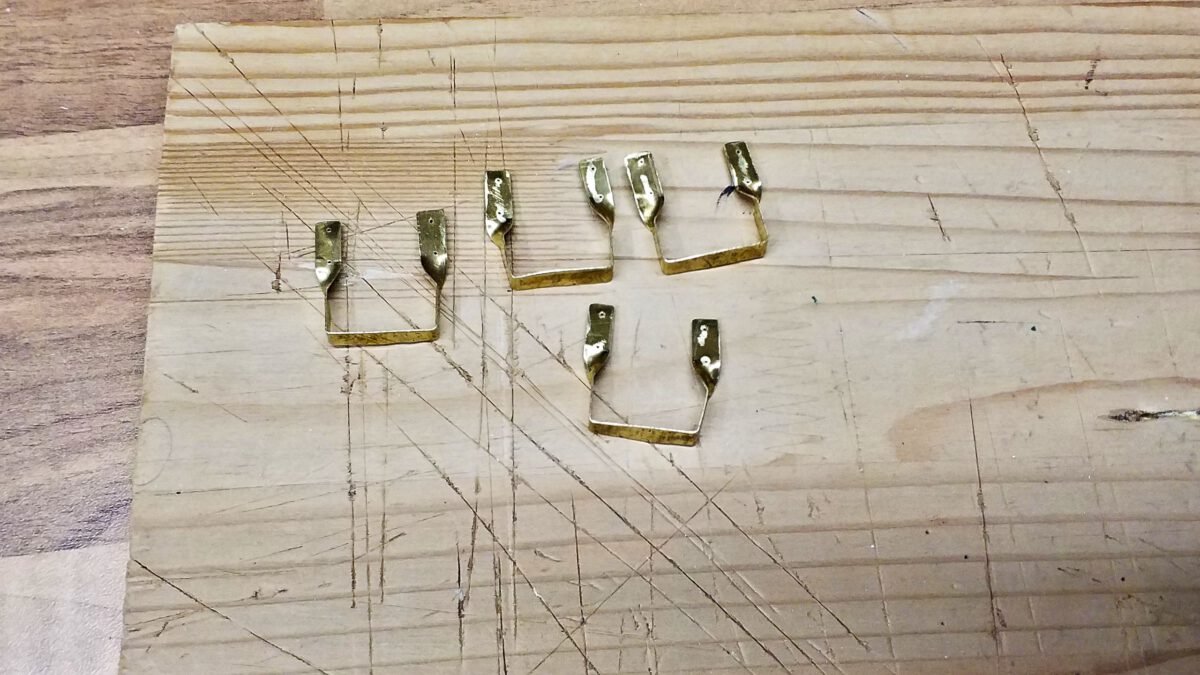
This procedure is repeated for the remaining three steps until a complete set is ready for the paint job.
At the railroad-line forums I found a thread which deals with painting brass. Following the recommendations, I first cleaned the brass using cleaner’s naphta and the blued the steps.
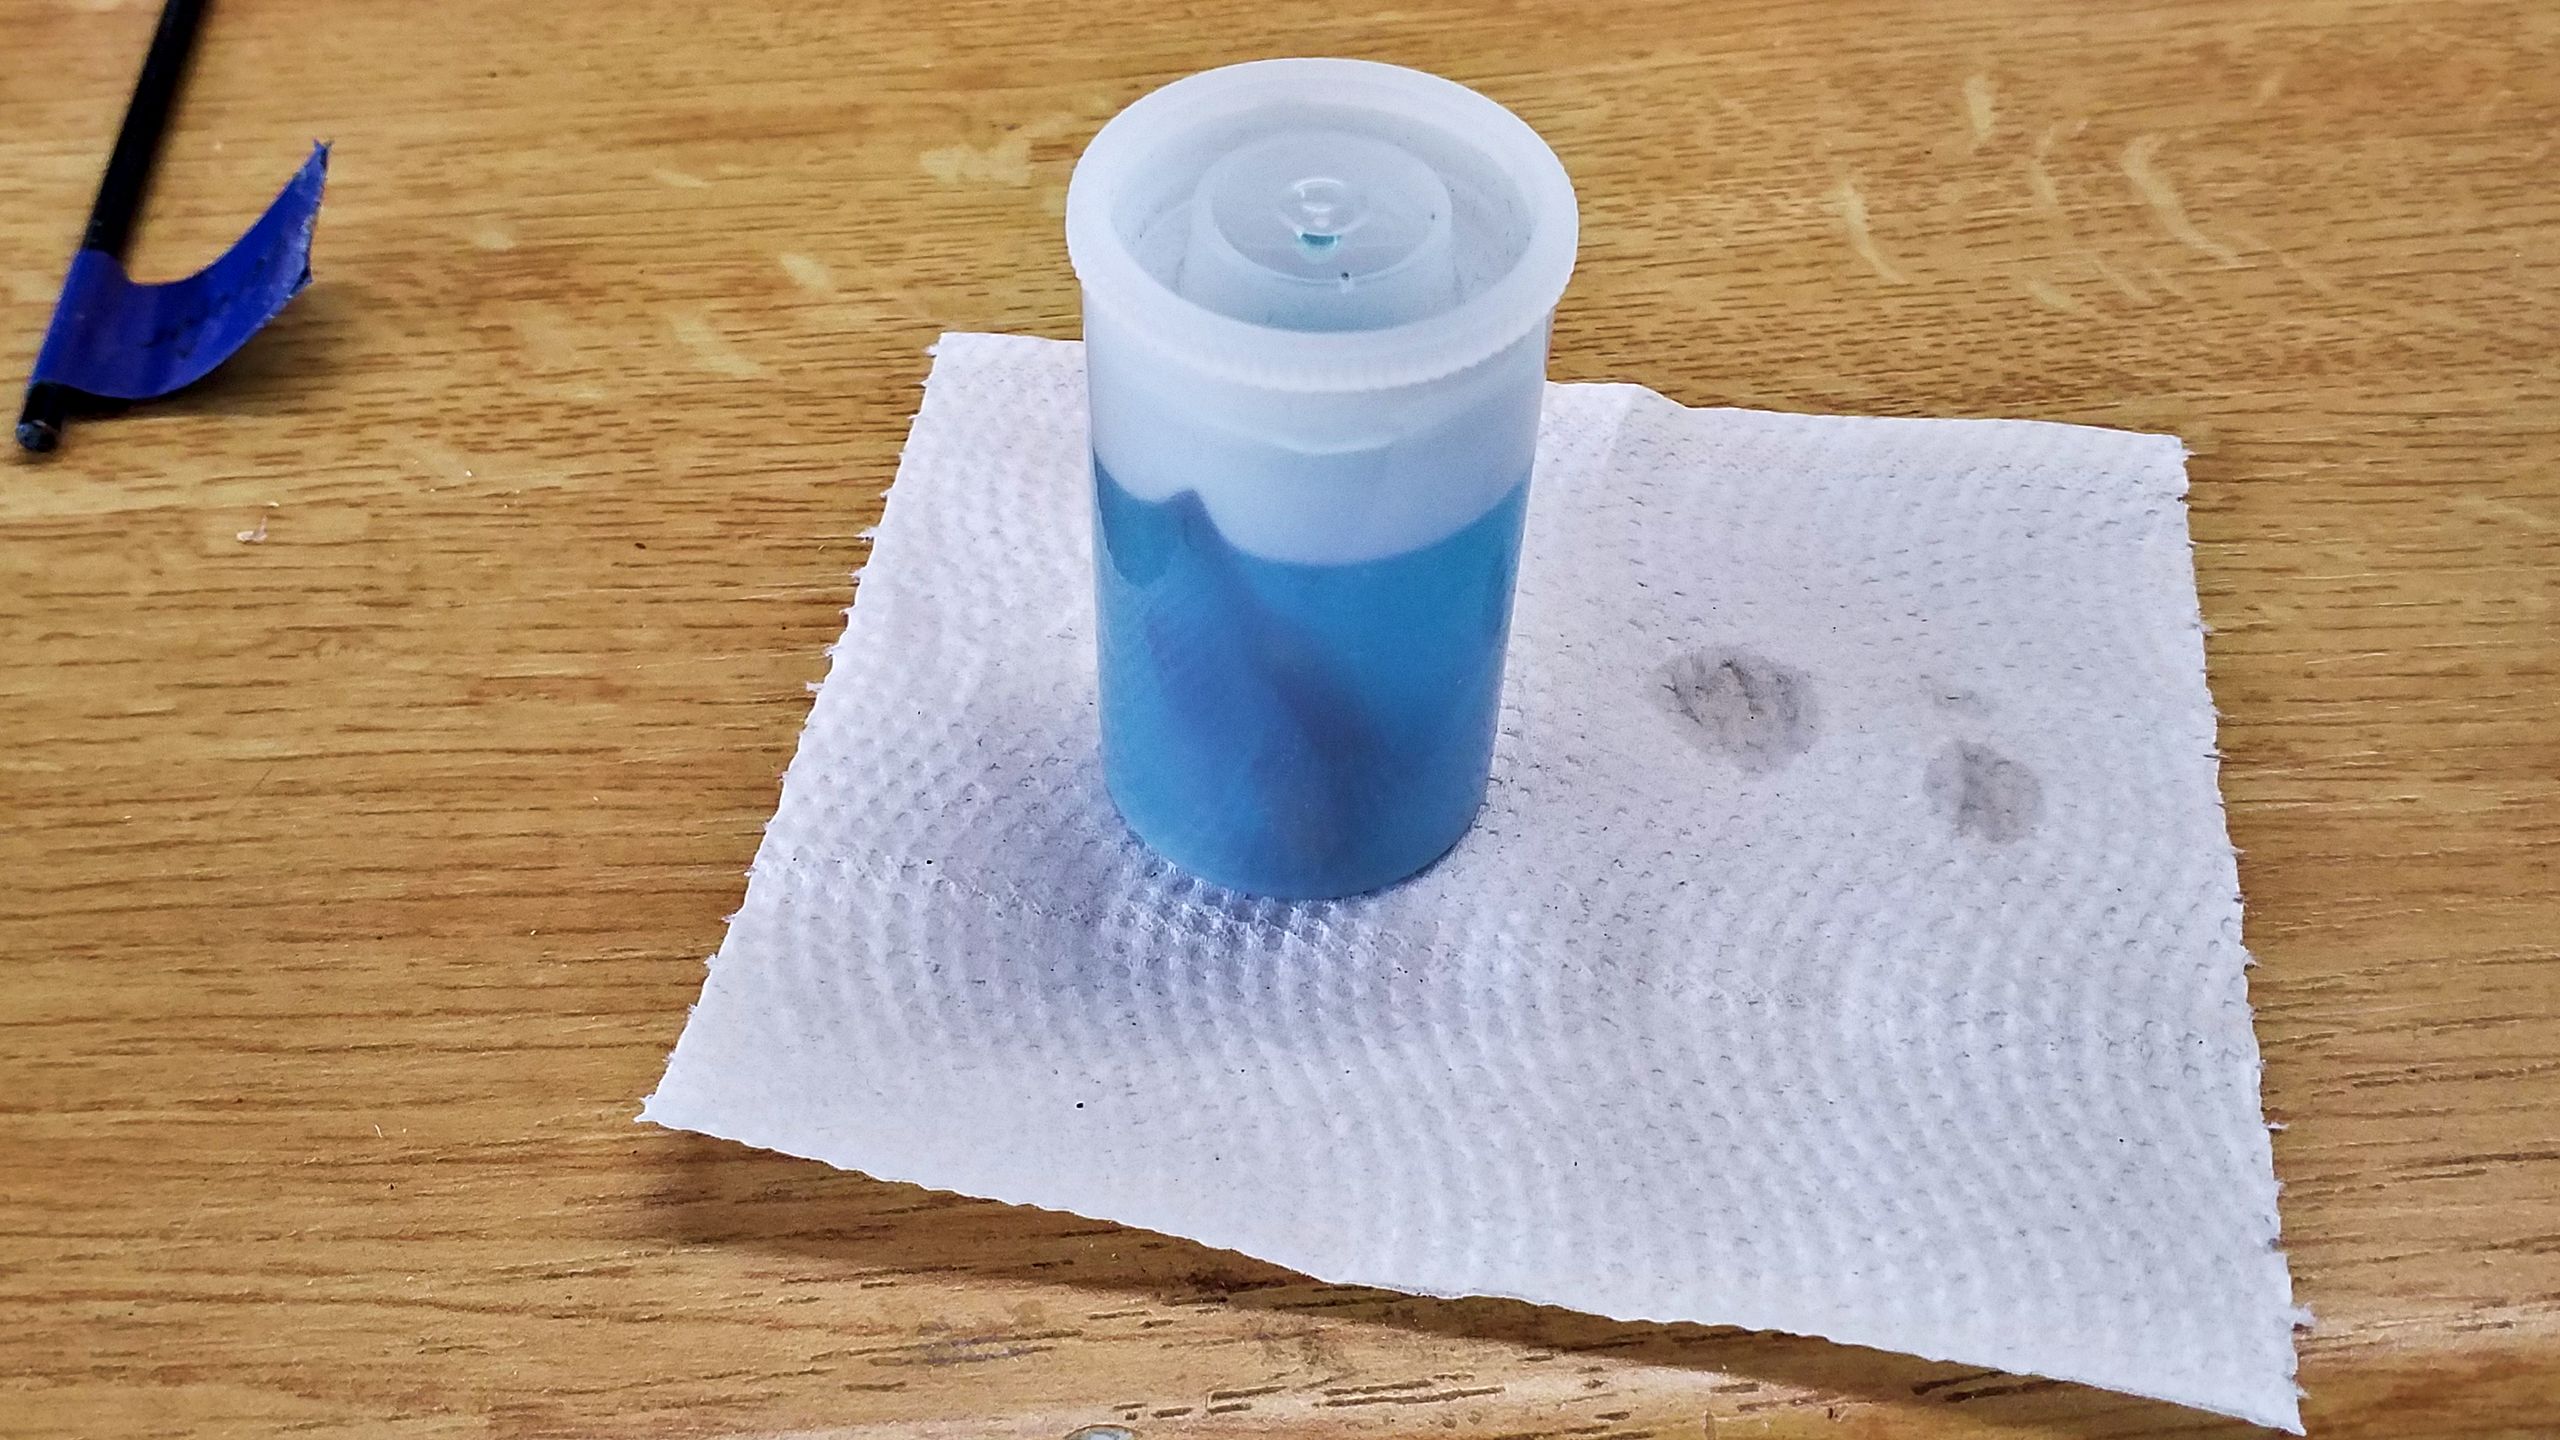
At first glance the result looks promising. However, I seem to have made an error because the blueing comes off easily and the paint doesn’t really stick to it. I hope that next time I can figure out what went wrong.

Nevertheless, the steps are painted with a coat of carmine red acrylic paint and mounted directly behind the end sills.
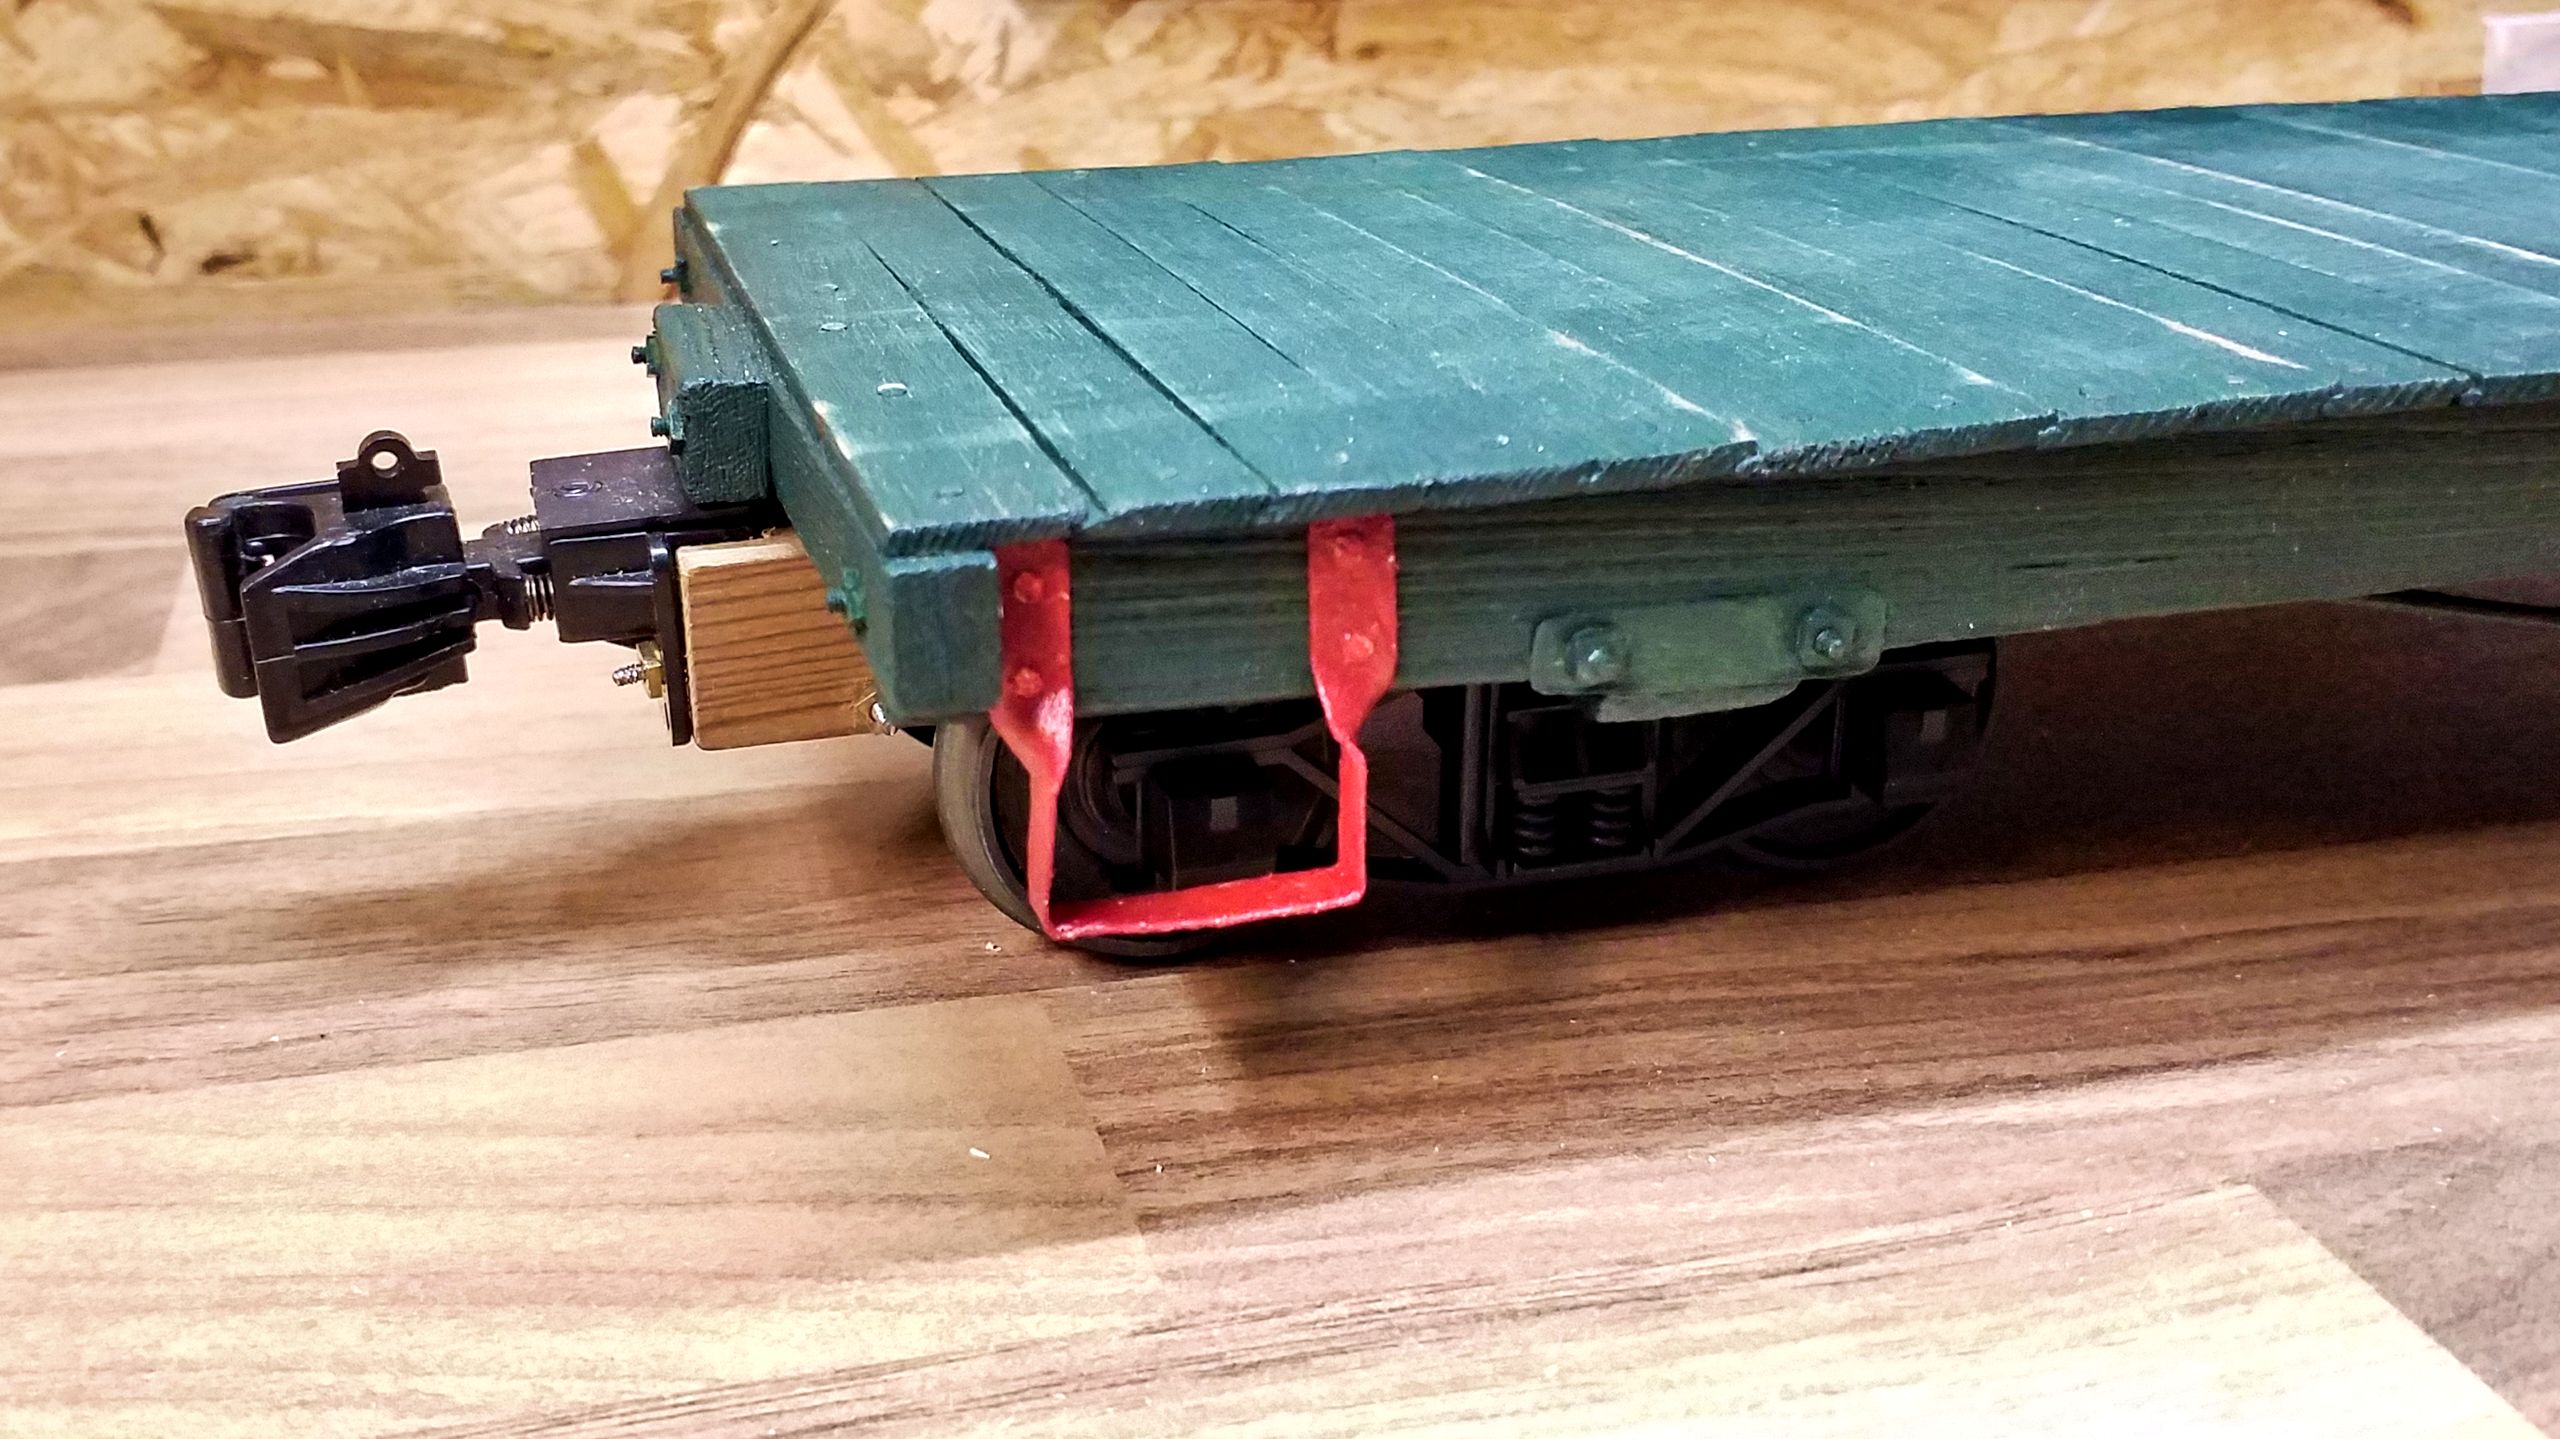
And all of a sudden the waggon is quite something to behold. Next time I’ll focus on the stake pockets.