
By mounting the queenposts the waggon’s substructre is now ready for the turnbuckles. The prototype is used to adjust the trusses’ tension in order to avoid the waggon’s floor to sag. I decided to go for a scratch-build again, since the cast pieces are currently very hard to come by and on top of that they would have been the weakest link in my current construction. However, as a matter of fact it’s very time-consuming to build them manually.
First off I purchased some brass pipe with 3 mm outer diameter, but only 1 mm inner diameter. Which is necesarry to construct working threads. From this pipe I cut off pieces of 2 cm length.
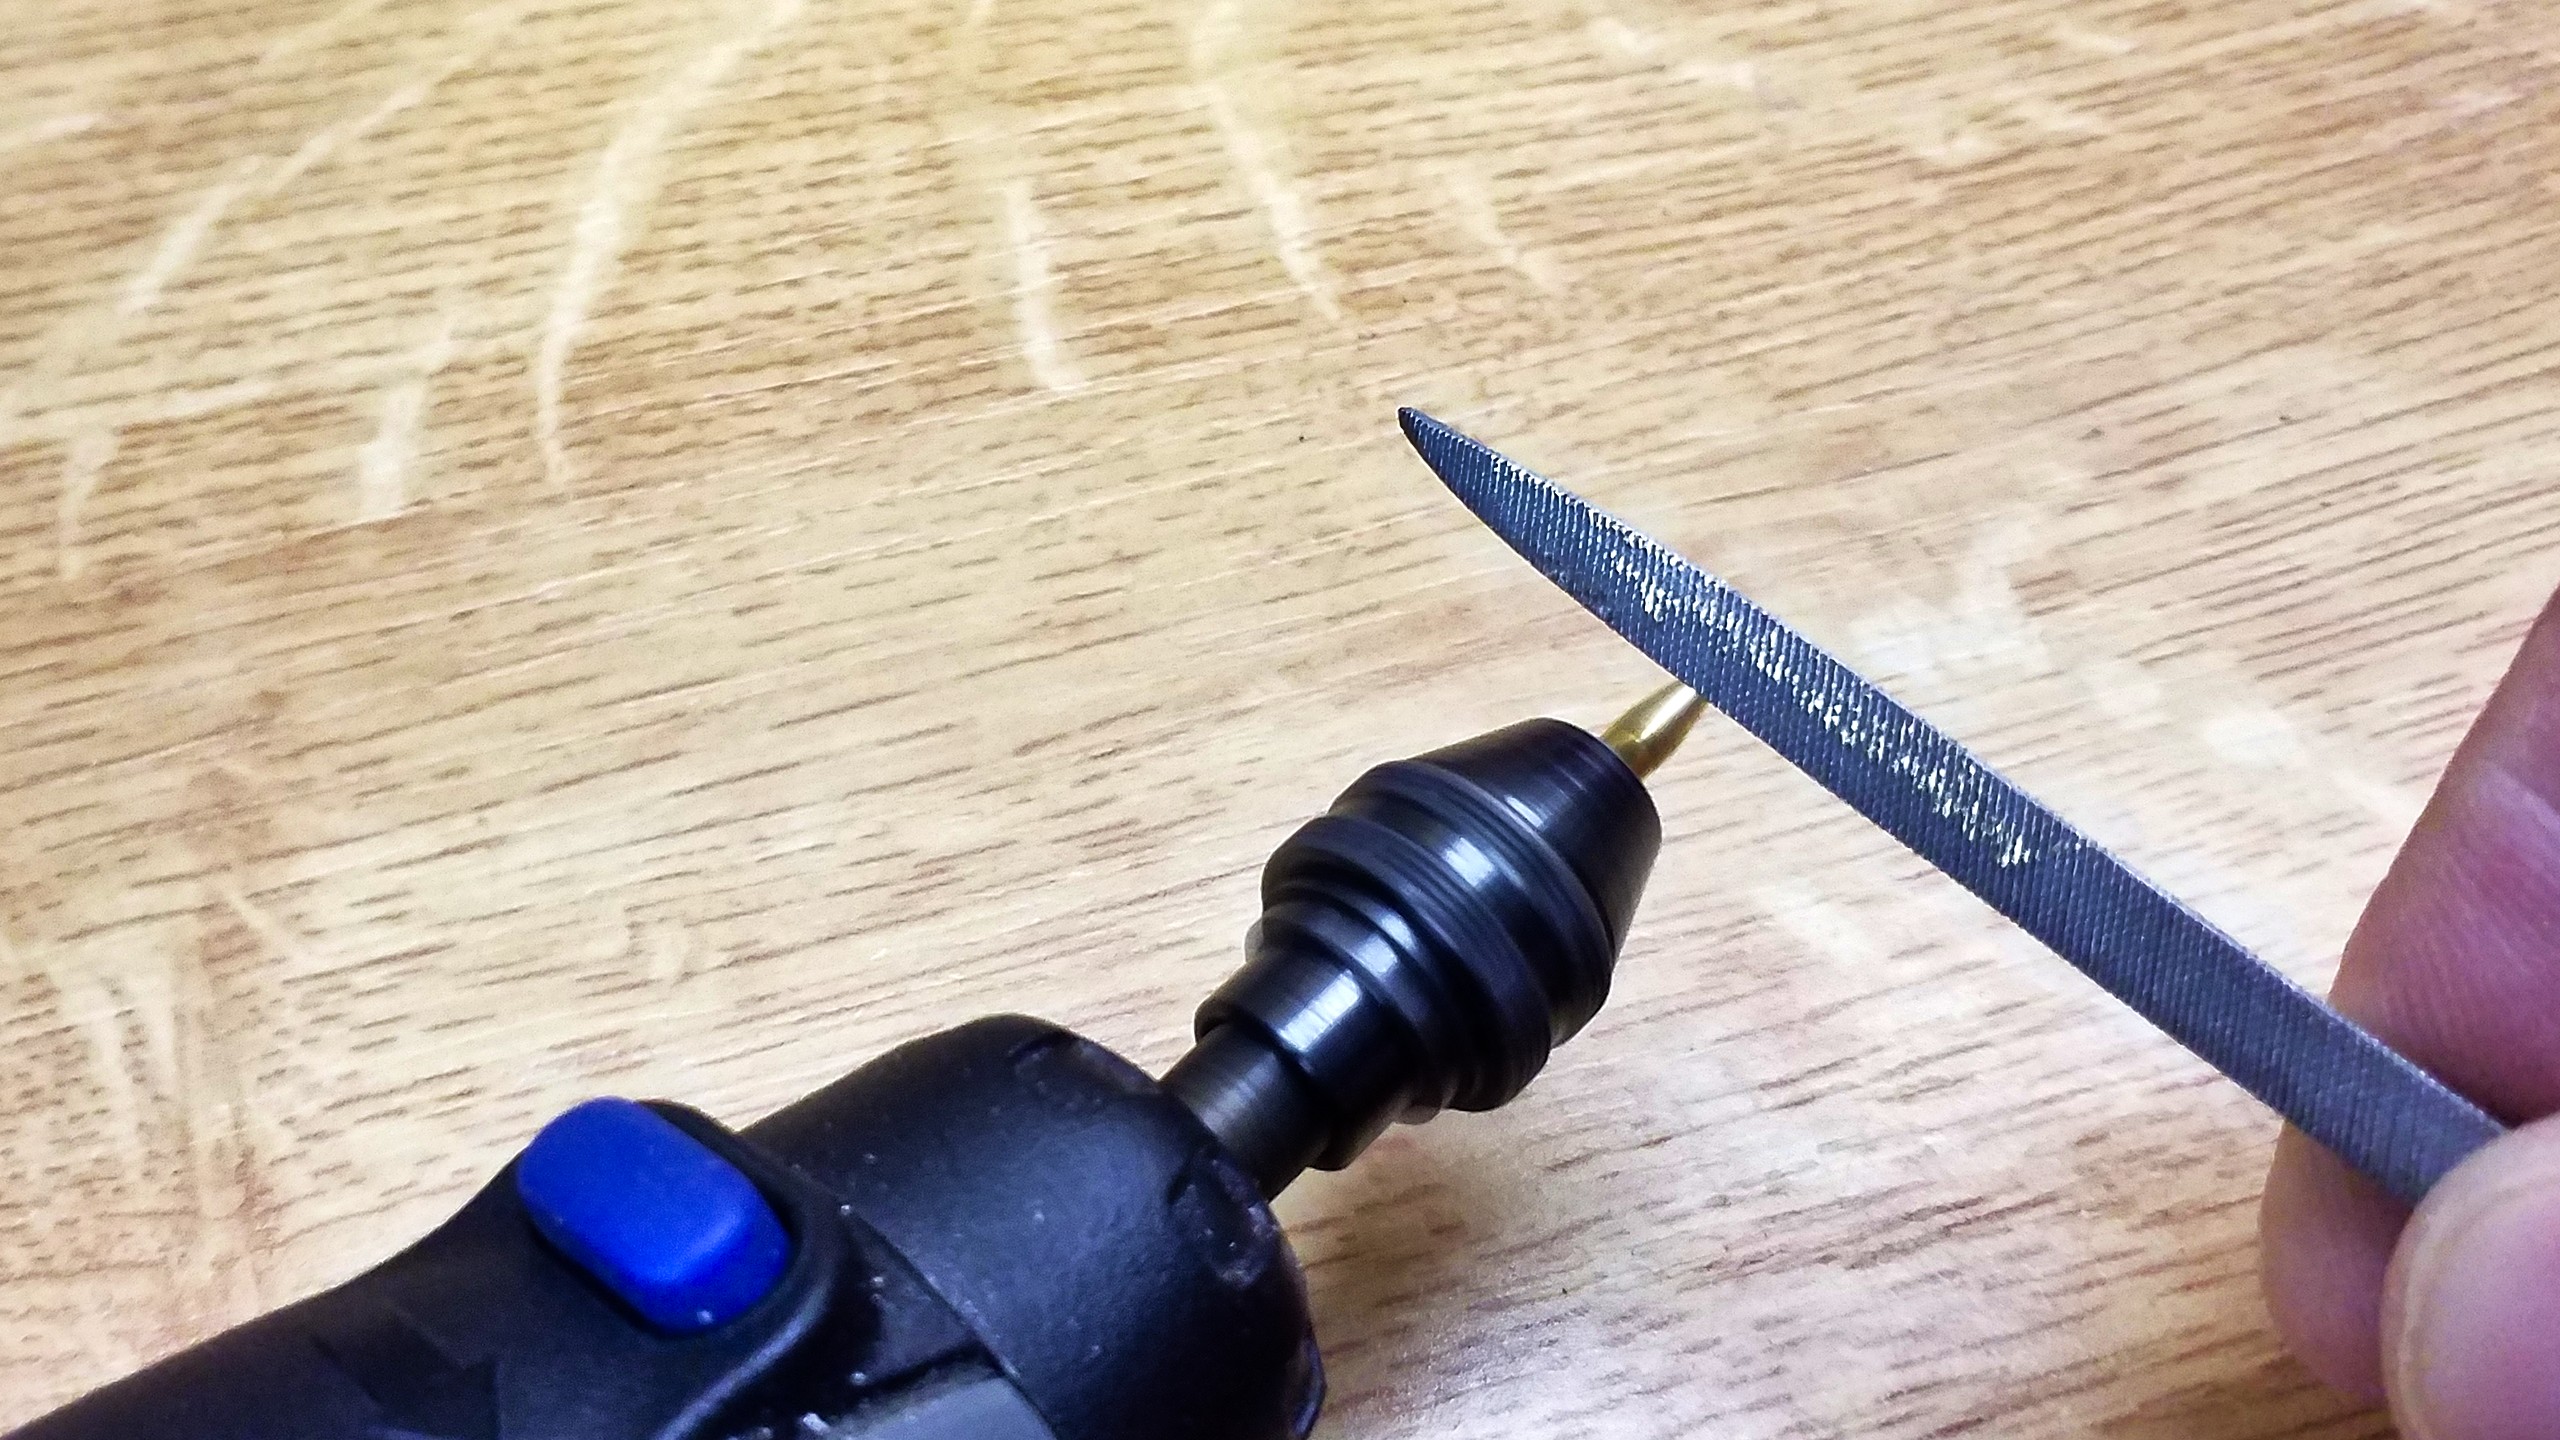
Thoses pieces are clamped in a mini drill and chamfered with a key file at the ends.
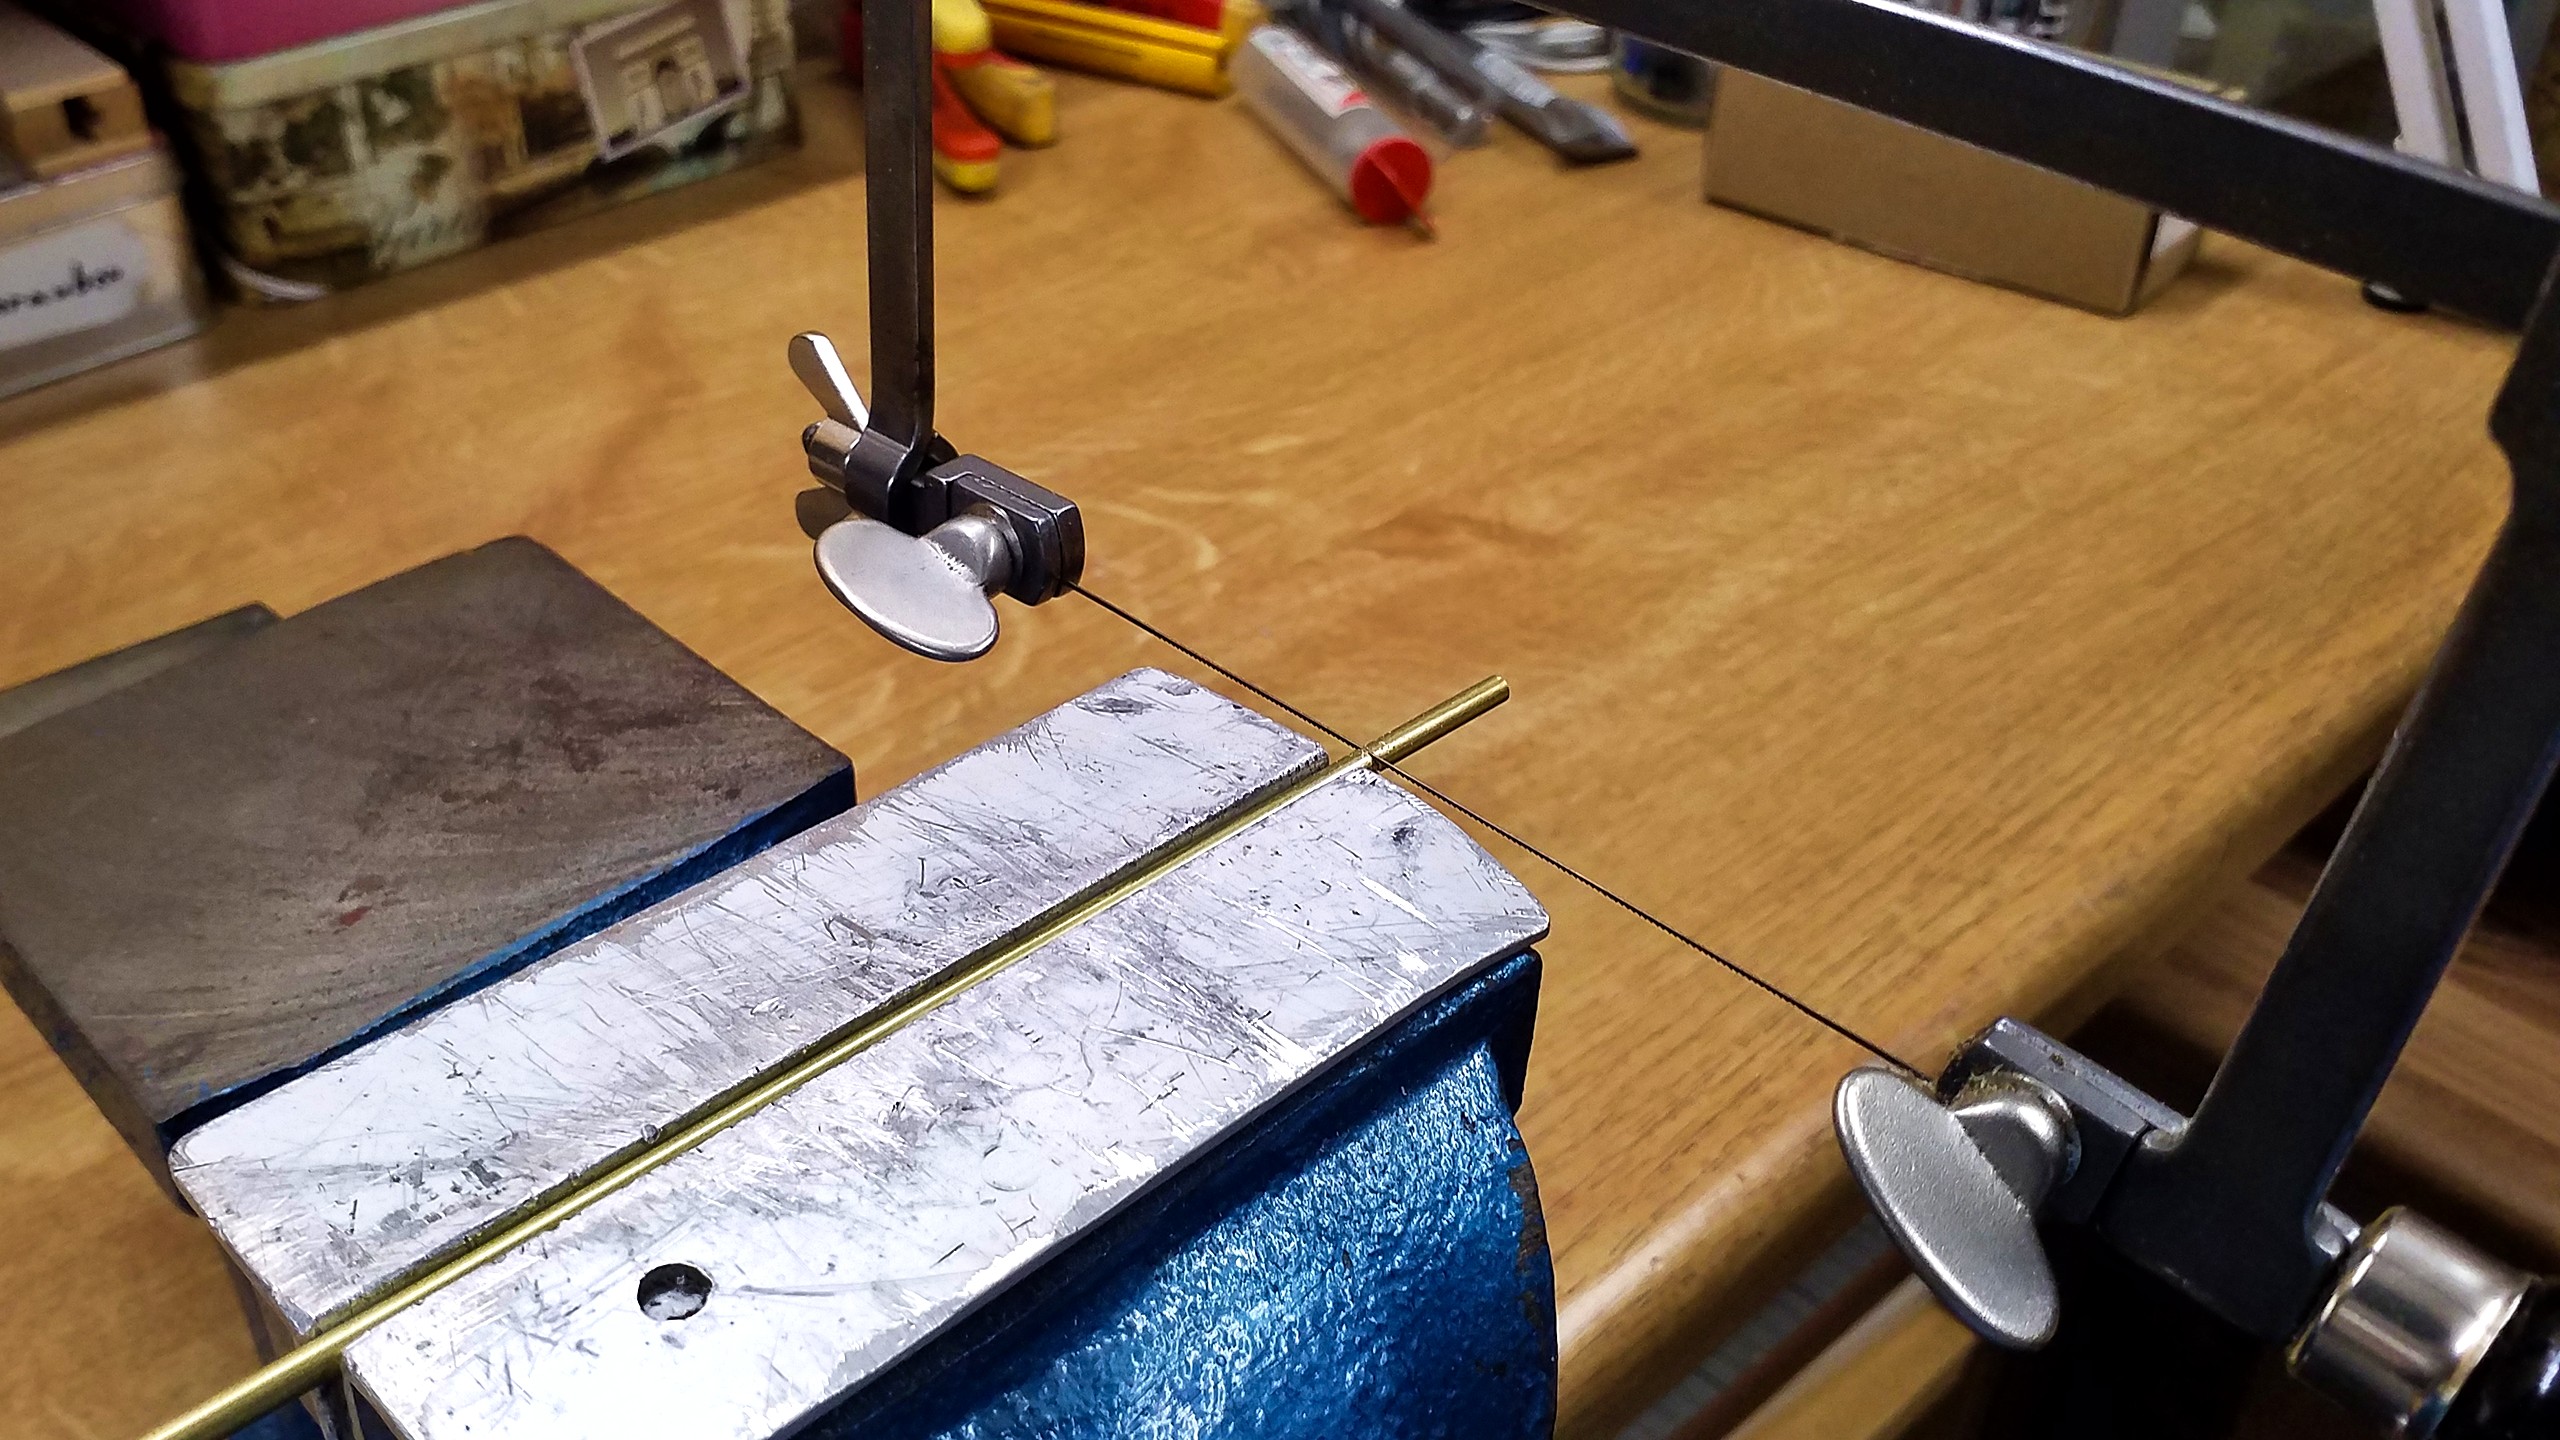
Next, the inner diameter is widened for the thread bore. I’ve already described how tedious the search for the trusses material turned out to be, but in the end I’ve found steel wire with 1.6 mm diameter. So for the female thread the diameter has to be widened to 1.3 mm.

At the first try I cut the thread at the very end, but that caused the turnbuckle to warp. To avoid that, it’s preferrable to cut the threads right after widening the diameter, namely a right-hand thread at one end and a left-hand thread at the other one. Thus the turnbuckle can actually adjust the trusses’ tension.

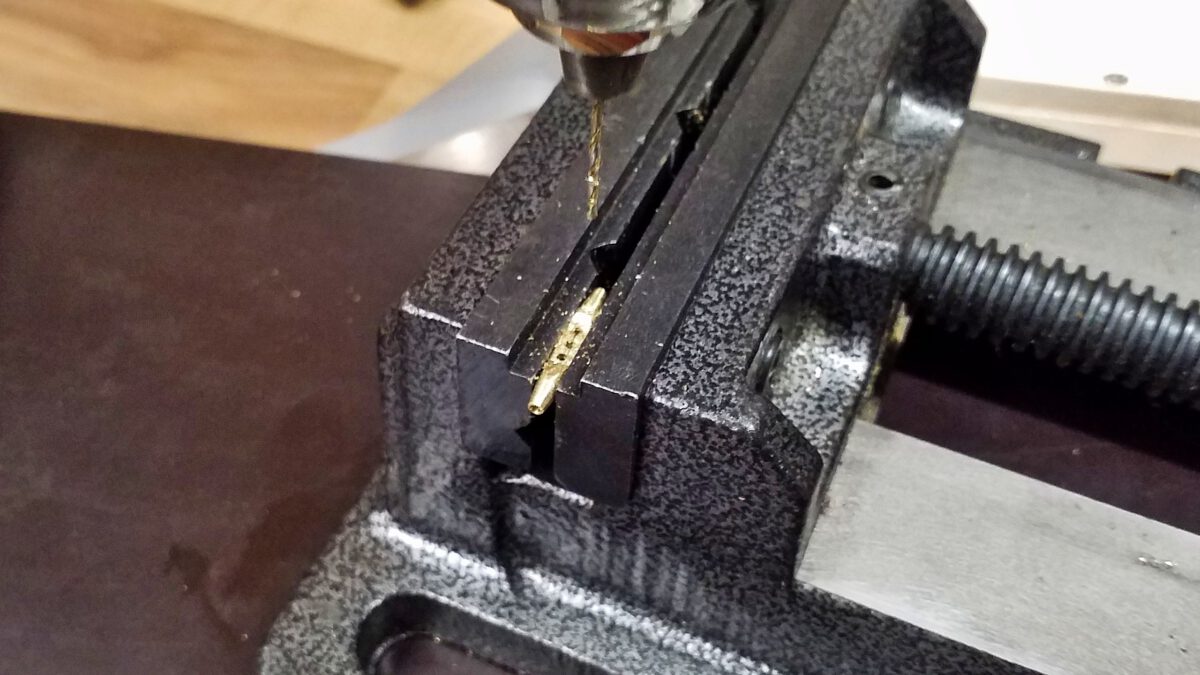
After that it’s time to bring the typical shape of the turnbuckles to light. The middle part’s flanks are milled until two rather slim webs remain.

The gap in the middle needs to be widened to 1.3 mm. To that end, I drill a series of holes with a suitable drill bit…

…and then connect those with a slim milling head.
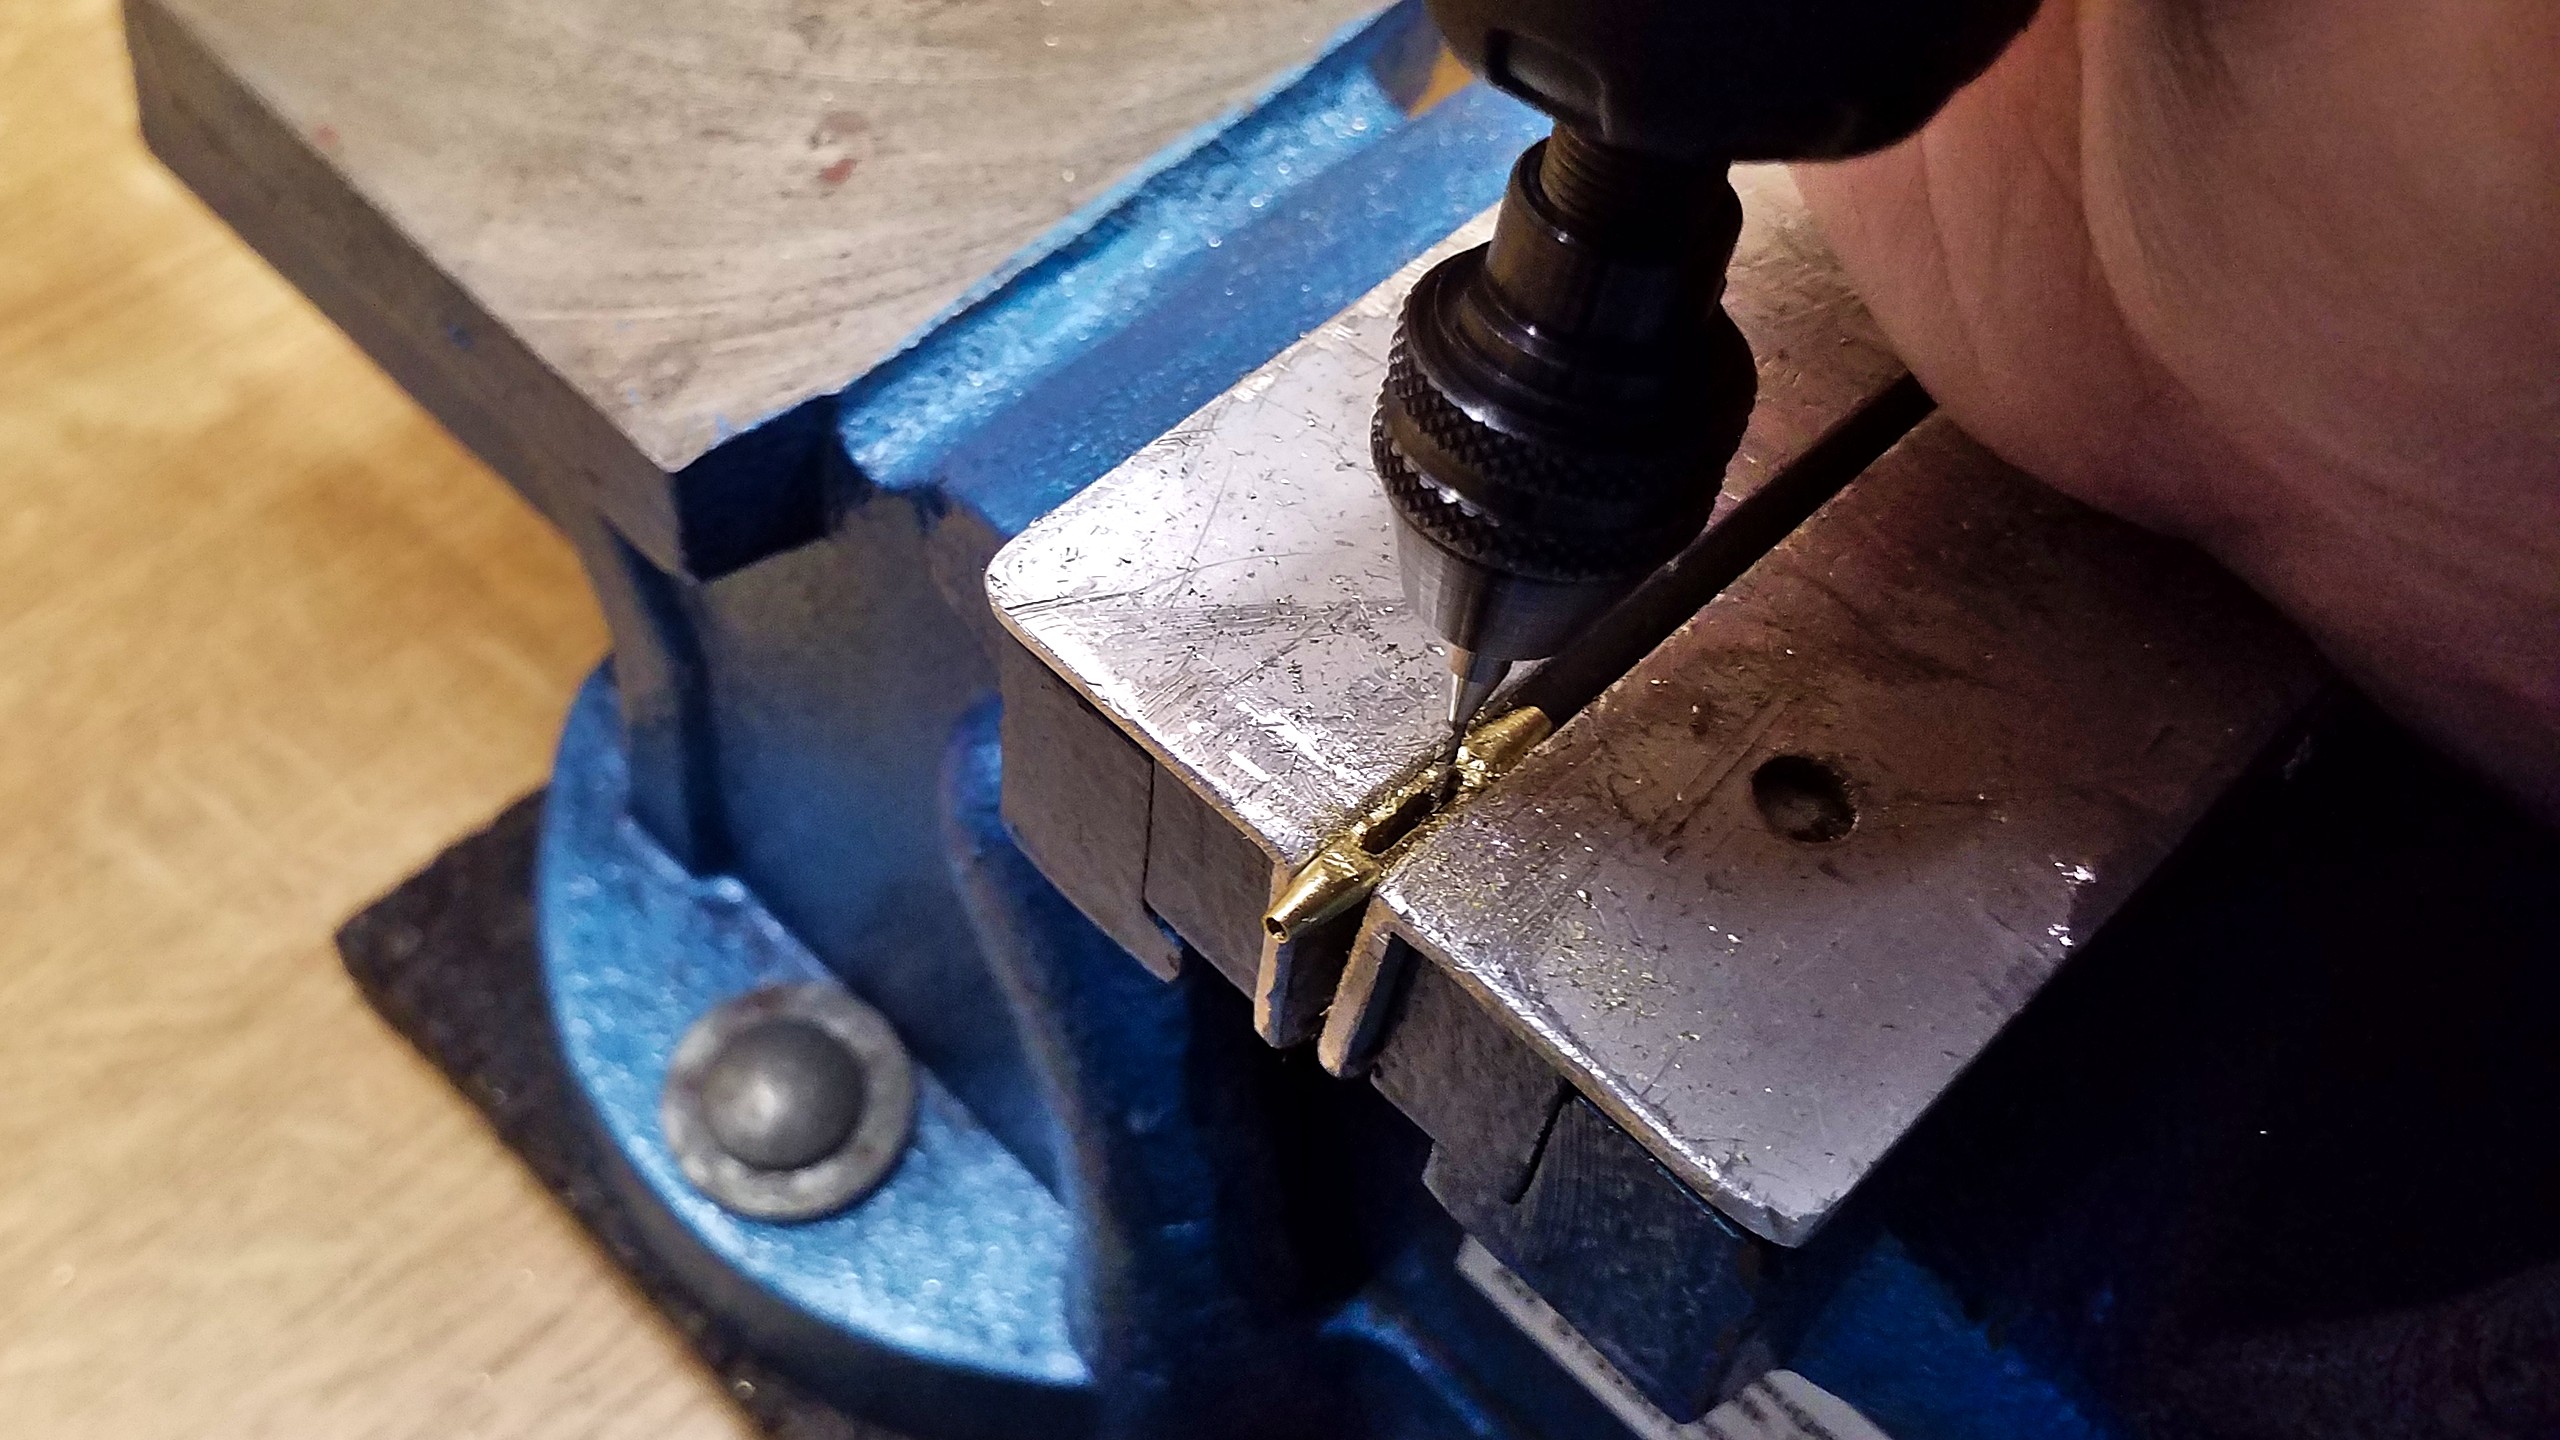
Naturally, doing that step by hand won’t deliver a smooth result. So the turnbuckle is cleaned out afterwards using a key file. That wouldn’t be necesarry with a proper milling machine, but I lack the pocket change…
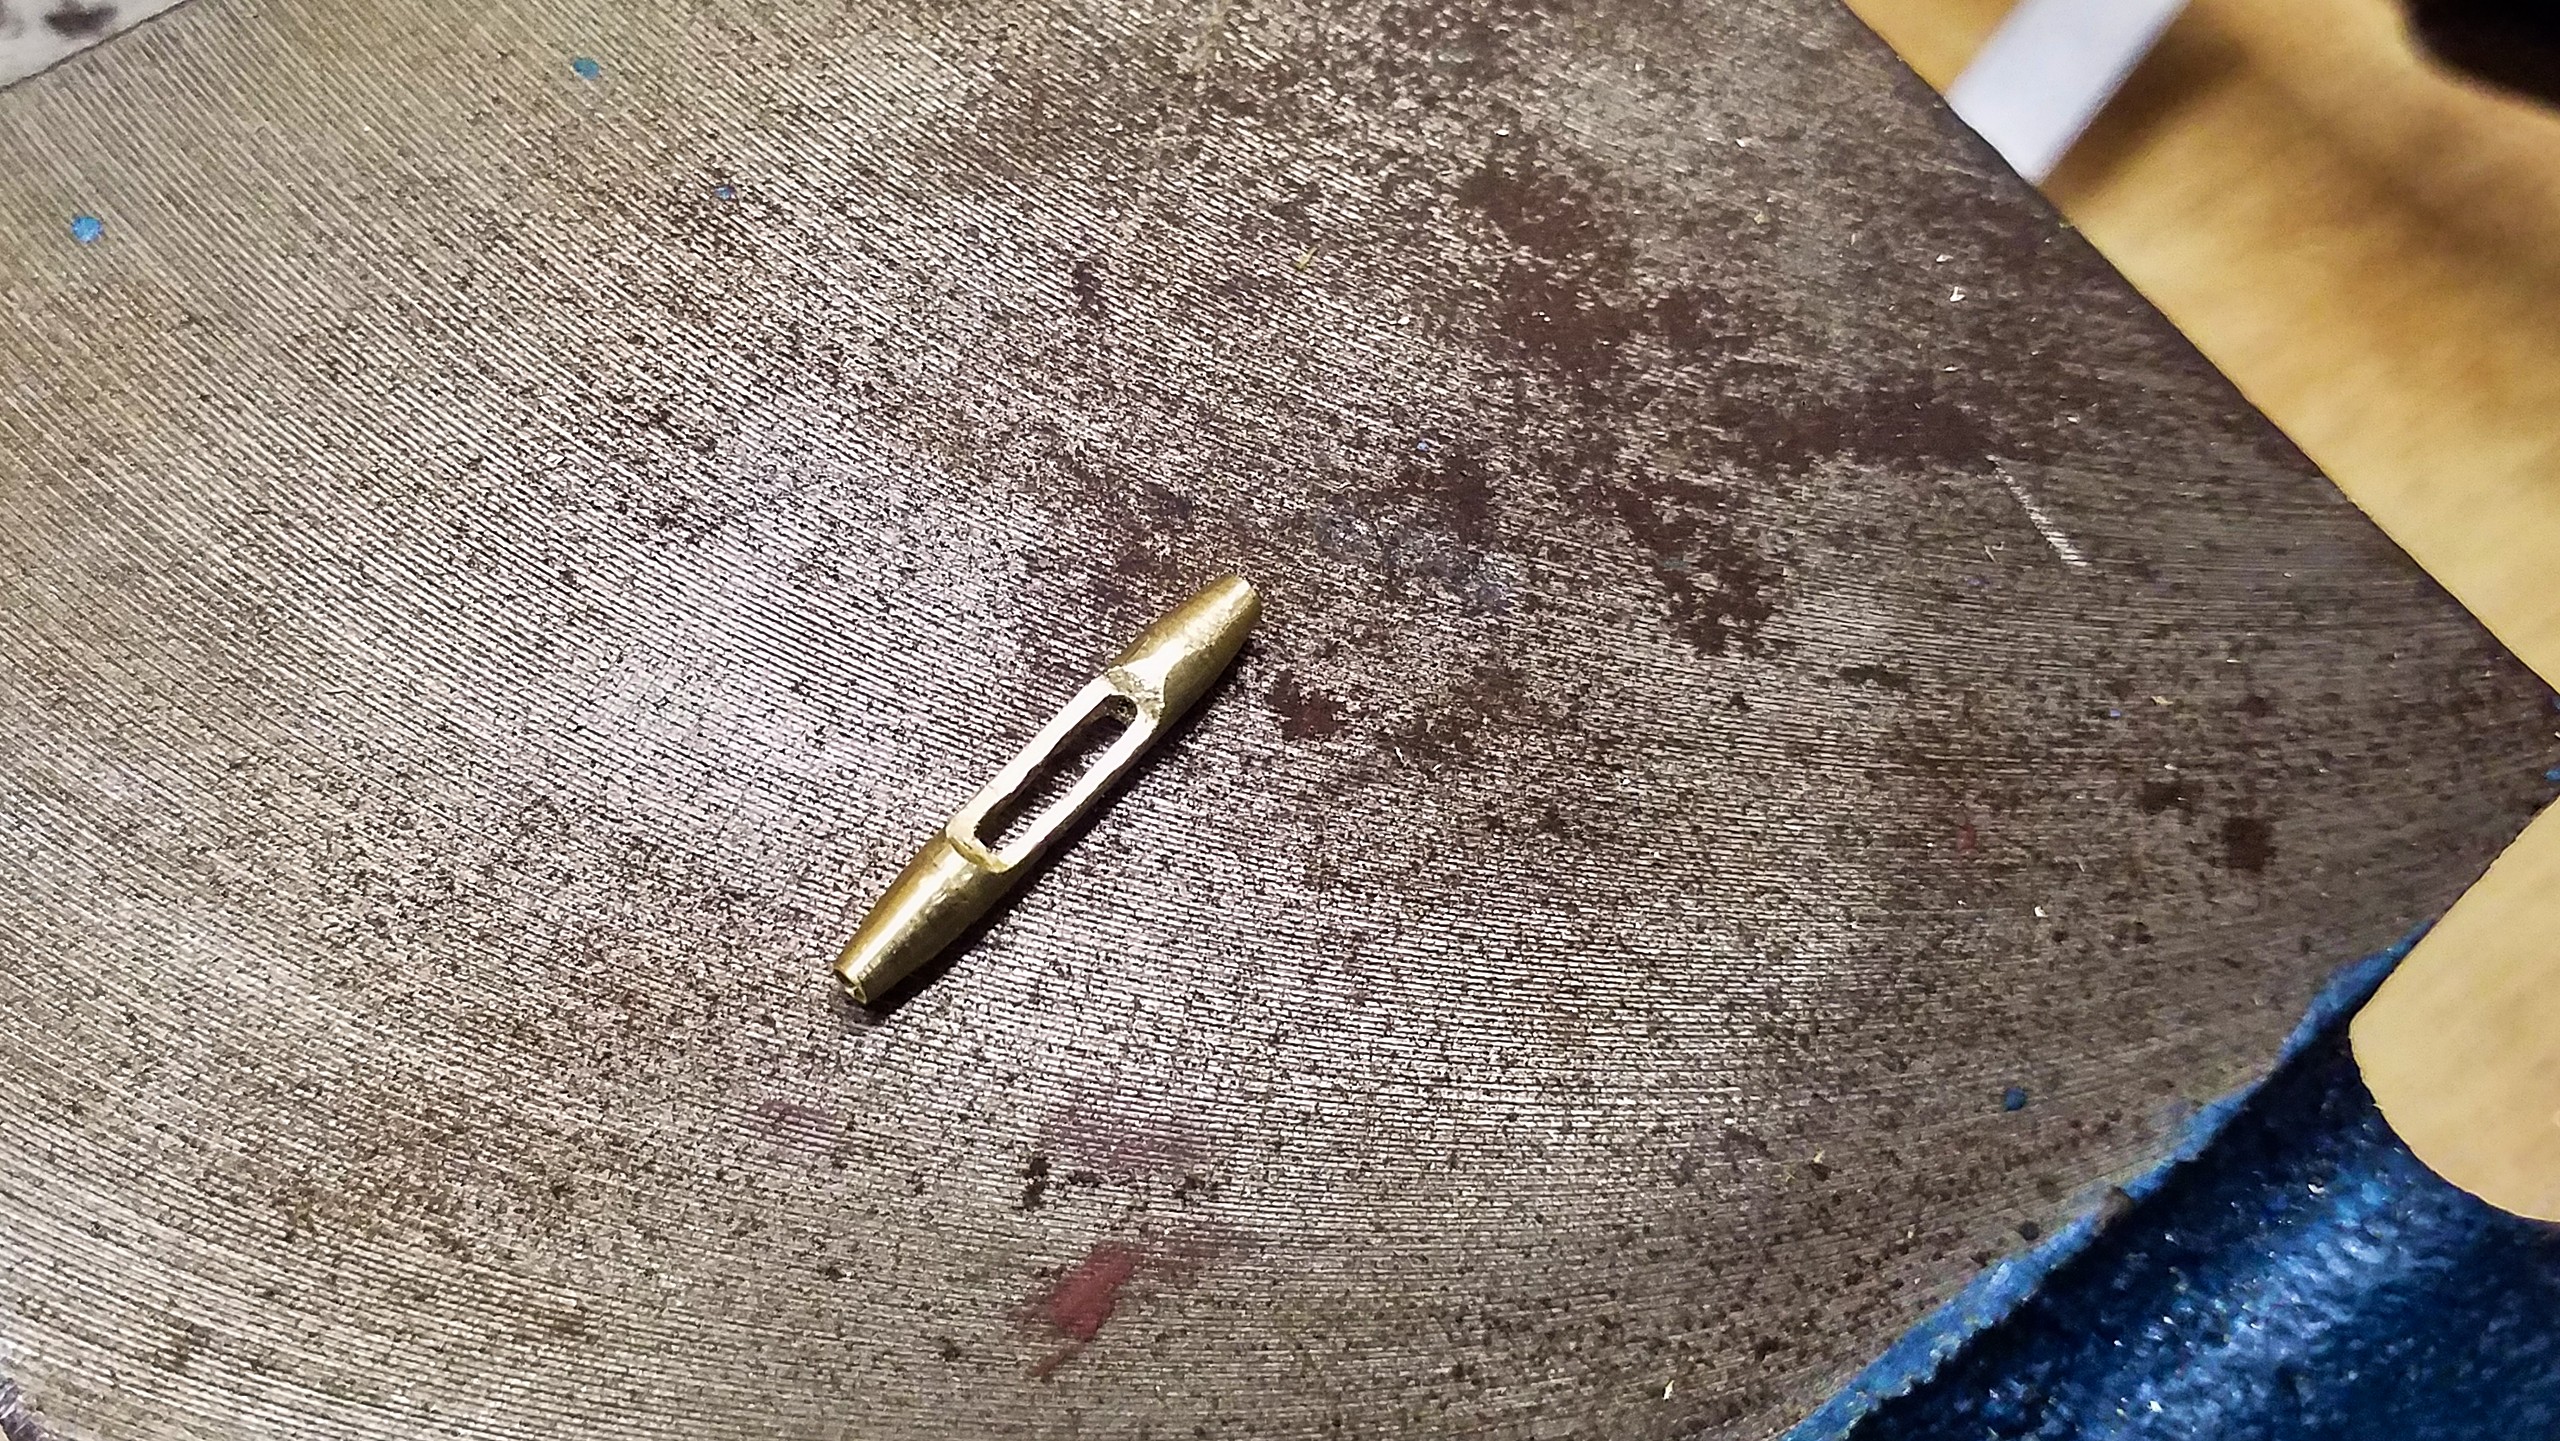
This includes to file the turnbuckle’s ends as thin as possible. The prototype has got very short threads, which I couldn’t replicate in the model for the brass would give too easily. So I elongated the threads and reduced the outer diameter as far as practicable to conceal them.
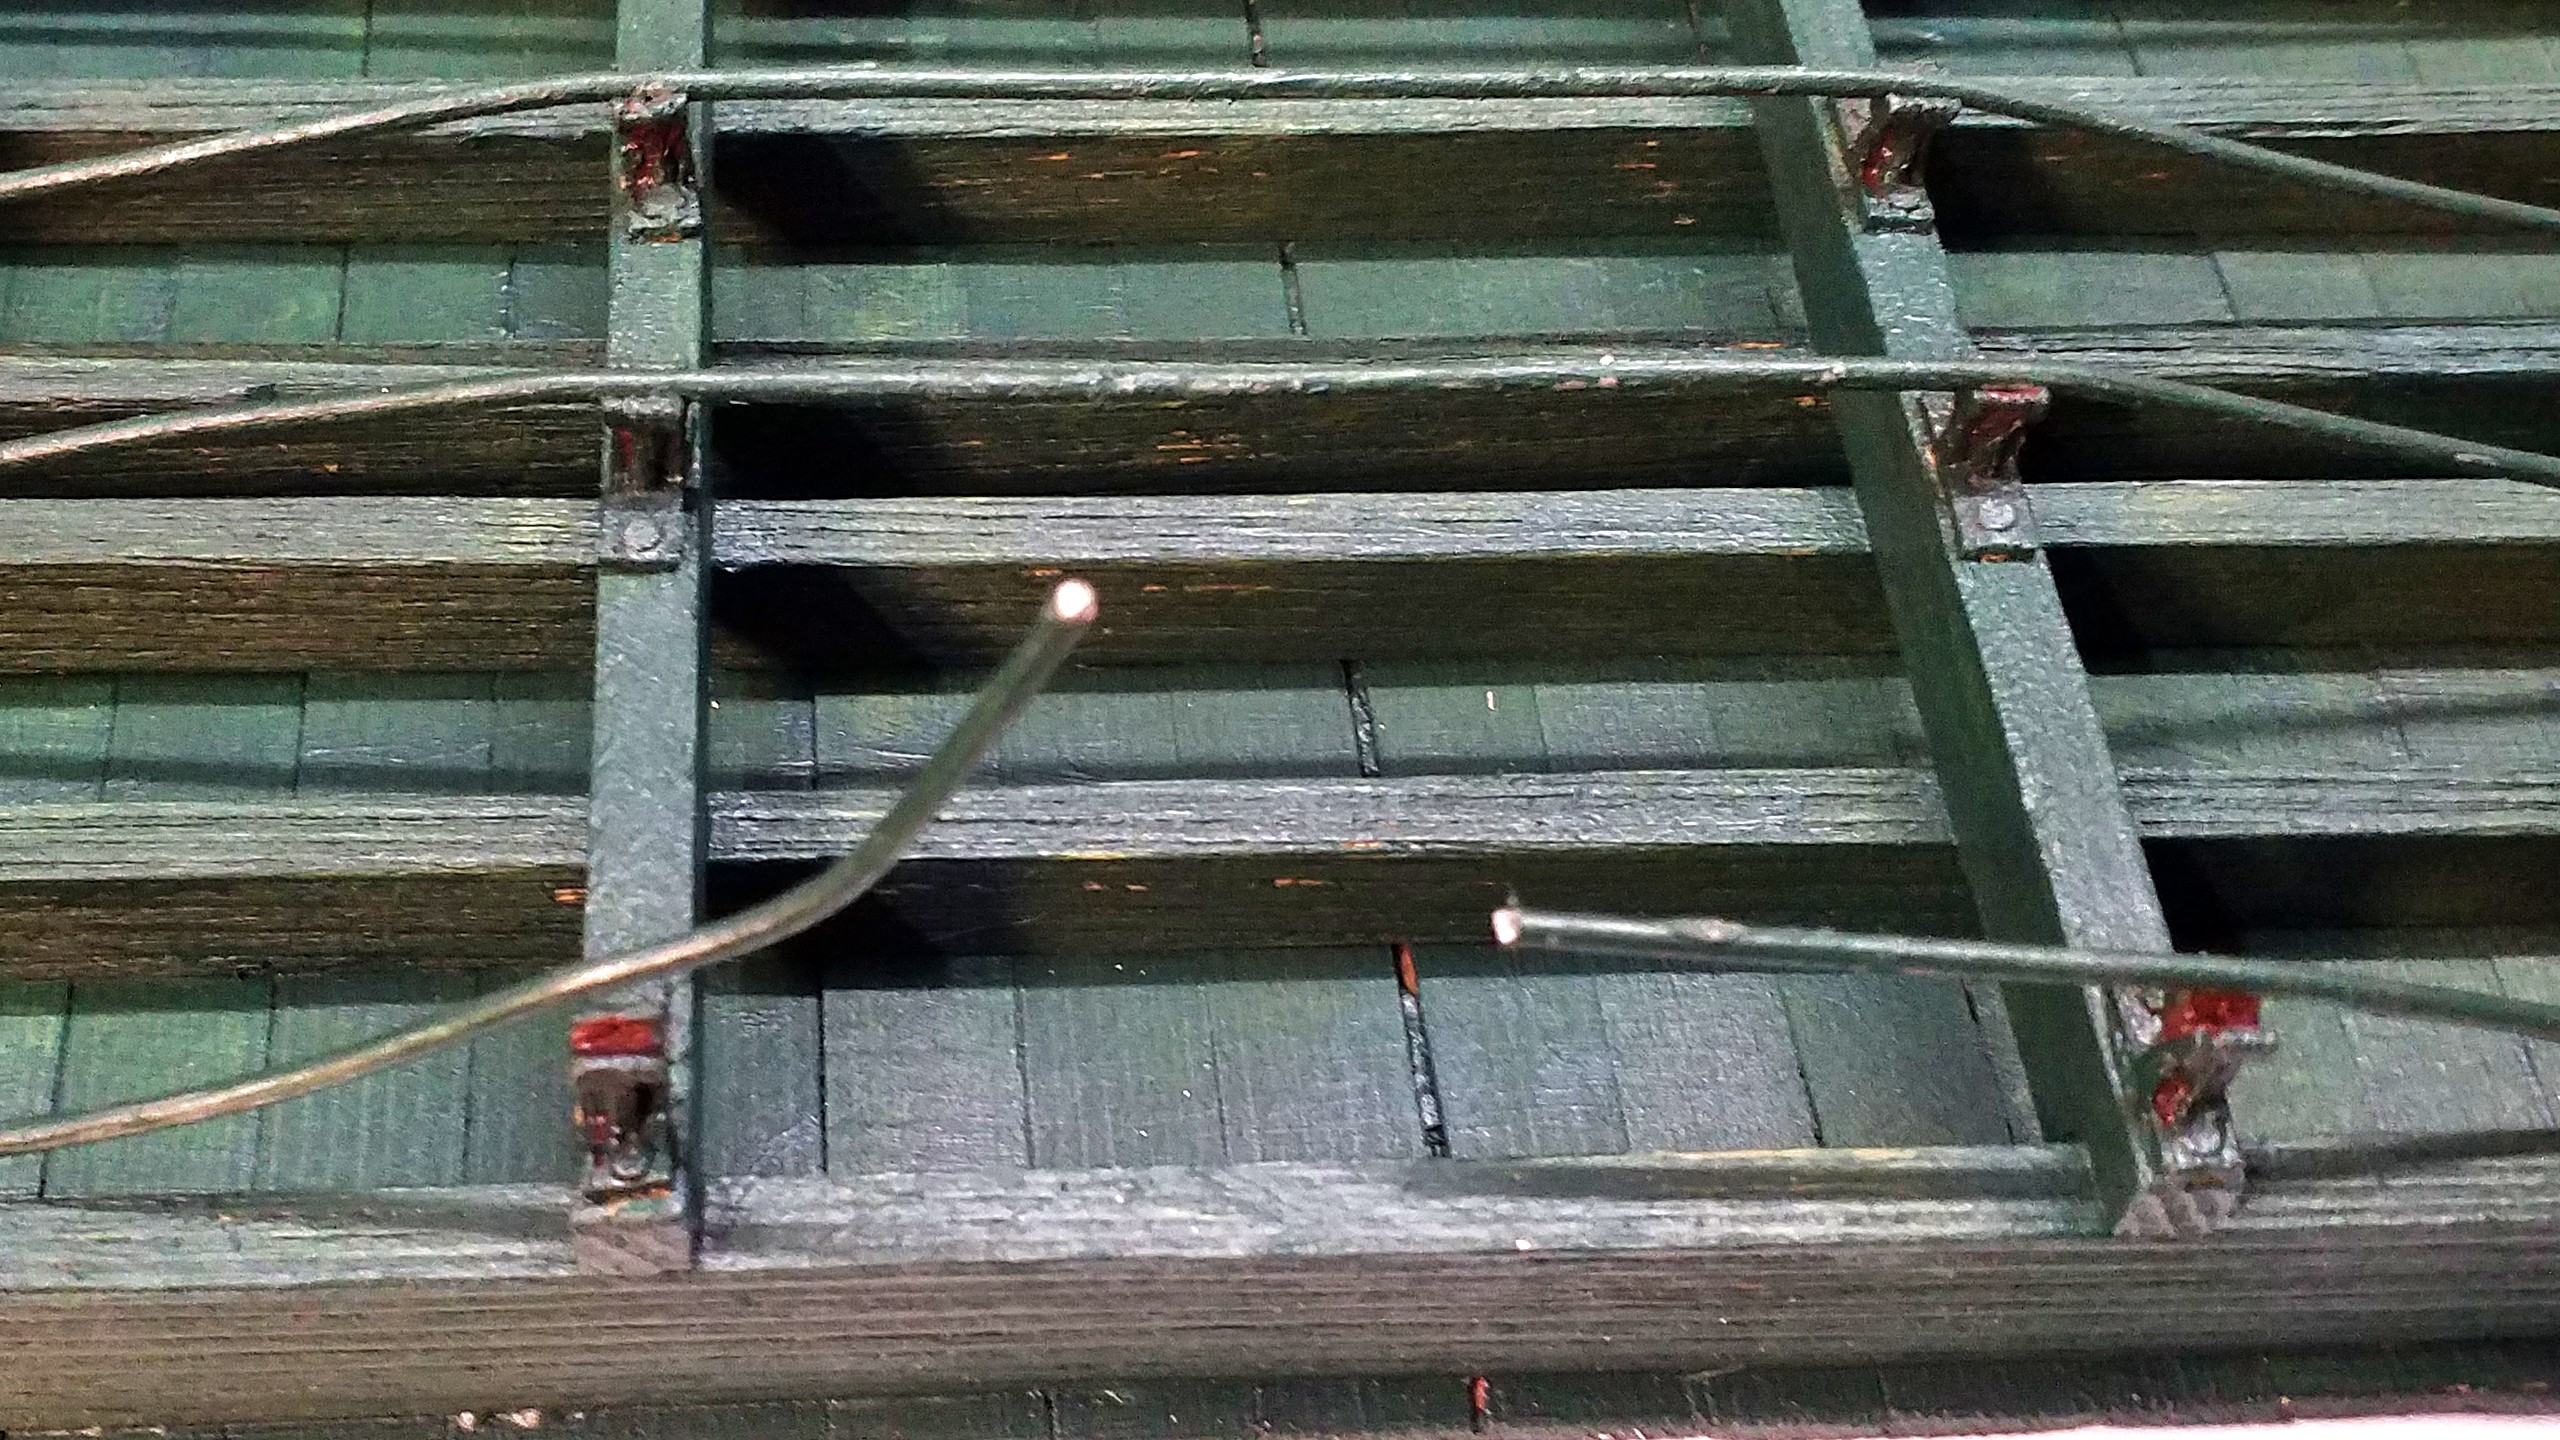
Now it’s time to lay the freshly painted waggon on its back and cut the trusses in the middle. A piece of wire has to be removed so the turnbuckle’s gap remains clear.
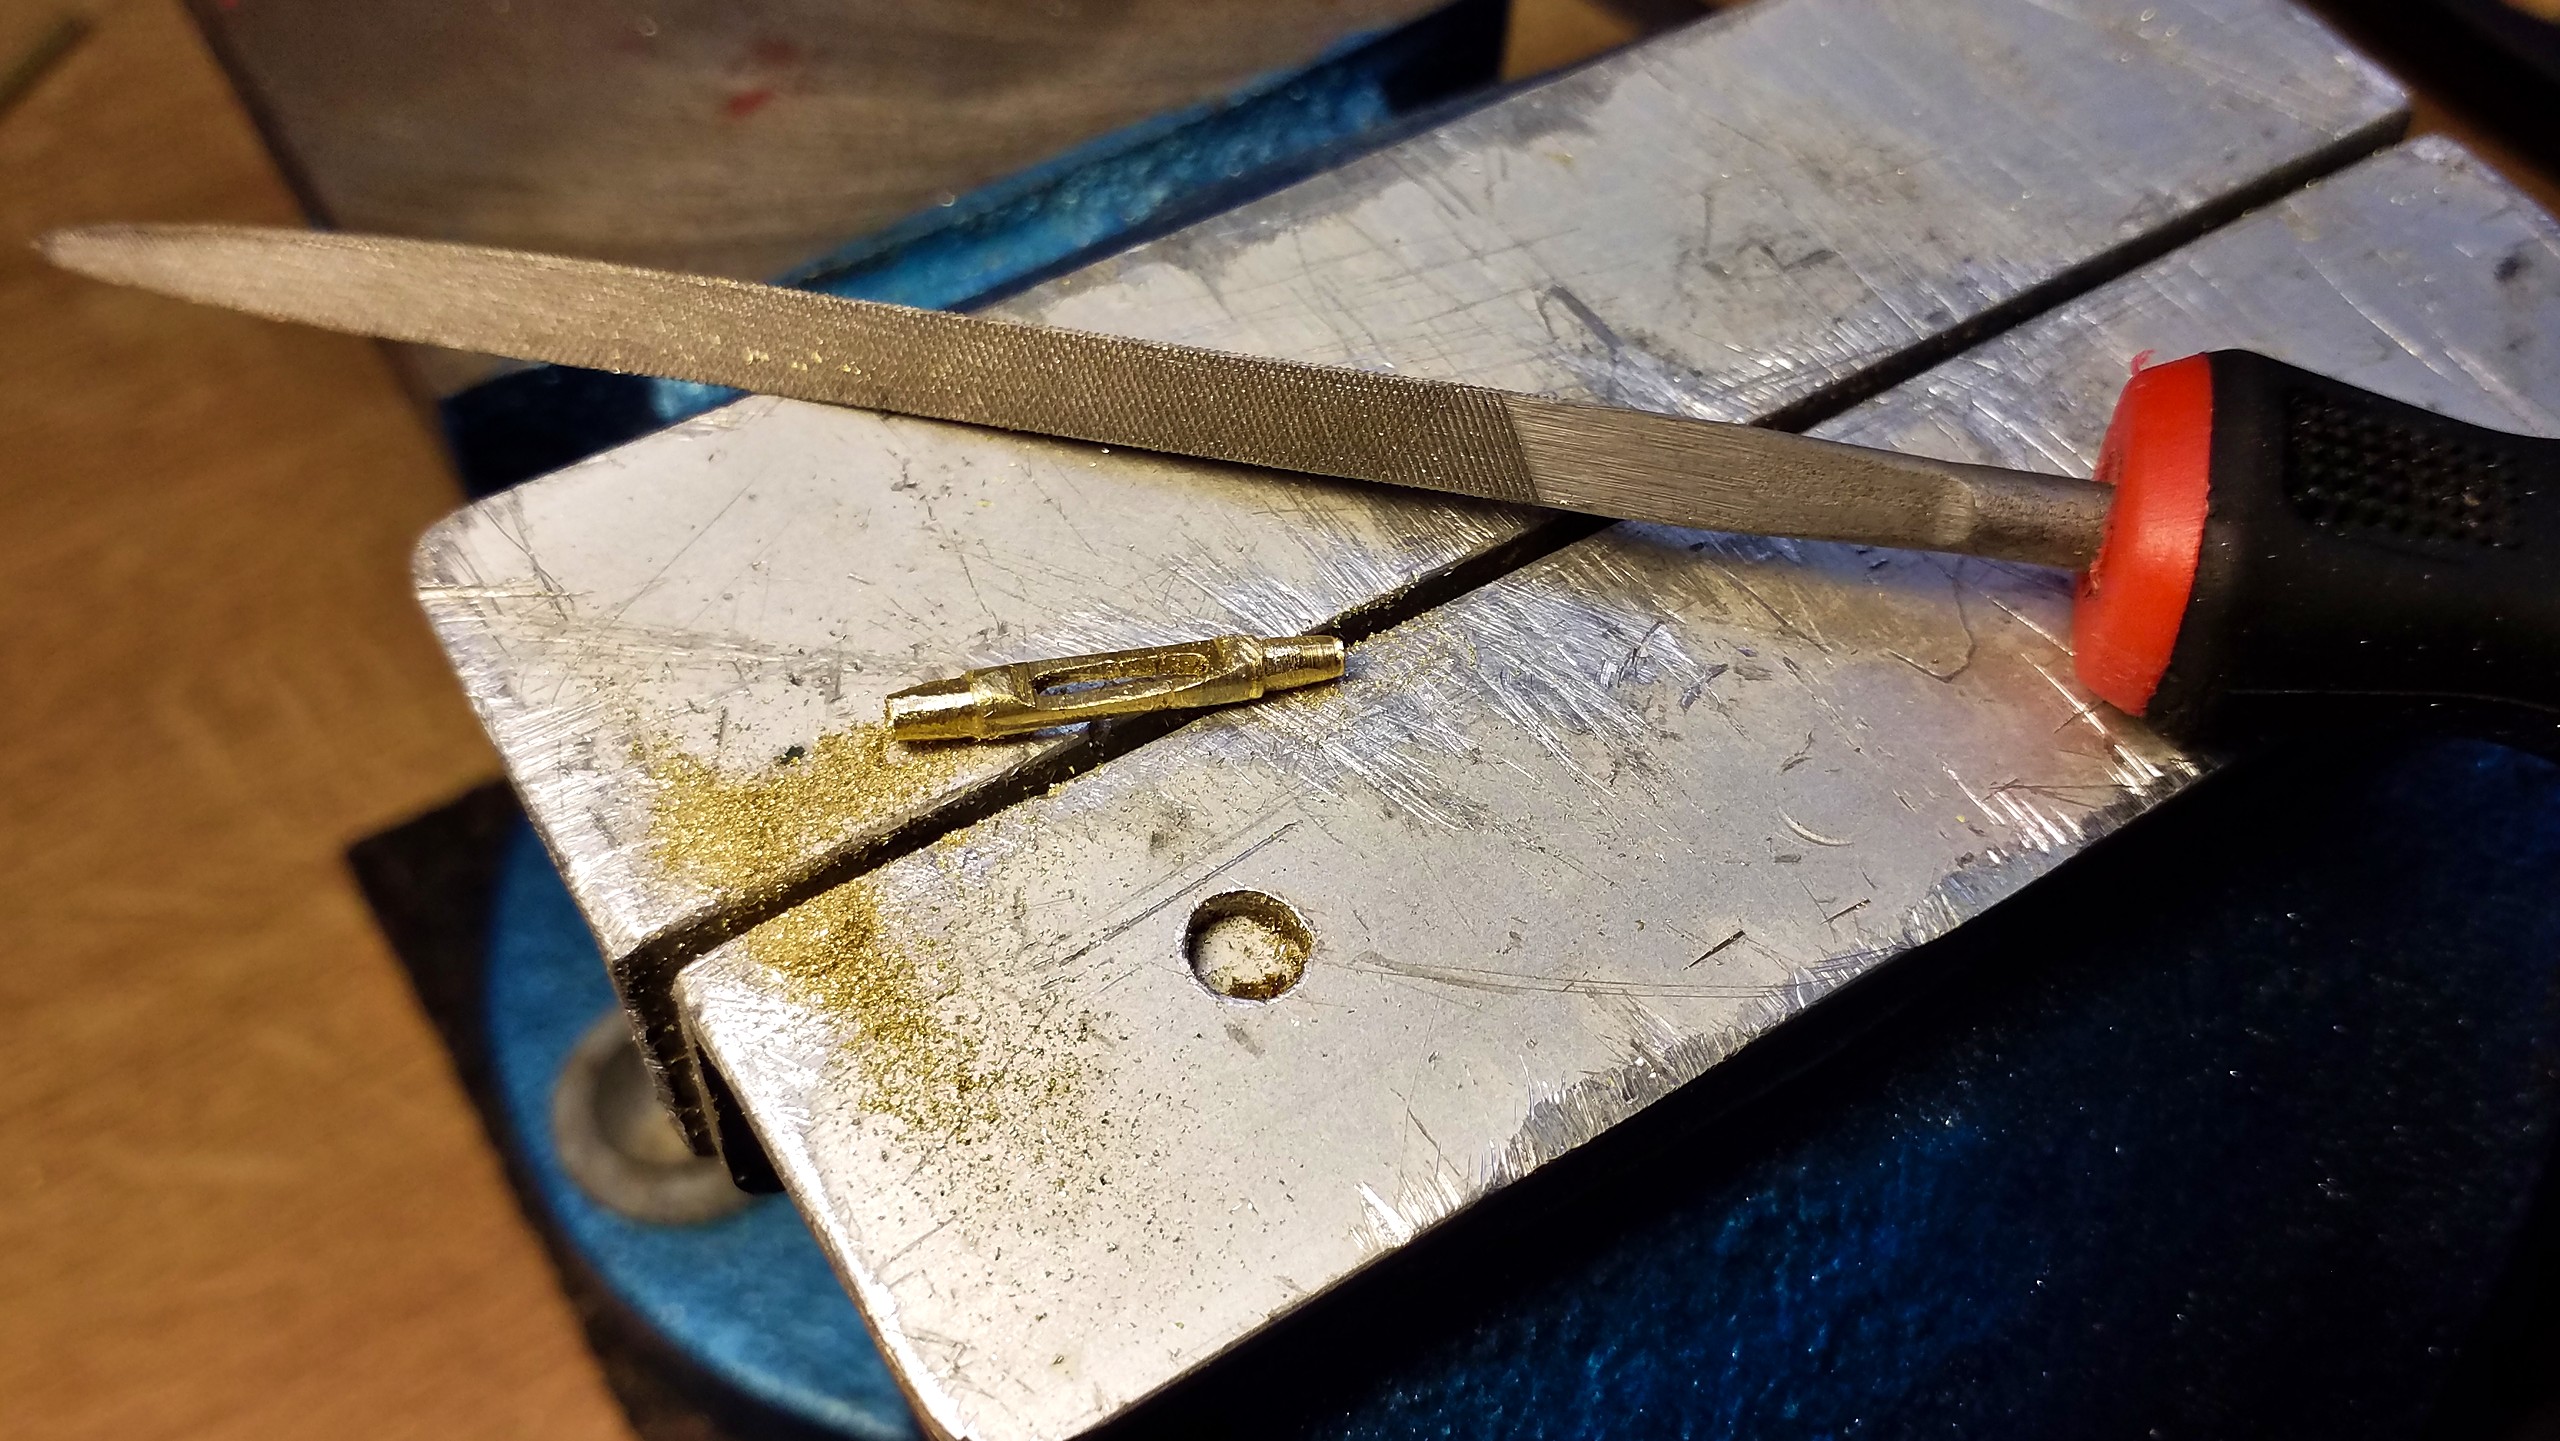
As soon as the male threads are tapped, the turnbuckle can be slid on and fastened tight.
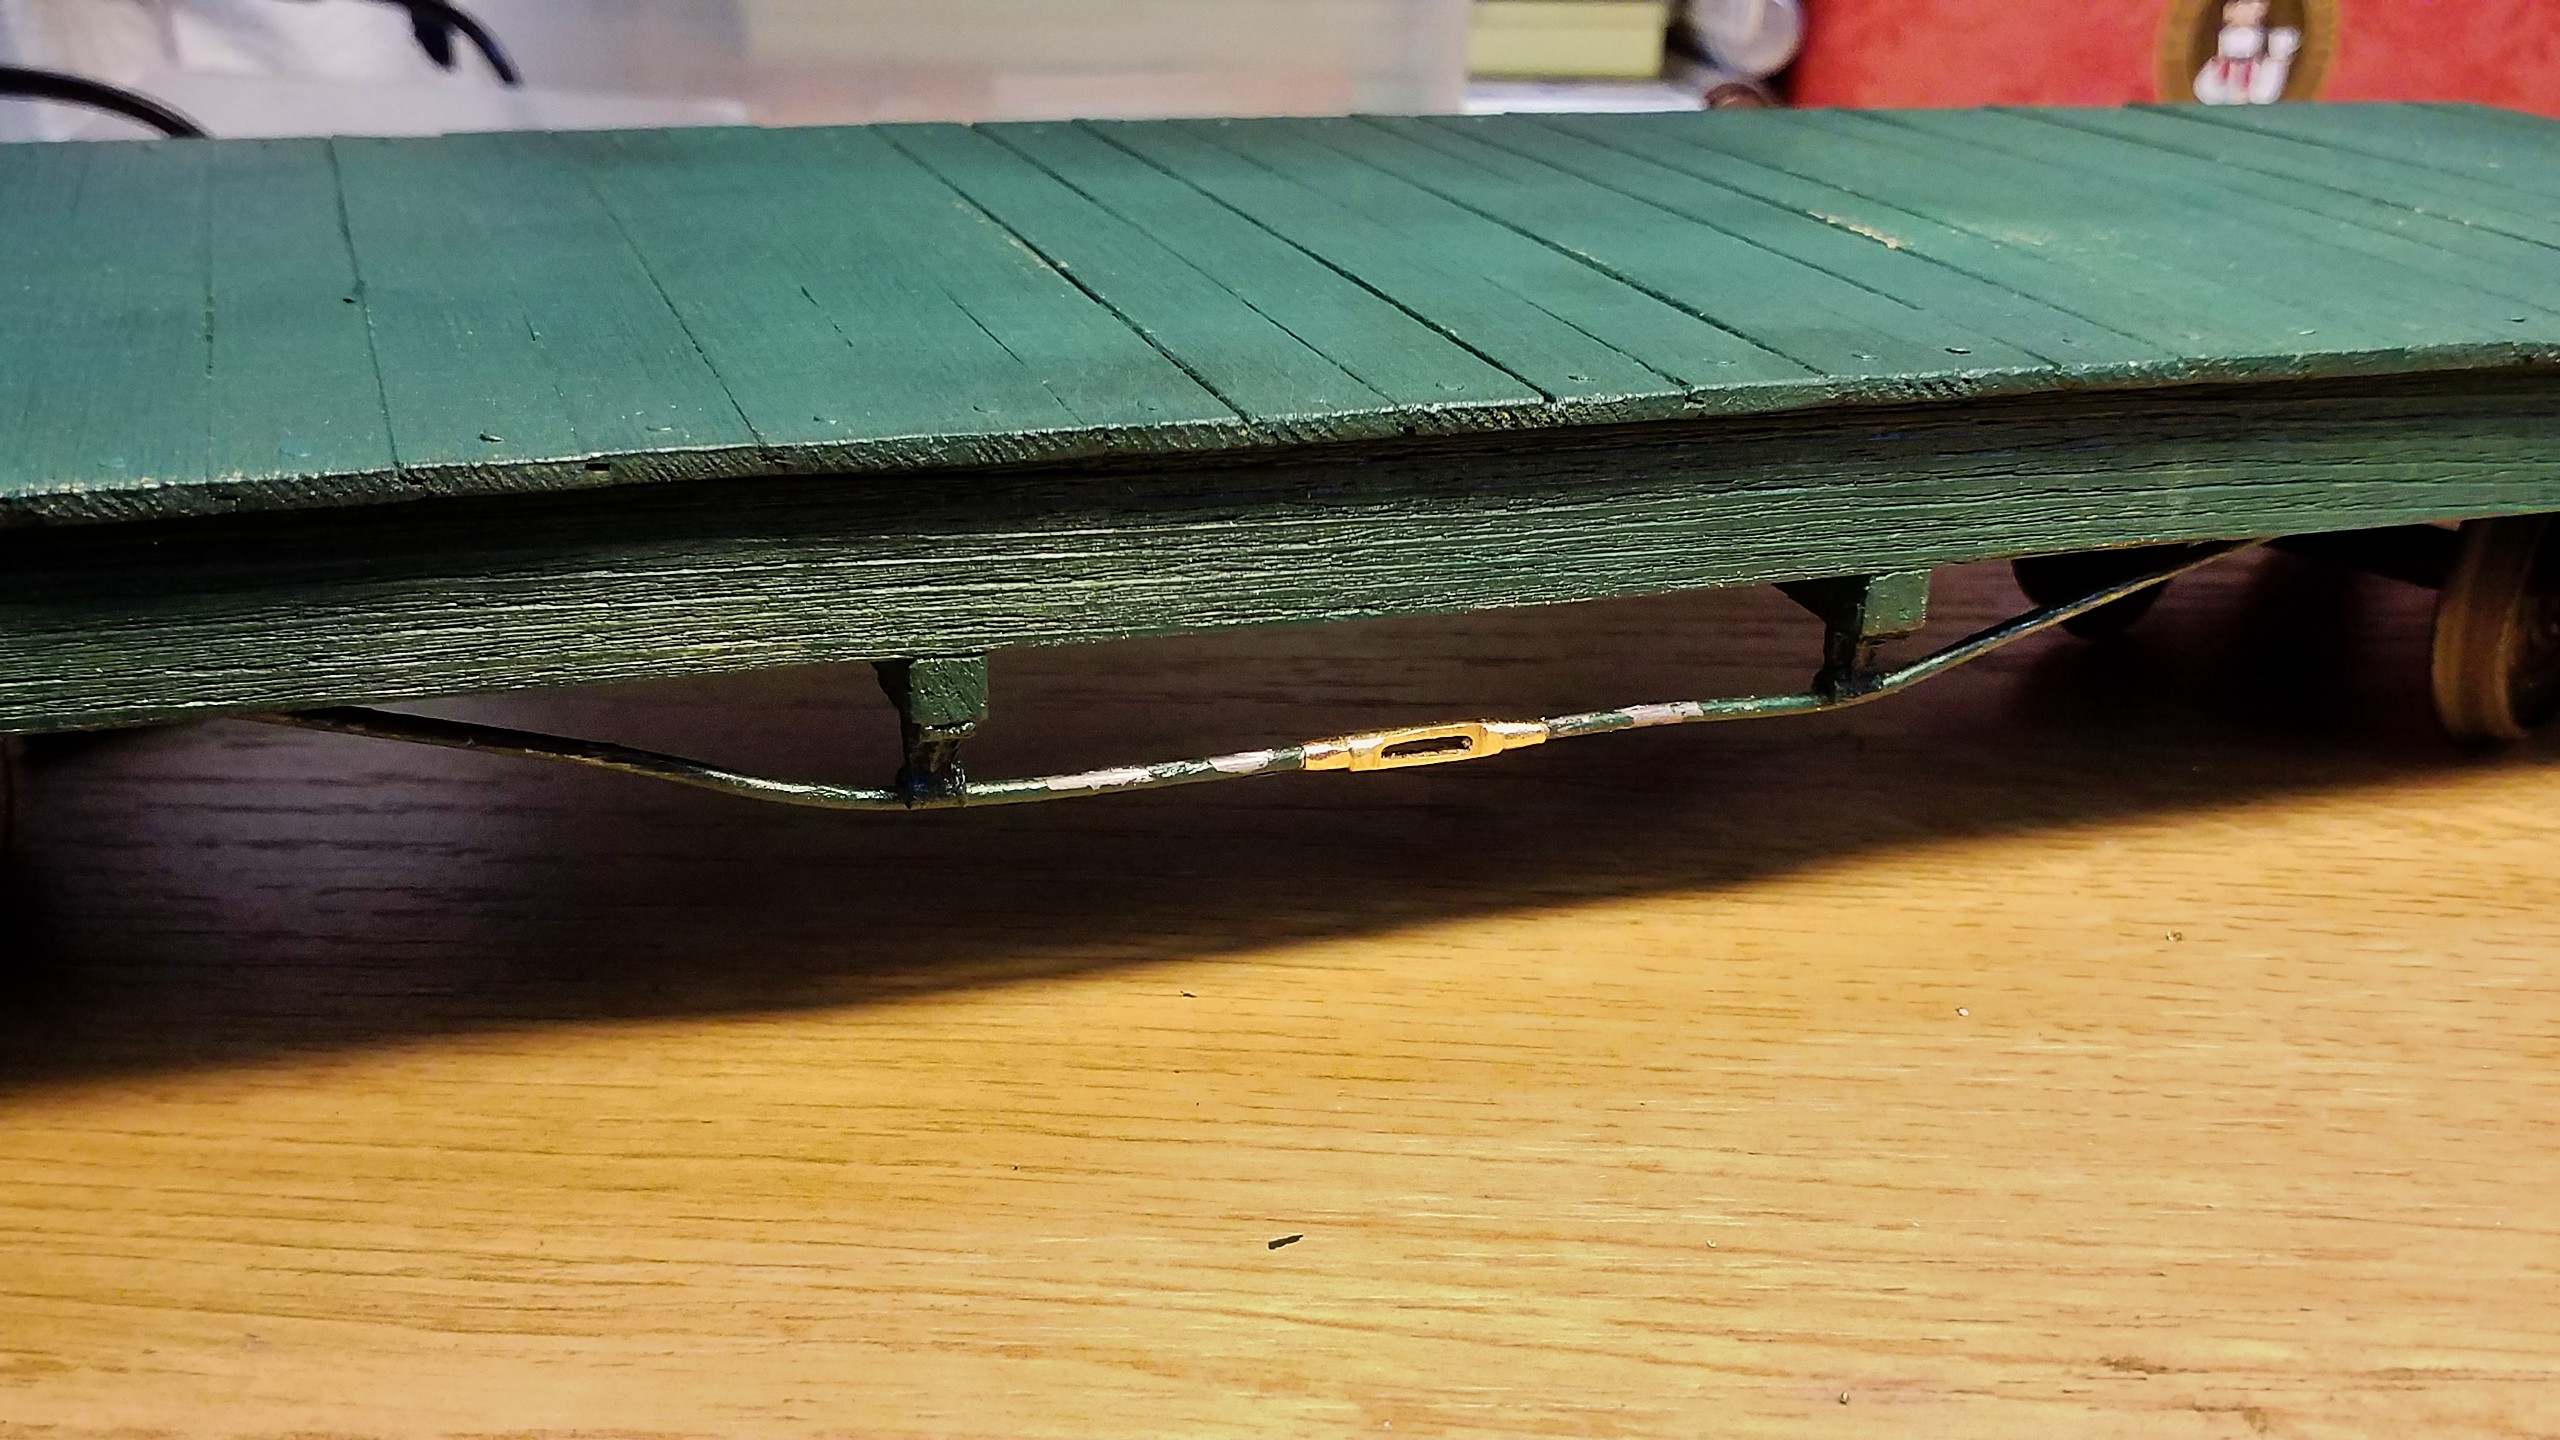
It’s really astonishing how well the turnbuckles perform in the model. The tension can be adjusted very precisely and the long threads absorbe the force very well. This concludes an important building step and I can now focus on other details. Next time, I’m going to focus on the footsteps.