
As I’ve already described, I’d like to build a consistent set of waggons to build a short train for my porter loco. Of course, that entails waggons. Which run on bogies. Turns out, it’s not that easy to find suitable bogies for Fn3 which stay in a reasonable pricing range. So during winter 2020, I started busying myself with the construction of a bogie prototype.
A particular “thank you” goes out to Gerd, AKA “Waldbahner”, who published a nice series of posts about 5” bogies on his website. I let myself wantonly inspire by those. Extra thanks to Gerd, who kindly allowed me to use some of his pictures of his own projects.
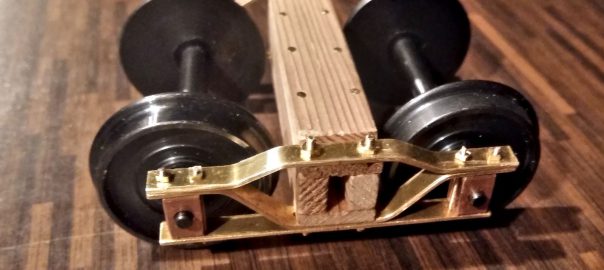
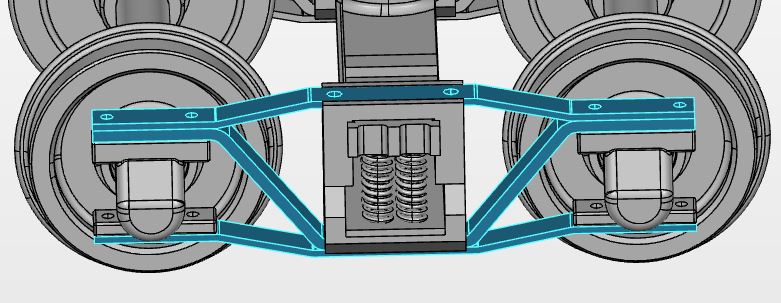
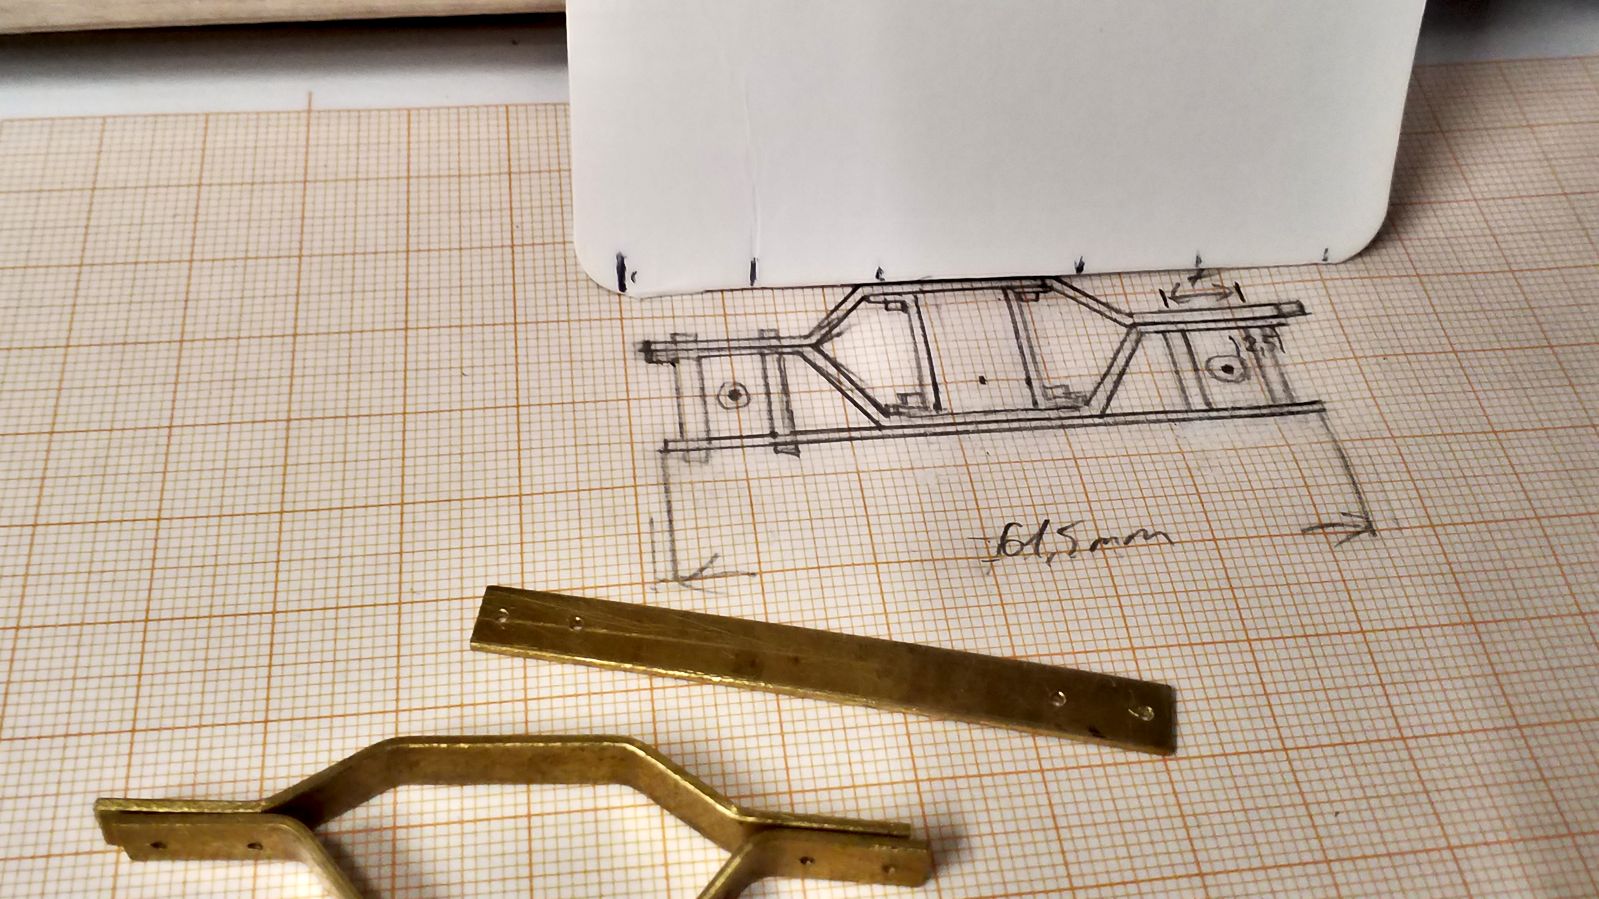
It all started with the research of plausible prototypical bogies. I catched on the archbars rather fast. A really nice 3D model is available at GrabCAD. It allowed me to study the details of its construction and to identify the main parts.
However I soon realized that this quite extensive design with fully functional springs was out of my reach. I would raise the bar too high and thus stand in my own way. And not all things have to be made from metal. Gerd, AKA “Waldbahner” came up with a wooden construction for his cross bolsters and produced a quite an impressive result.

At the moment I’m not capable of such precision and perhaps I’ll never be. However, at least one can try. So I threw together a sketch of an archbar bogie and ripped some strips of 0.5 mm thick brass.
A word of warning: cutting brass with a circular saw is tricky! The stuff is tough and tends to cant. What’s more and what I didn’t have a clue about: ripping brass from a sheet can cause tensions. Anyway, in my case the sheet contracted behind the blade because Proxxon doesn’t sell a splitter for the small saw blade. It resulted in a full jam of the powertrain and a damaged cog wheel at the cambelt. Fortunately the saw is still functional, the cambelt will jump off under when the forces raise too high. Annoying, but a valuable lesson.
What did I learn? Just like milling it’s a good thing to make shallow cuts and start with carving cuts until there’s only a thin ridge of metal left. Then I flip the brass sheet and cut the ridge again with a very shallow cut. That produces good results and I risk neither my tools nor my fingers.
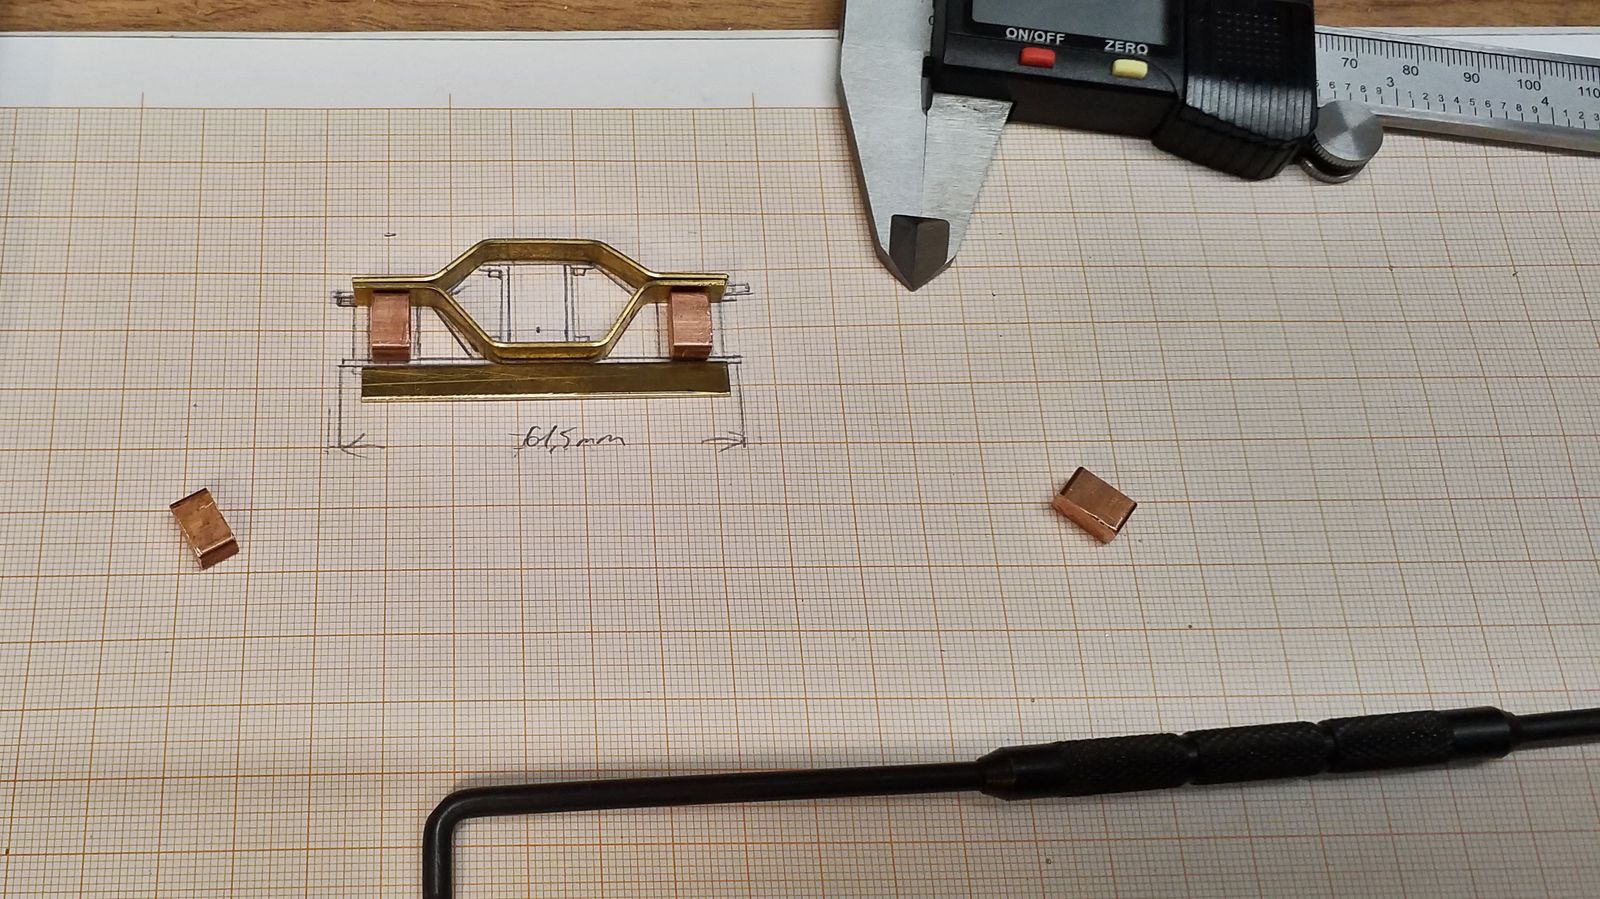
Well, I quickly turned up with a set of bent brass strips and two sets of bearing blocks made from massive copper.
Unfortunately, my delight was tempered quickly. I had planned to connect these strips with rods made of stainless steel which I wanted to thread. It turned out that my tools are not sturdy enough for the job, after some excruciating attempts I managed to break my M1 threading die. Another painful lesson.
So, the threaded rods have to be made from brass, only I wouldn’t trust 1 mm diameter to suffice at this place. And the drilled holes couldn’t be widened to 1.6 mm because there wasn’t enough room left at the end of the strips. The third unpleasant lesson!
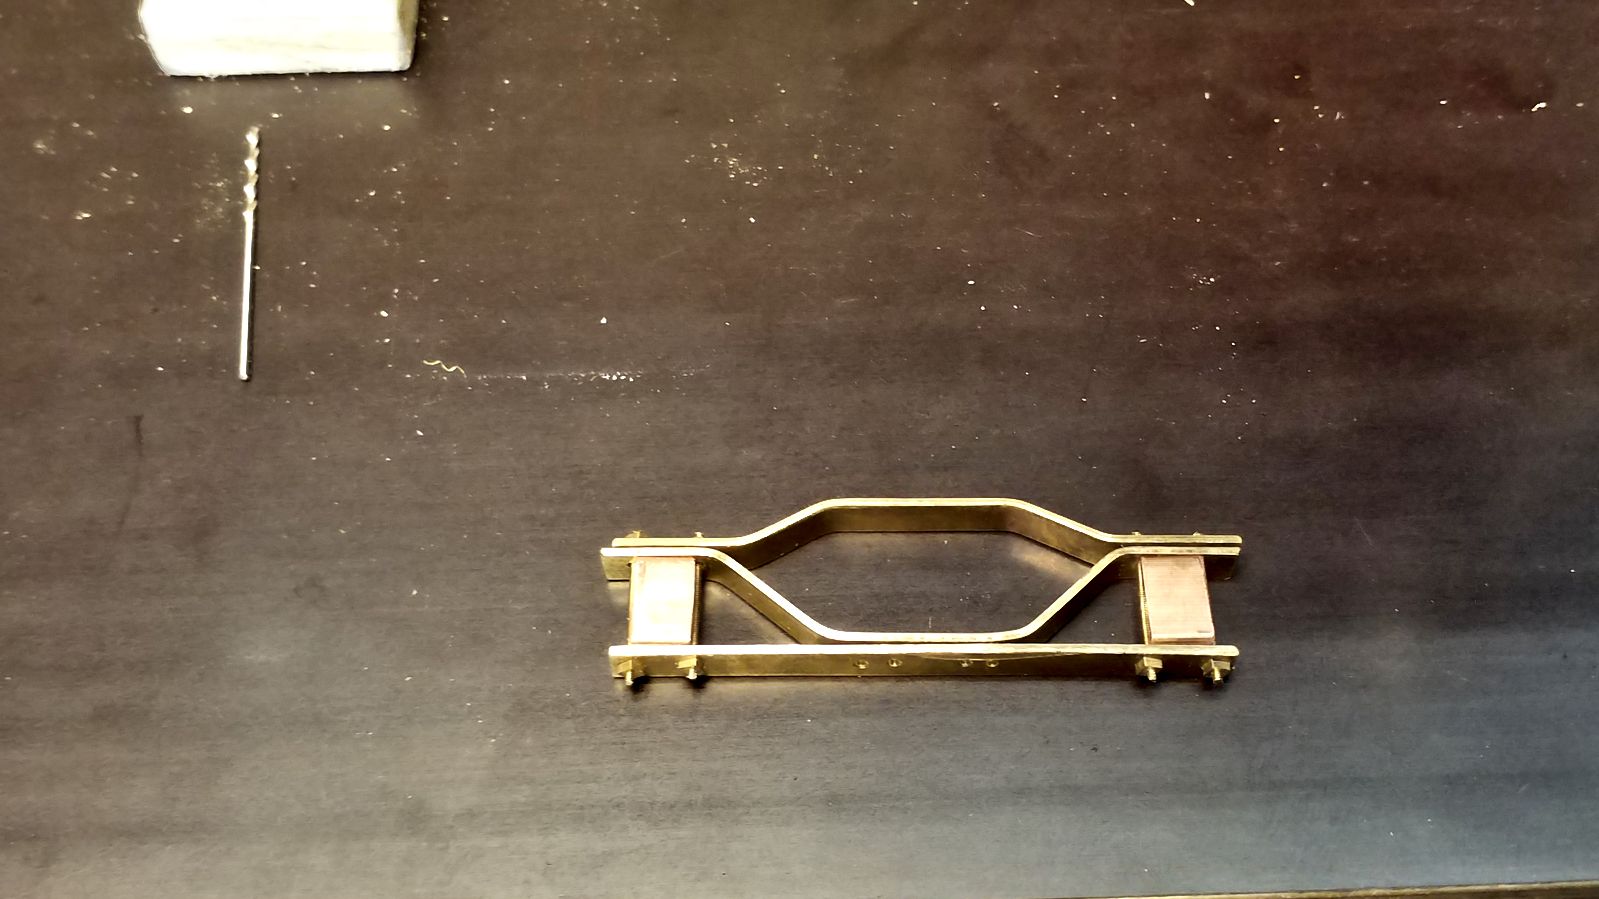
I had to start over. This time I wanted to do things right and built a drilling gauge, so I could repeatedly drill the holes at the right distances. However, such a gauge can only be as precise as the tool. And since a hammer drill fixed in a drill stand is not quite as precise as an industrial-graded drill press… so in the end I had to mark and drill the holes manually. I did achieve some good results, though.

The next challenge won’t be long in coming. The strips have to be bent into shape precisely. And of course I’m already thinking ahead, I’m not going to build one bogie, but at least a dozen in order to build a complete short train. Which means I need repeatability.
With that in mind I made a template from cardboard which I can place alongside the brass strips to mark them for bending. Since I don’t own a press, I have to bend the workpieces manually in a vice, so at least for the prototype it’s no bother to mark one strip at a time.
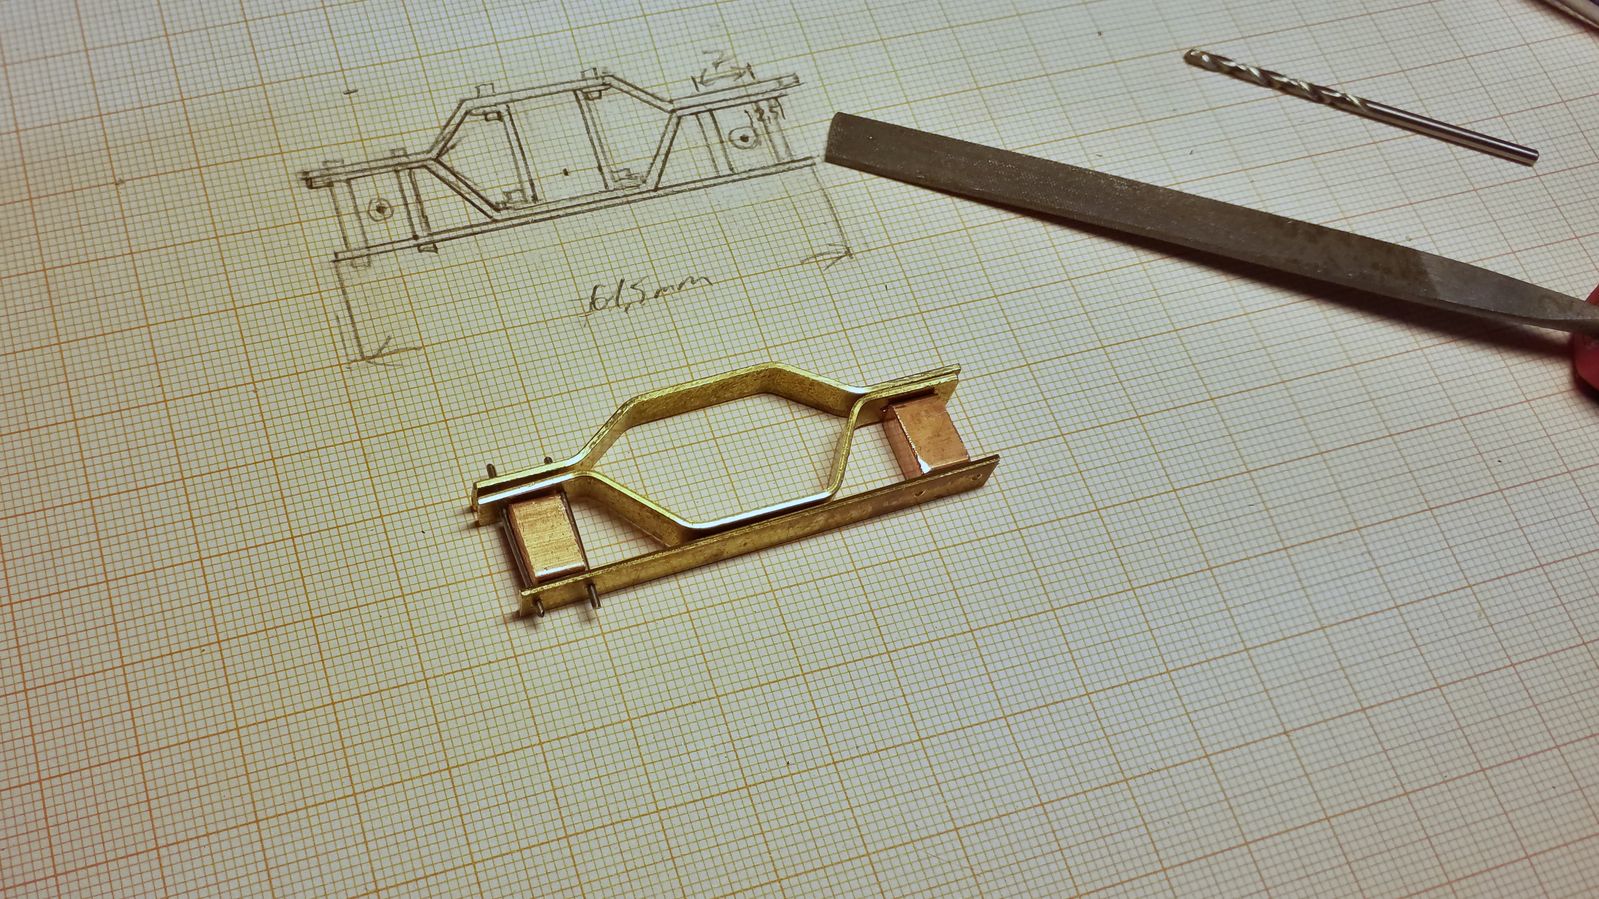
After much effort and some mistakes I came up with one side finished and was able to assemble it with selfmade square nuts and threaded brass rod. The picture below tells that I mismeasured the center mounting holes, so there are twice as many holes as needed. Fortunately the construction is sturdy enough to allow such a mishap.
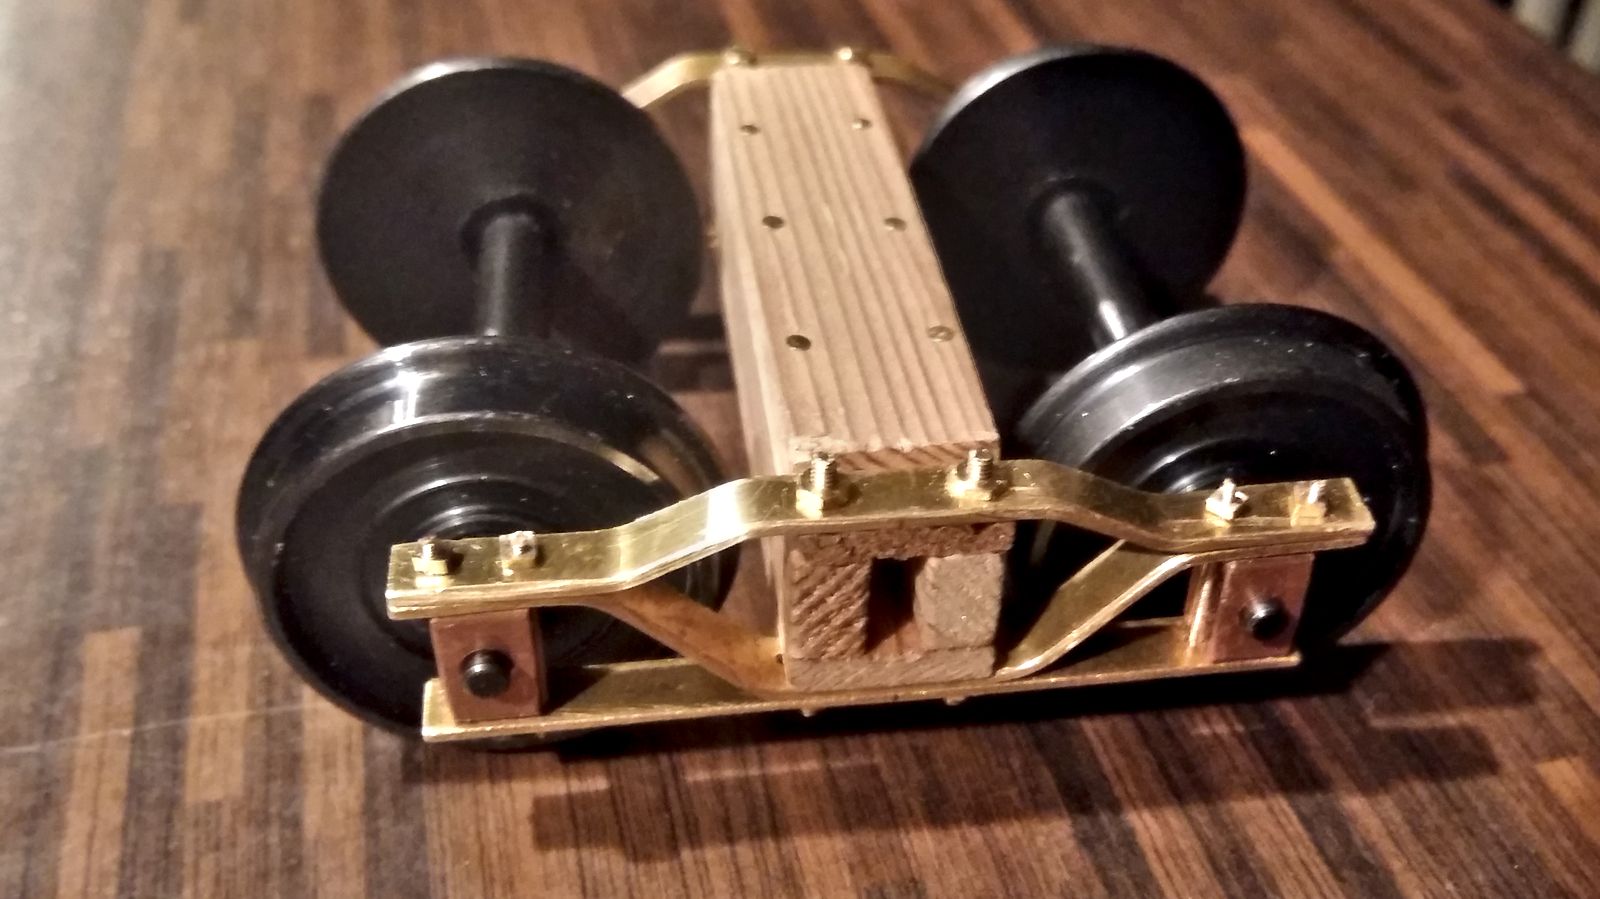
With these experiences made the second side was swiftly completed and then it was time to get to the bolster. I wasn’t keen on building a sprung version. While building the Tender for the Porter (translation pending) I had already realized that a working suspension doesn’t make a whole lot of a difference.
Gerd built some mockup springs into his design and it really is a pretty sight, however it wouldn’t persuade with my construction. So after some additional research I came acrosss sterlingworth bogies which use a simple wooden bolster instead of springs and metal crossbeams. Instead of a solid beam I chose a square tubing design made of four slats that were white glued and nailed.
In the end building this prototype proved very helpful. I stumbled over a whole set of challenges and learned a lot on working with metal. It will aid me when I try and build further bogies. Right now, I have to admit that I’m a bit sobered and not quite sure wheter I really want to build a small series.
On the other hand I’d like to build at least a second bogie, so this prototype can spend some year’s worth of service time supporting a waggon. And once one starts to build another… time will tell.