
In order to prepare for the next operation session, I set myself the goal to arrange for some operations. So this time there will be no new waggon, but a loading ramp and some cargo.
The ramp’s design is inspired by Scott Perry’s Blog, who has published a very nice and extensive series. If you look for a step-by-step guide, you can find it there.
This time I choose a mix of my trusted red cedar and some material from the hardware store, namely some beech rods from which I cut the posts. The cross cut sled pays for itself once more.
The posts are spaced in prototypical 4 ft. by 6 ft. which roughly amounts to 60 mm by 90 mm. The projected total length of 26 ft. will enable the ramp to serve a single waggon. That keeps the project at a reasonable size and the finished ramp will be almost universally usable to add an industry to small spurs.

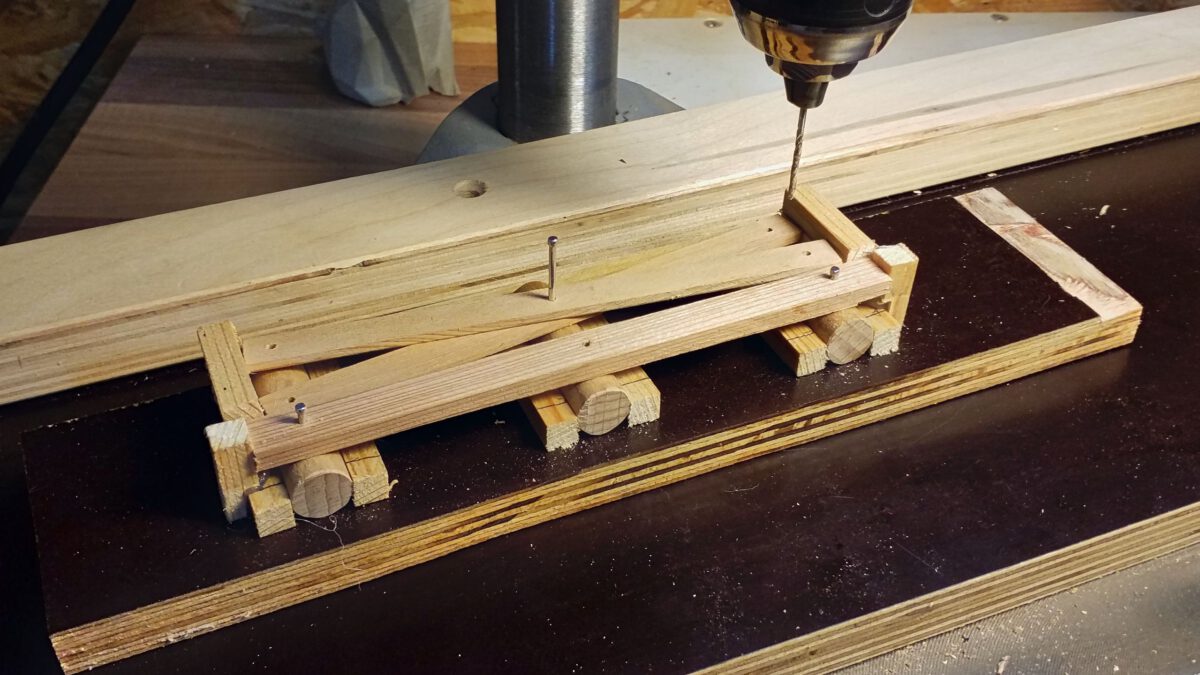
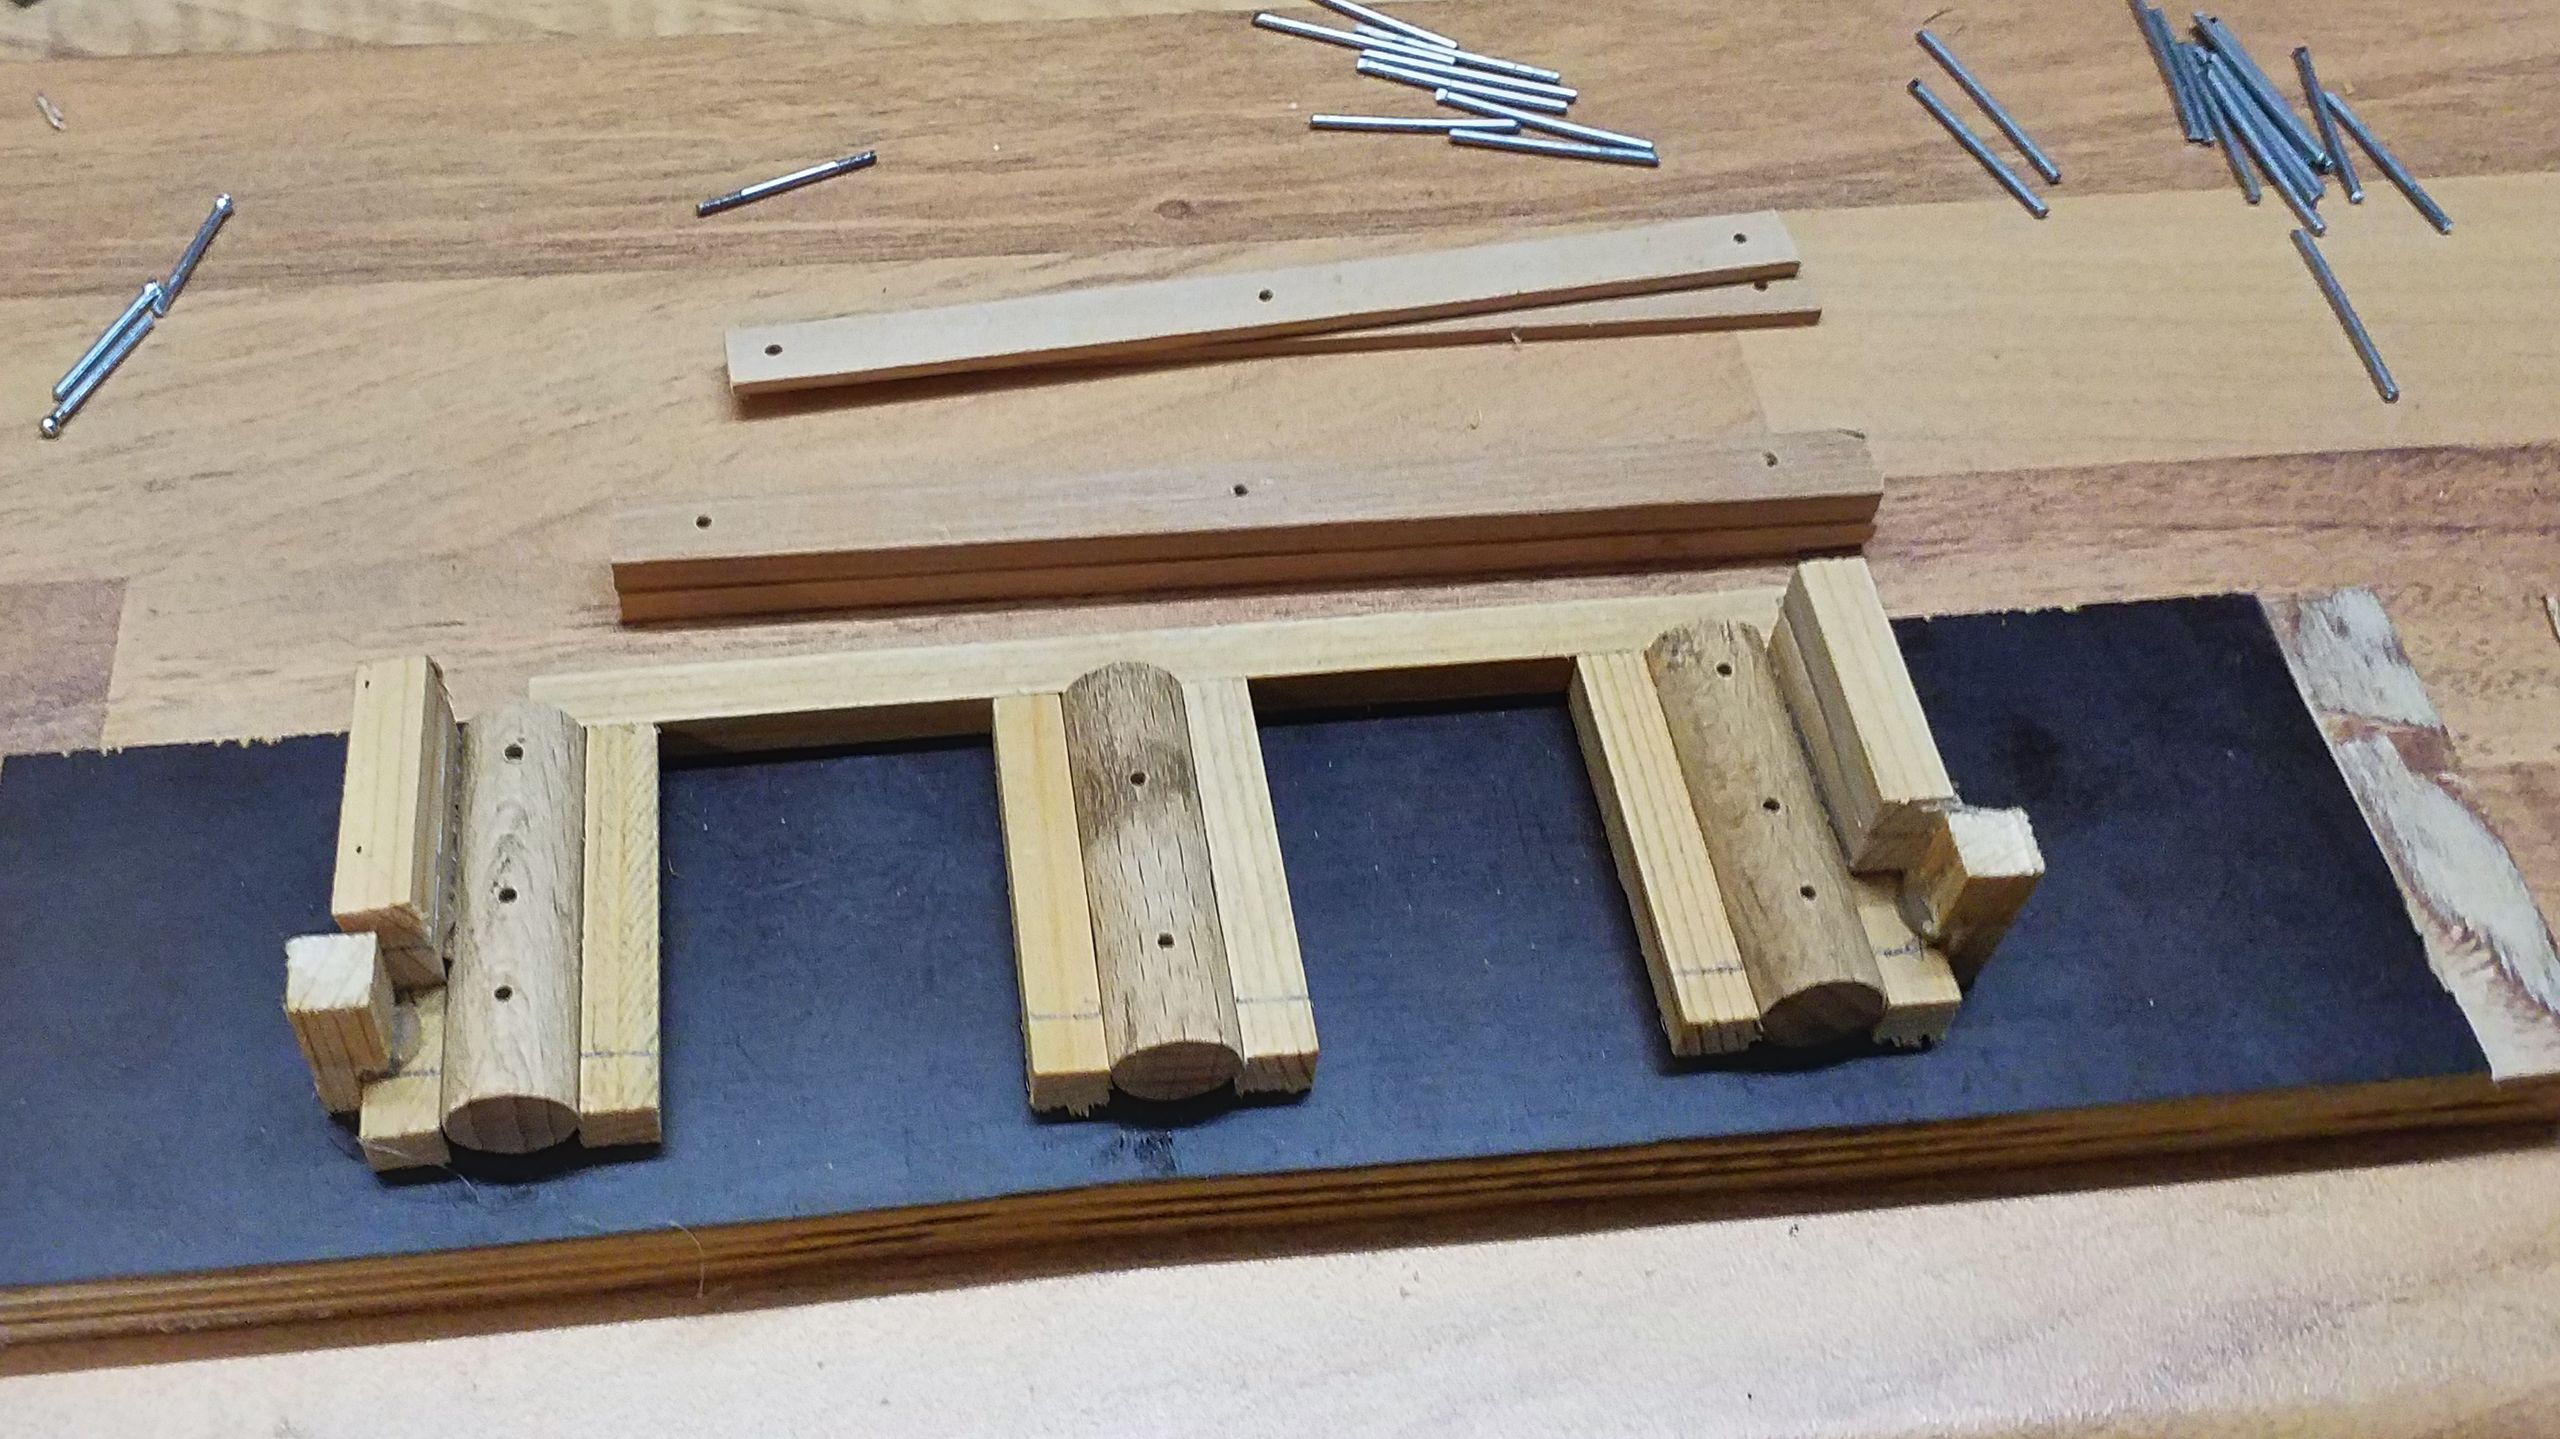
Three posts at a time are joined into one bent. The original knack is to build the bent torsionally stiff by using two transversal timbers which give the whole ramp a stability that one would never presume in such a flimsy wooden structure. Since even this small ramp will need five bents, I’m going to construct a template to facilitate the work.

One needs to keep an eye on aligning the posts exactly in parallel. The template’s frame is made from old skyrockets’ guide sticks, which are informally hot-glued to a piece of textured coated board.
The finished template helps to keep the cross timbers in place while they are drilled together with the posts. Pay attention to make the posts a tight fit in the template, they mustn’t rotate any more from here on!

For the next thing to do is placing and drilling the transversal timbers. If the posts twist within the template during this process, the construction won’t fit anymore.
As one can see, both transverse timbers lie on top of each other at the start. That’s important in order to align the central hole. Afterwards they are placed in cross-shape and the remaining holes are drilled. The whole affair gets a lot easier by fixating the timbers to the posts with small pins.

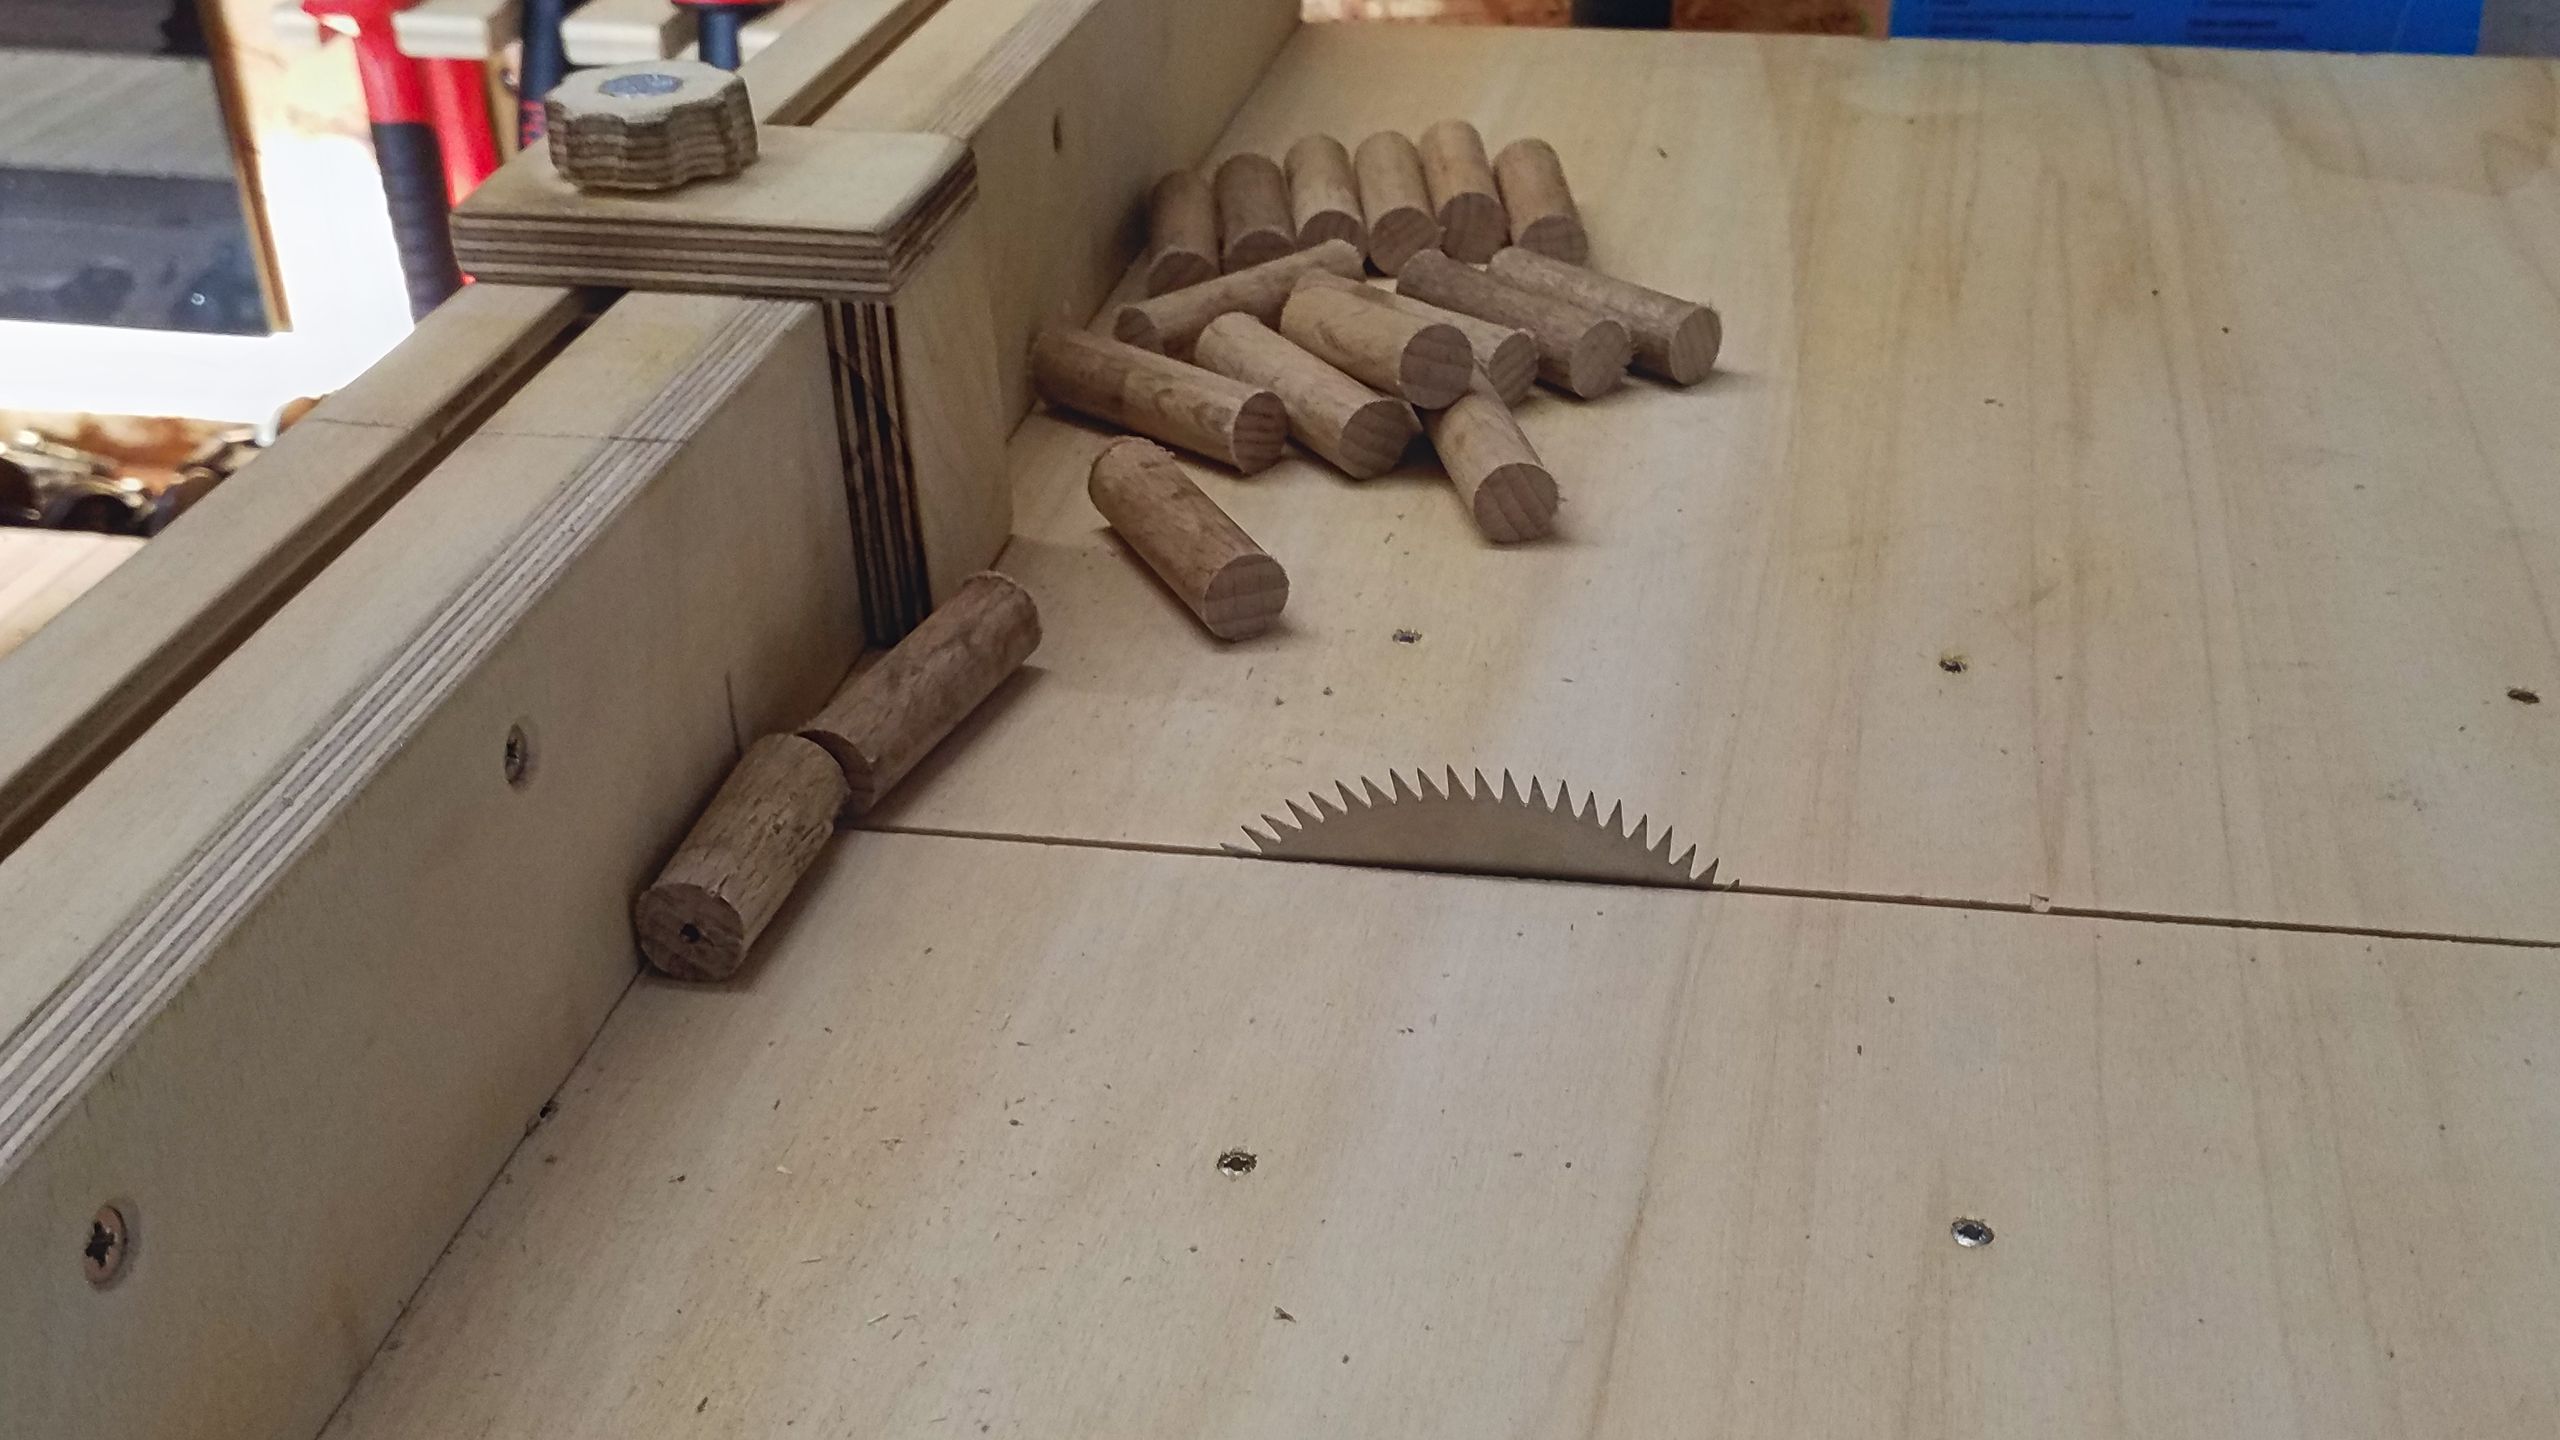
The cross timbers and the middle of the transverse timbers have to be secured with rods threaded at both ends. For this I choose my trusted pasture fence, which I’ve already used for the trusses of my flatcar.
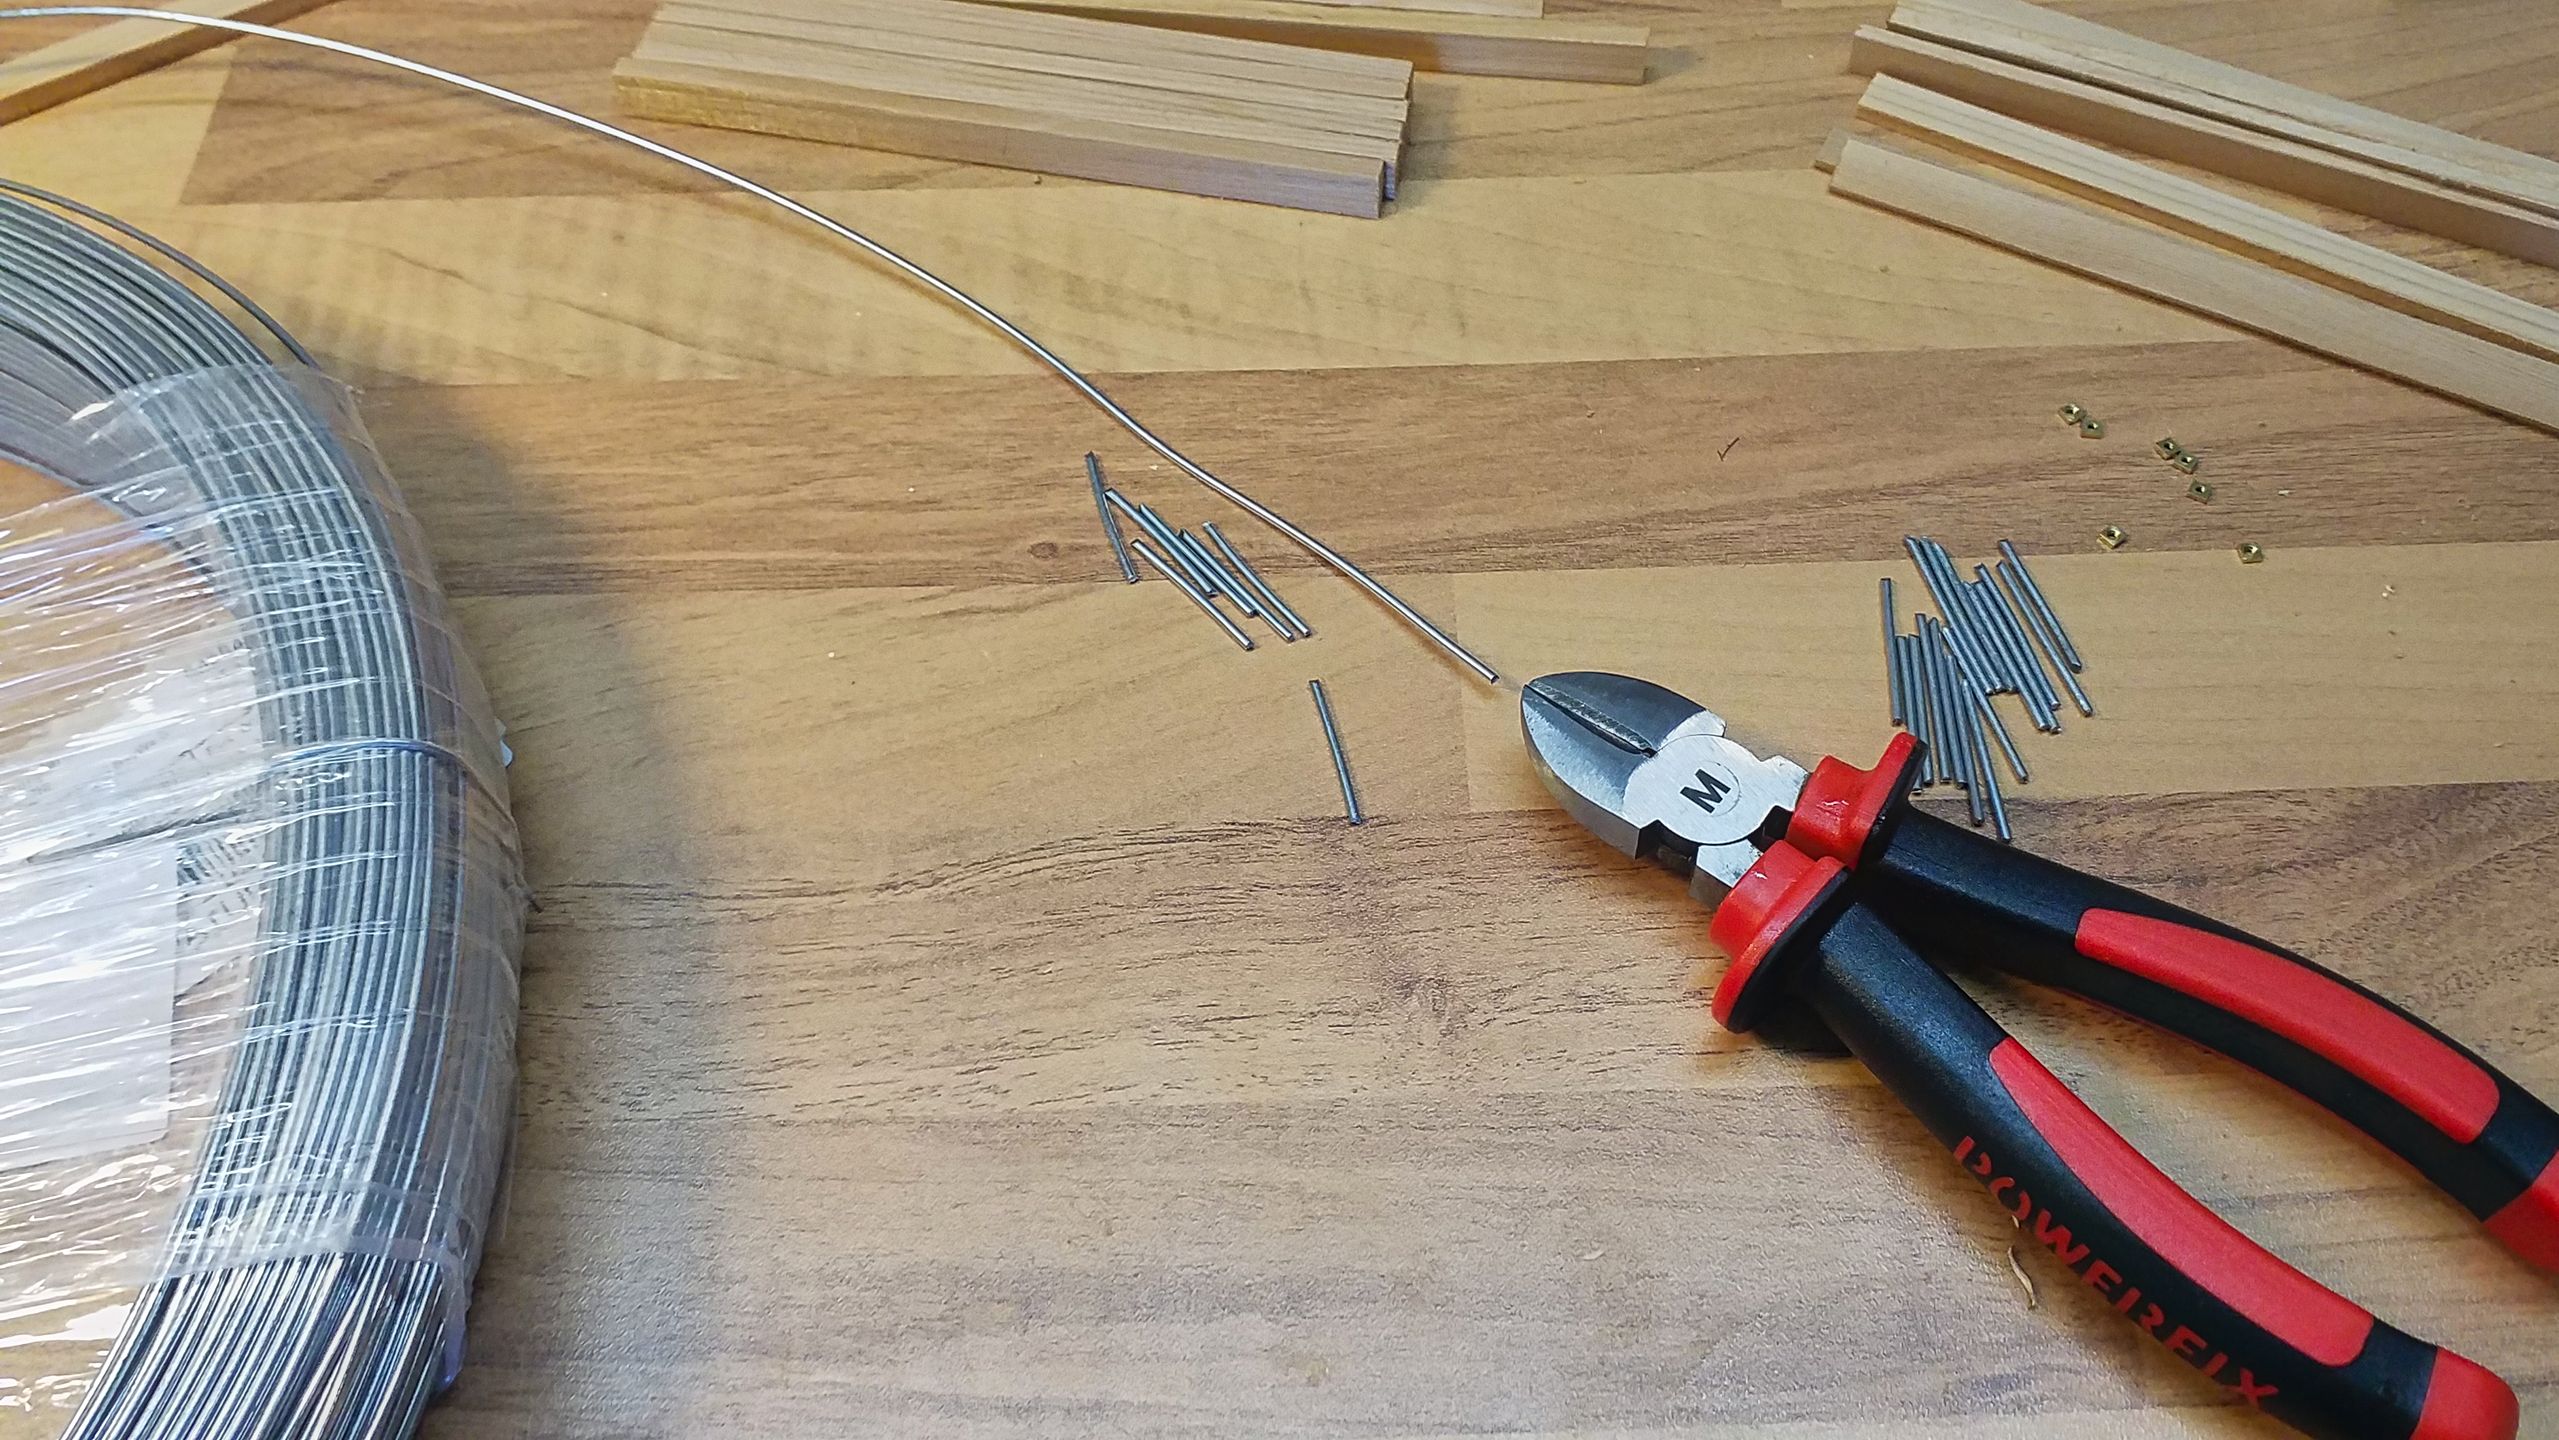
The rods are cut to length, tapped with a thread and then it’s on! Well, not quite since the traverse timbers need to be fastened at their edges with a threaded rod, with a rivet head at one end. These I make out of steel pins of 1.6 mm diameter. All one has to do is clamp the pin into a multi tool so that one can get the pin’s head into shape with a key file. Cut it to length, tap the thread, done!
Altogether one bent consists of three posts, two cross and traverse timbers each, four threaded rods and four rivet-headed threaded rods. For five bents that’s 20 rivet heads to file and the total sum of 60 threads to tap. A somewhat meditative task and one gets some routine, like it or not…
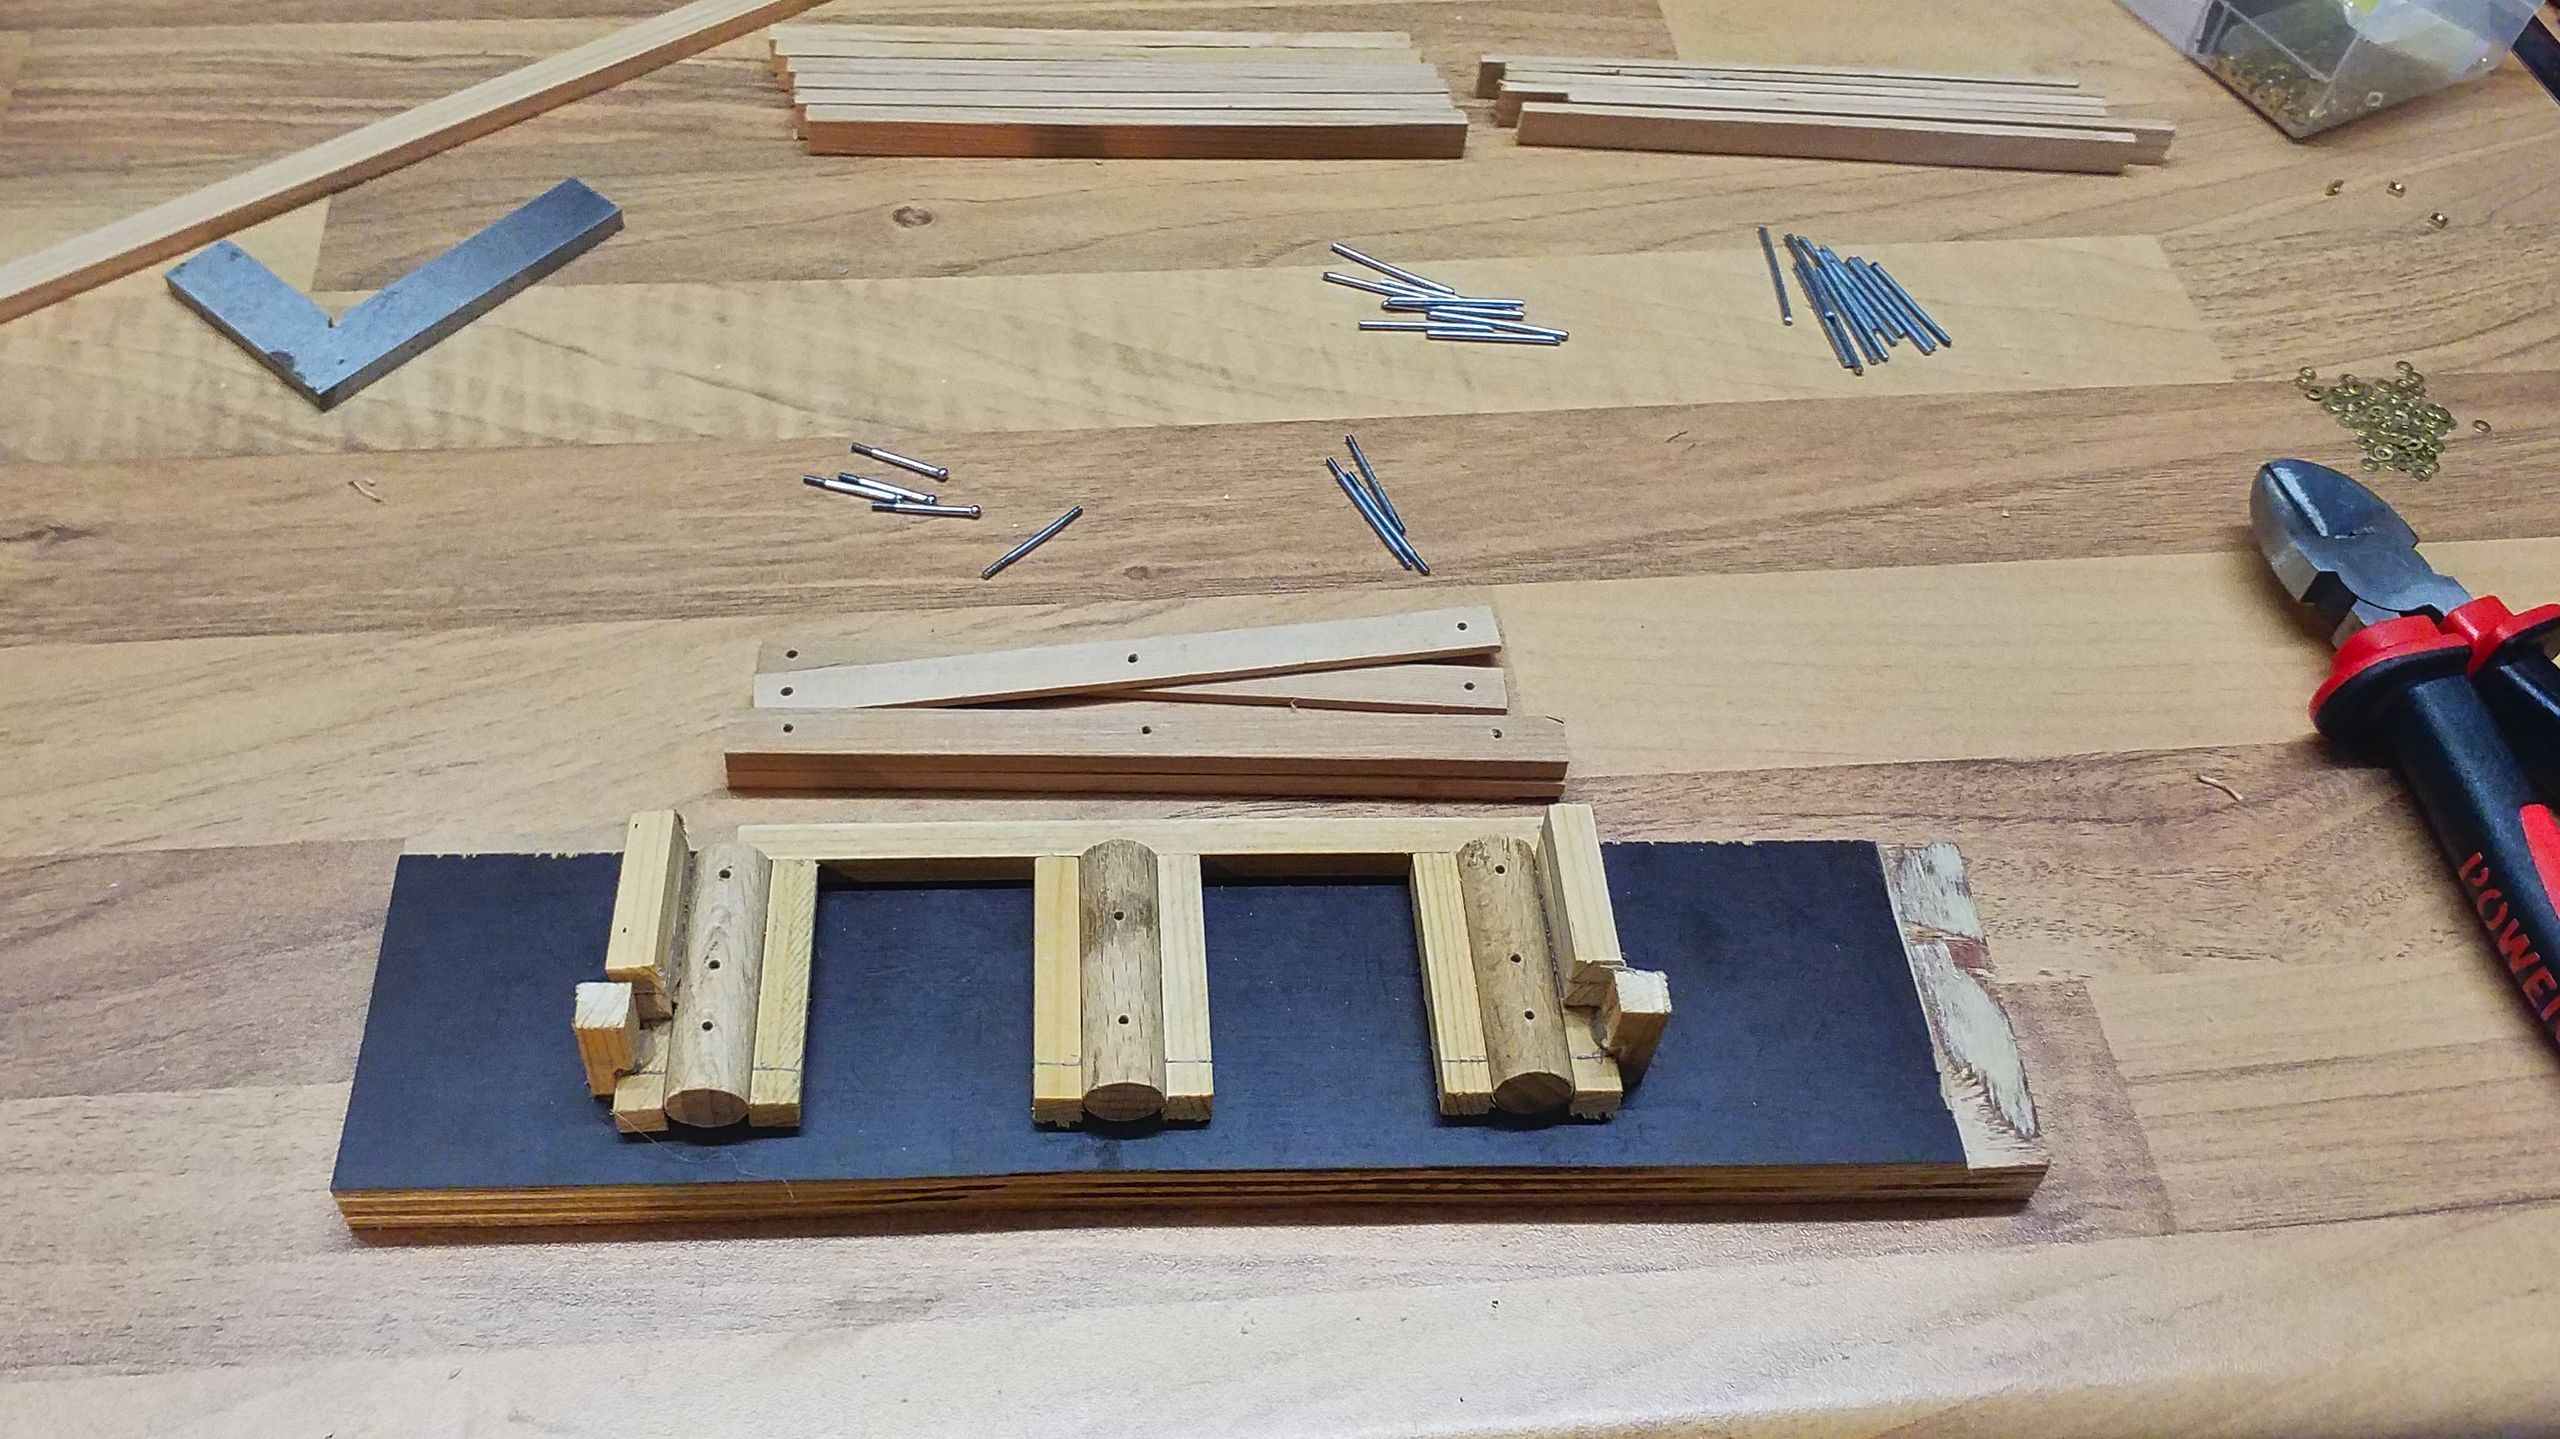
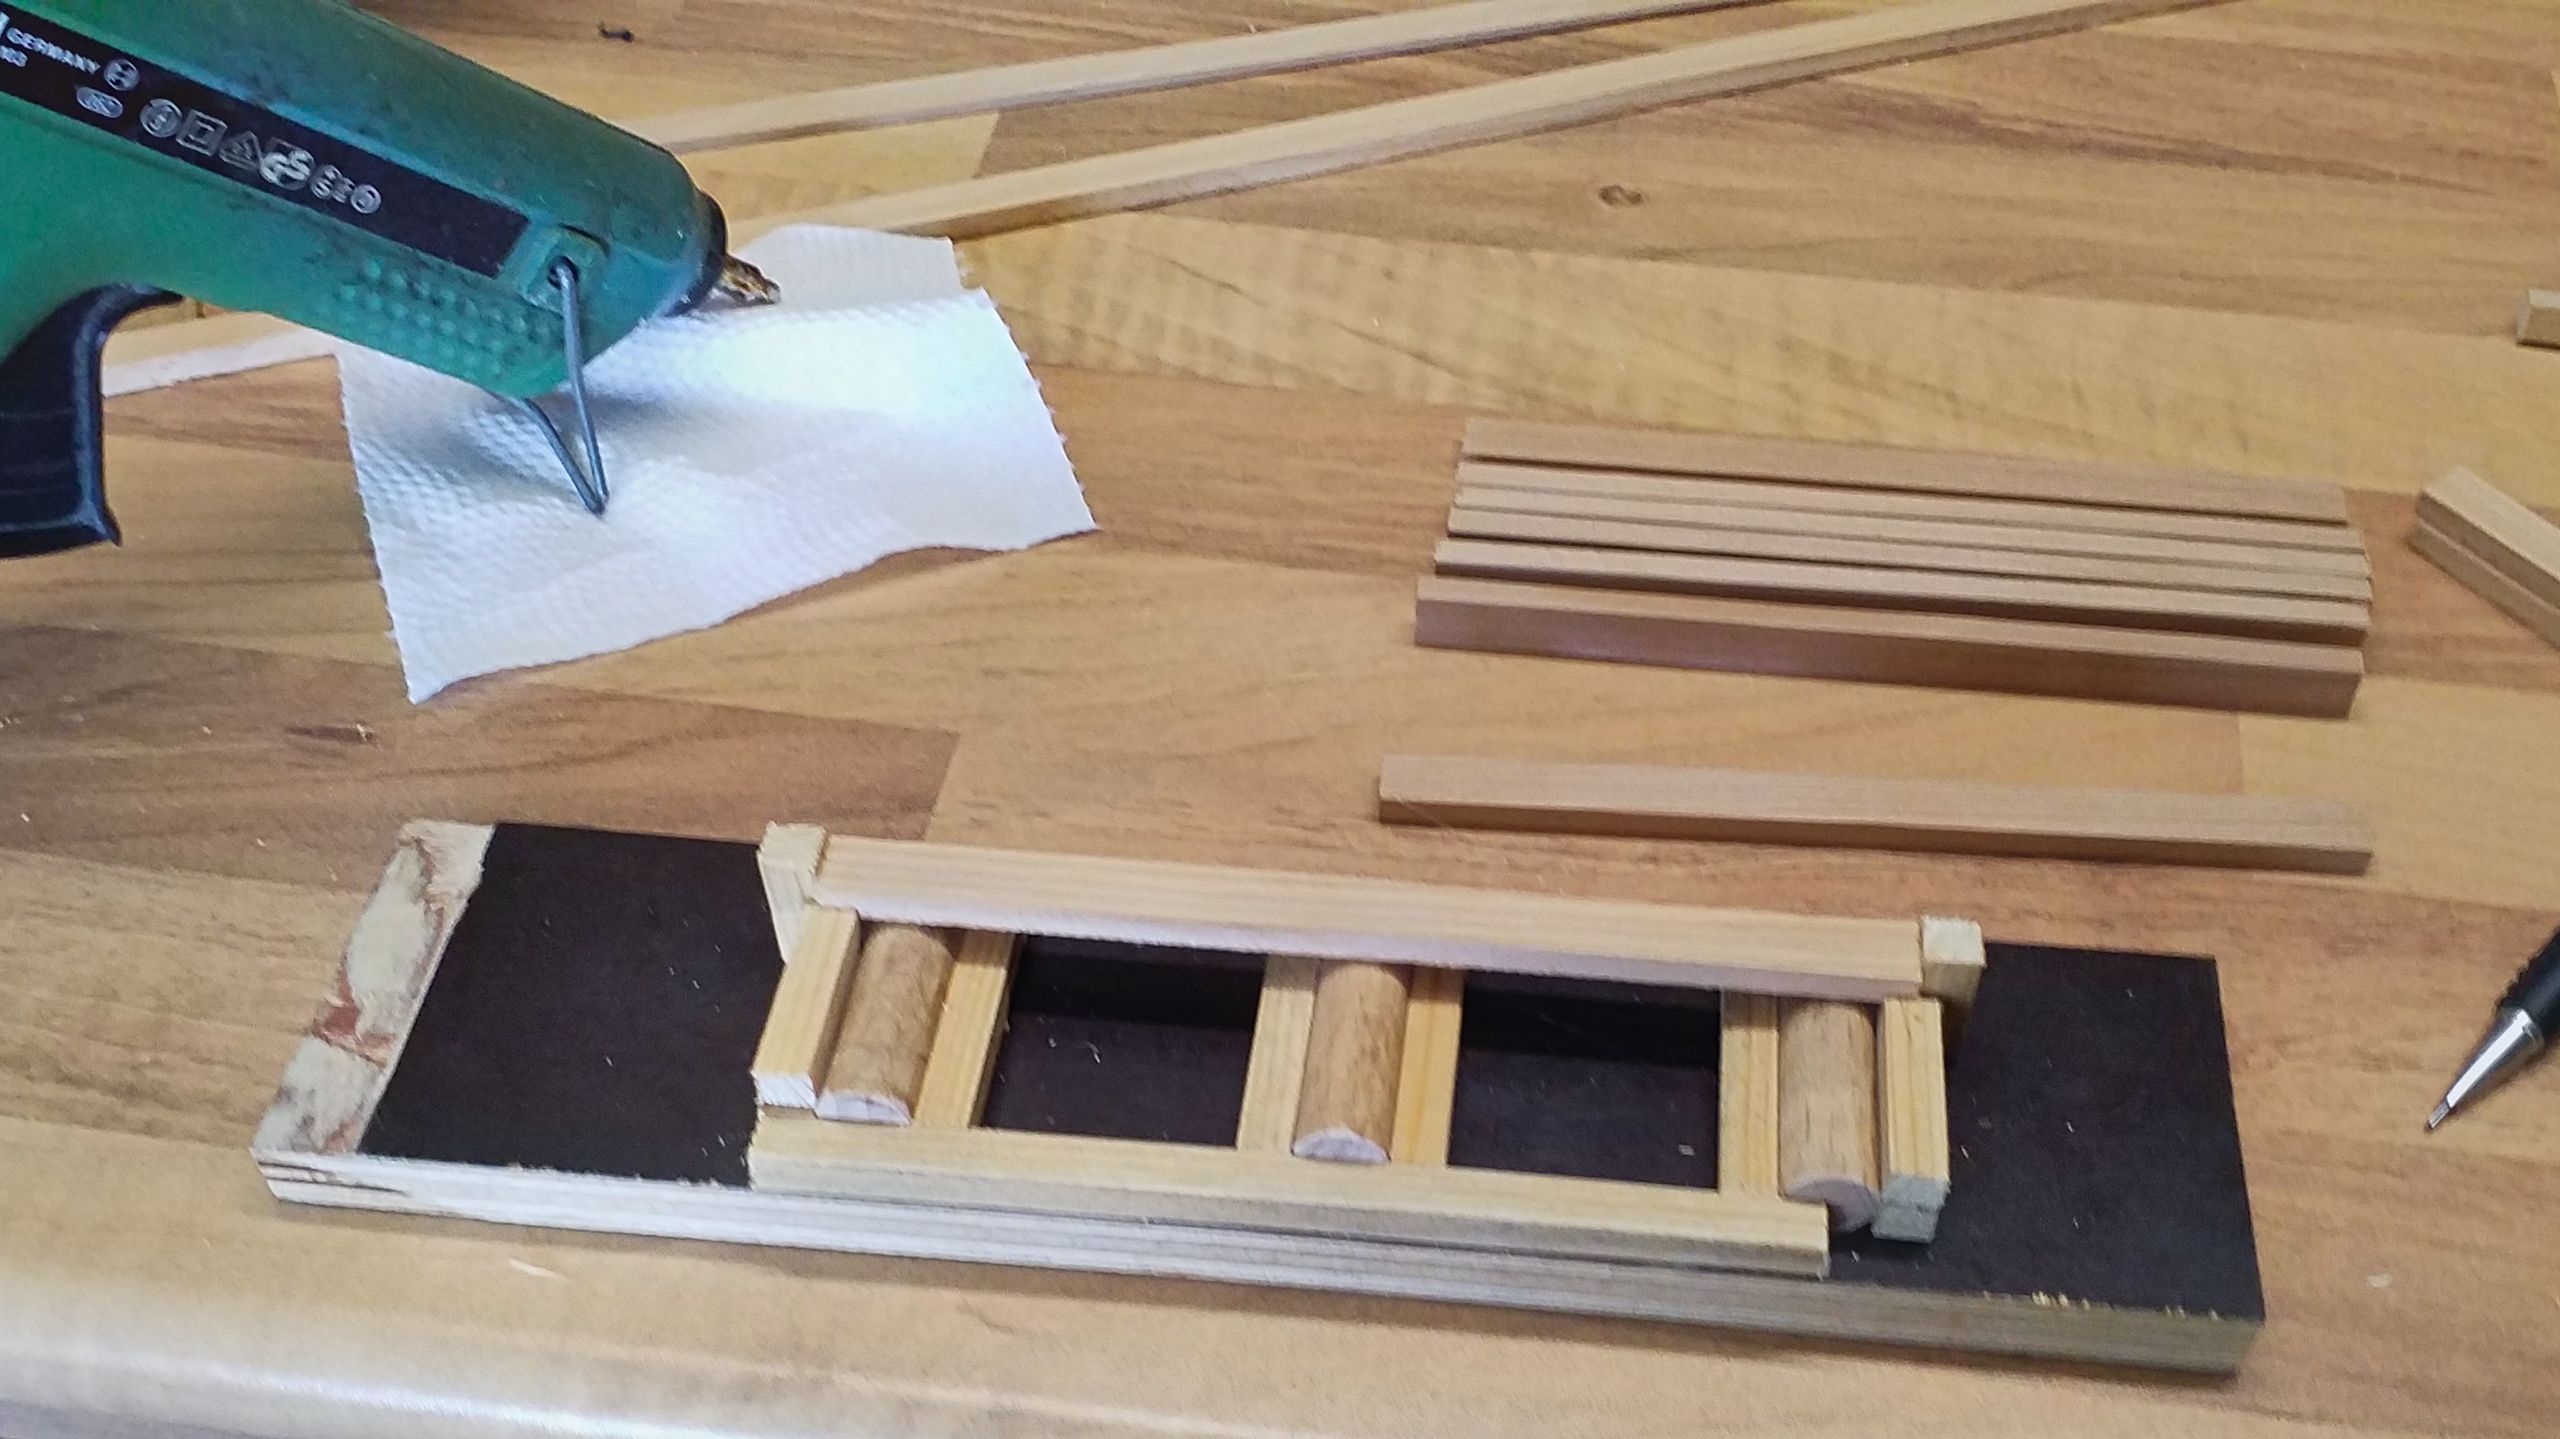
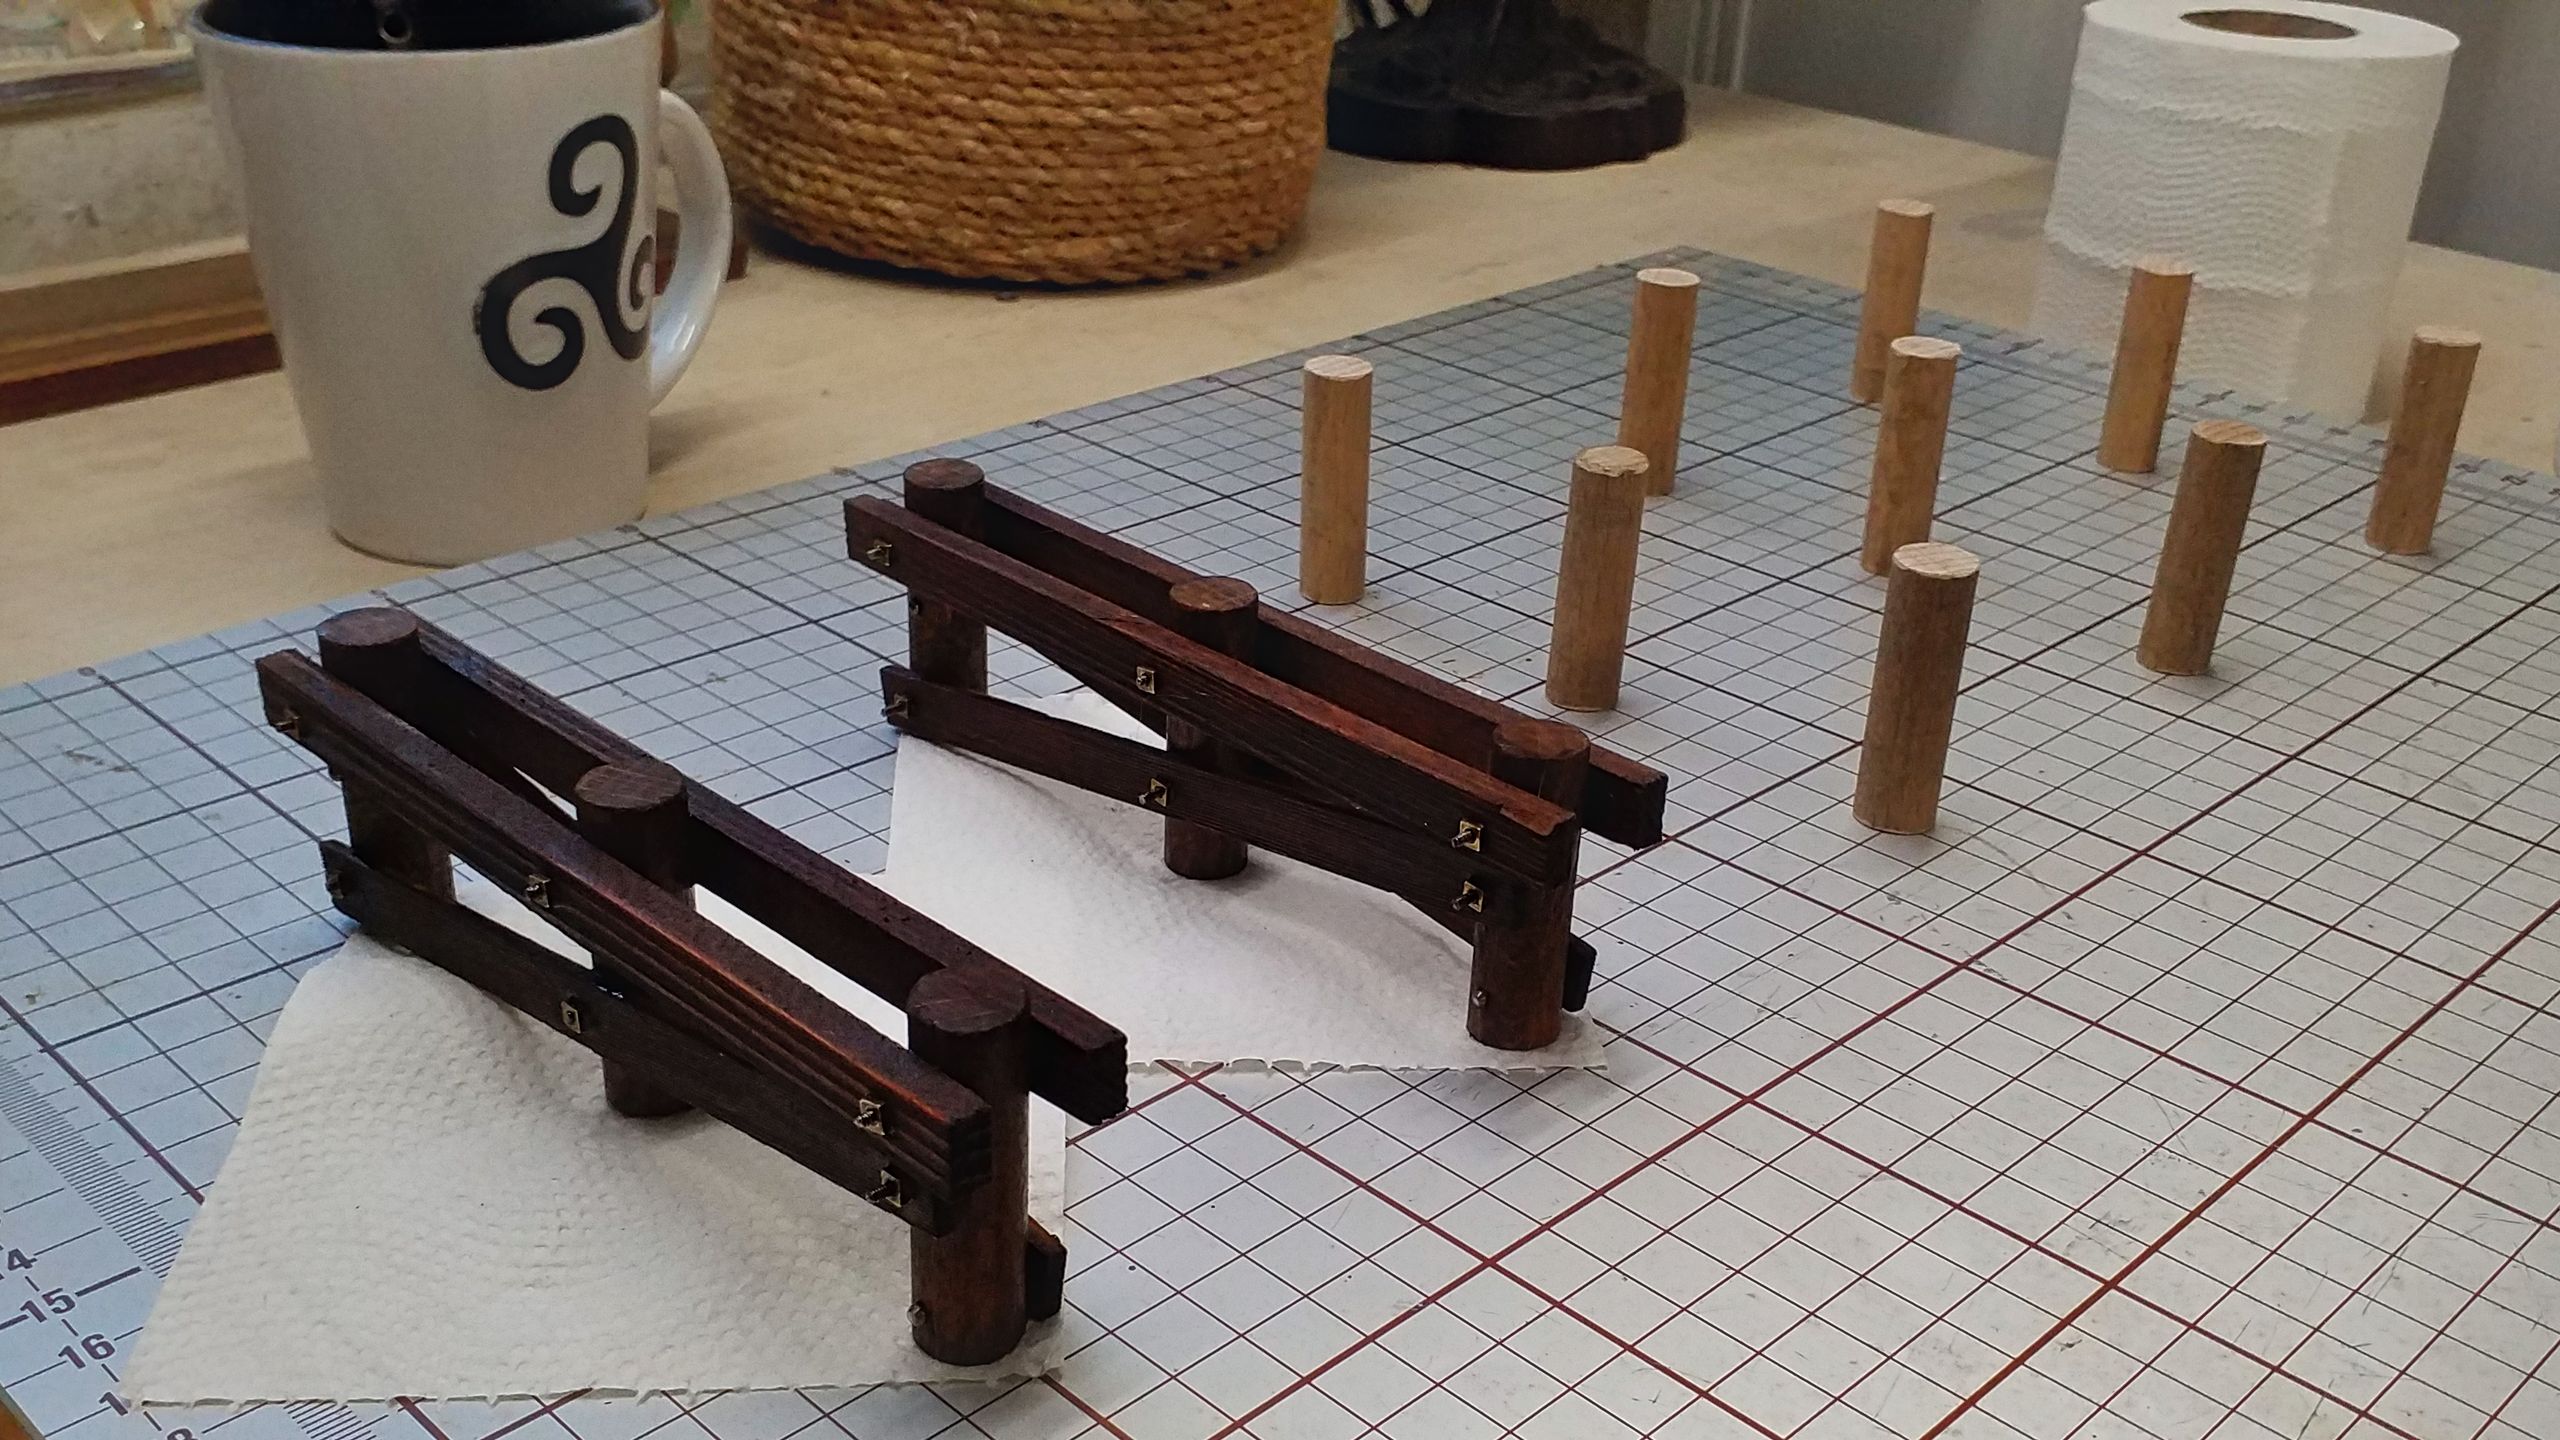
Here’s one bent under construction. The cross timbers are already fastened with washers and four-sided nuts (at least, I didn’t have to make them by hand as well…). The next step is to put the rivet-headed rods into place and fasten them.
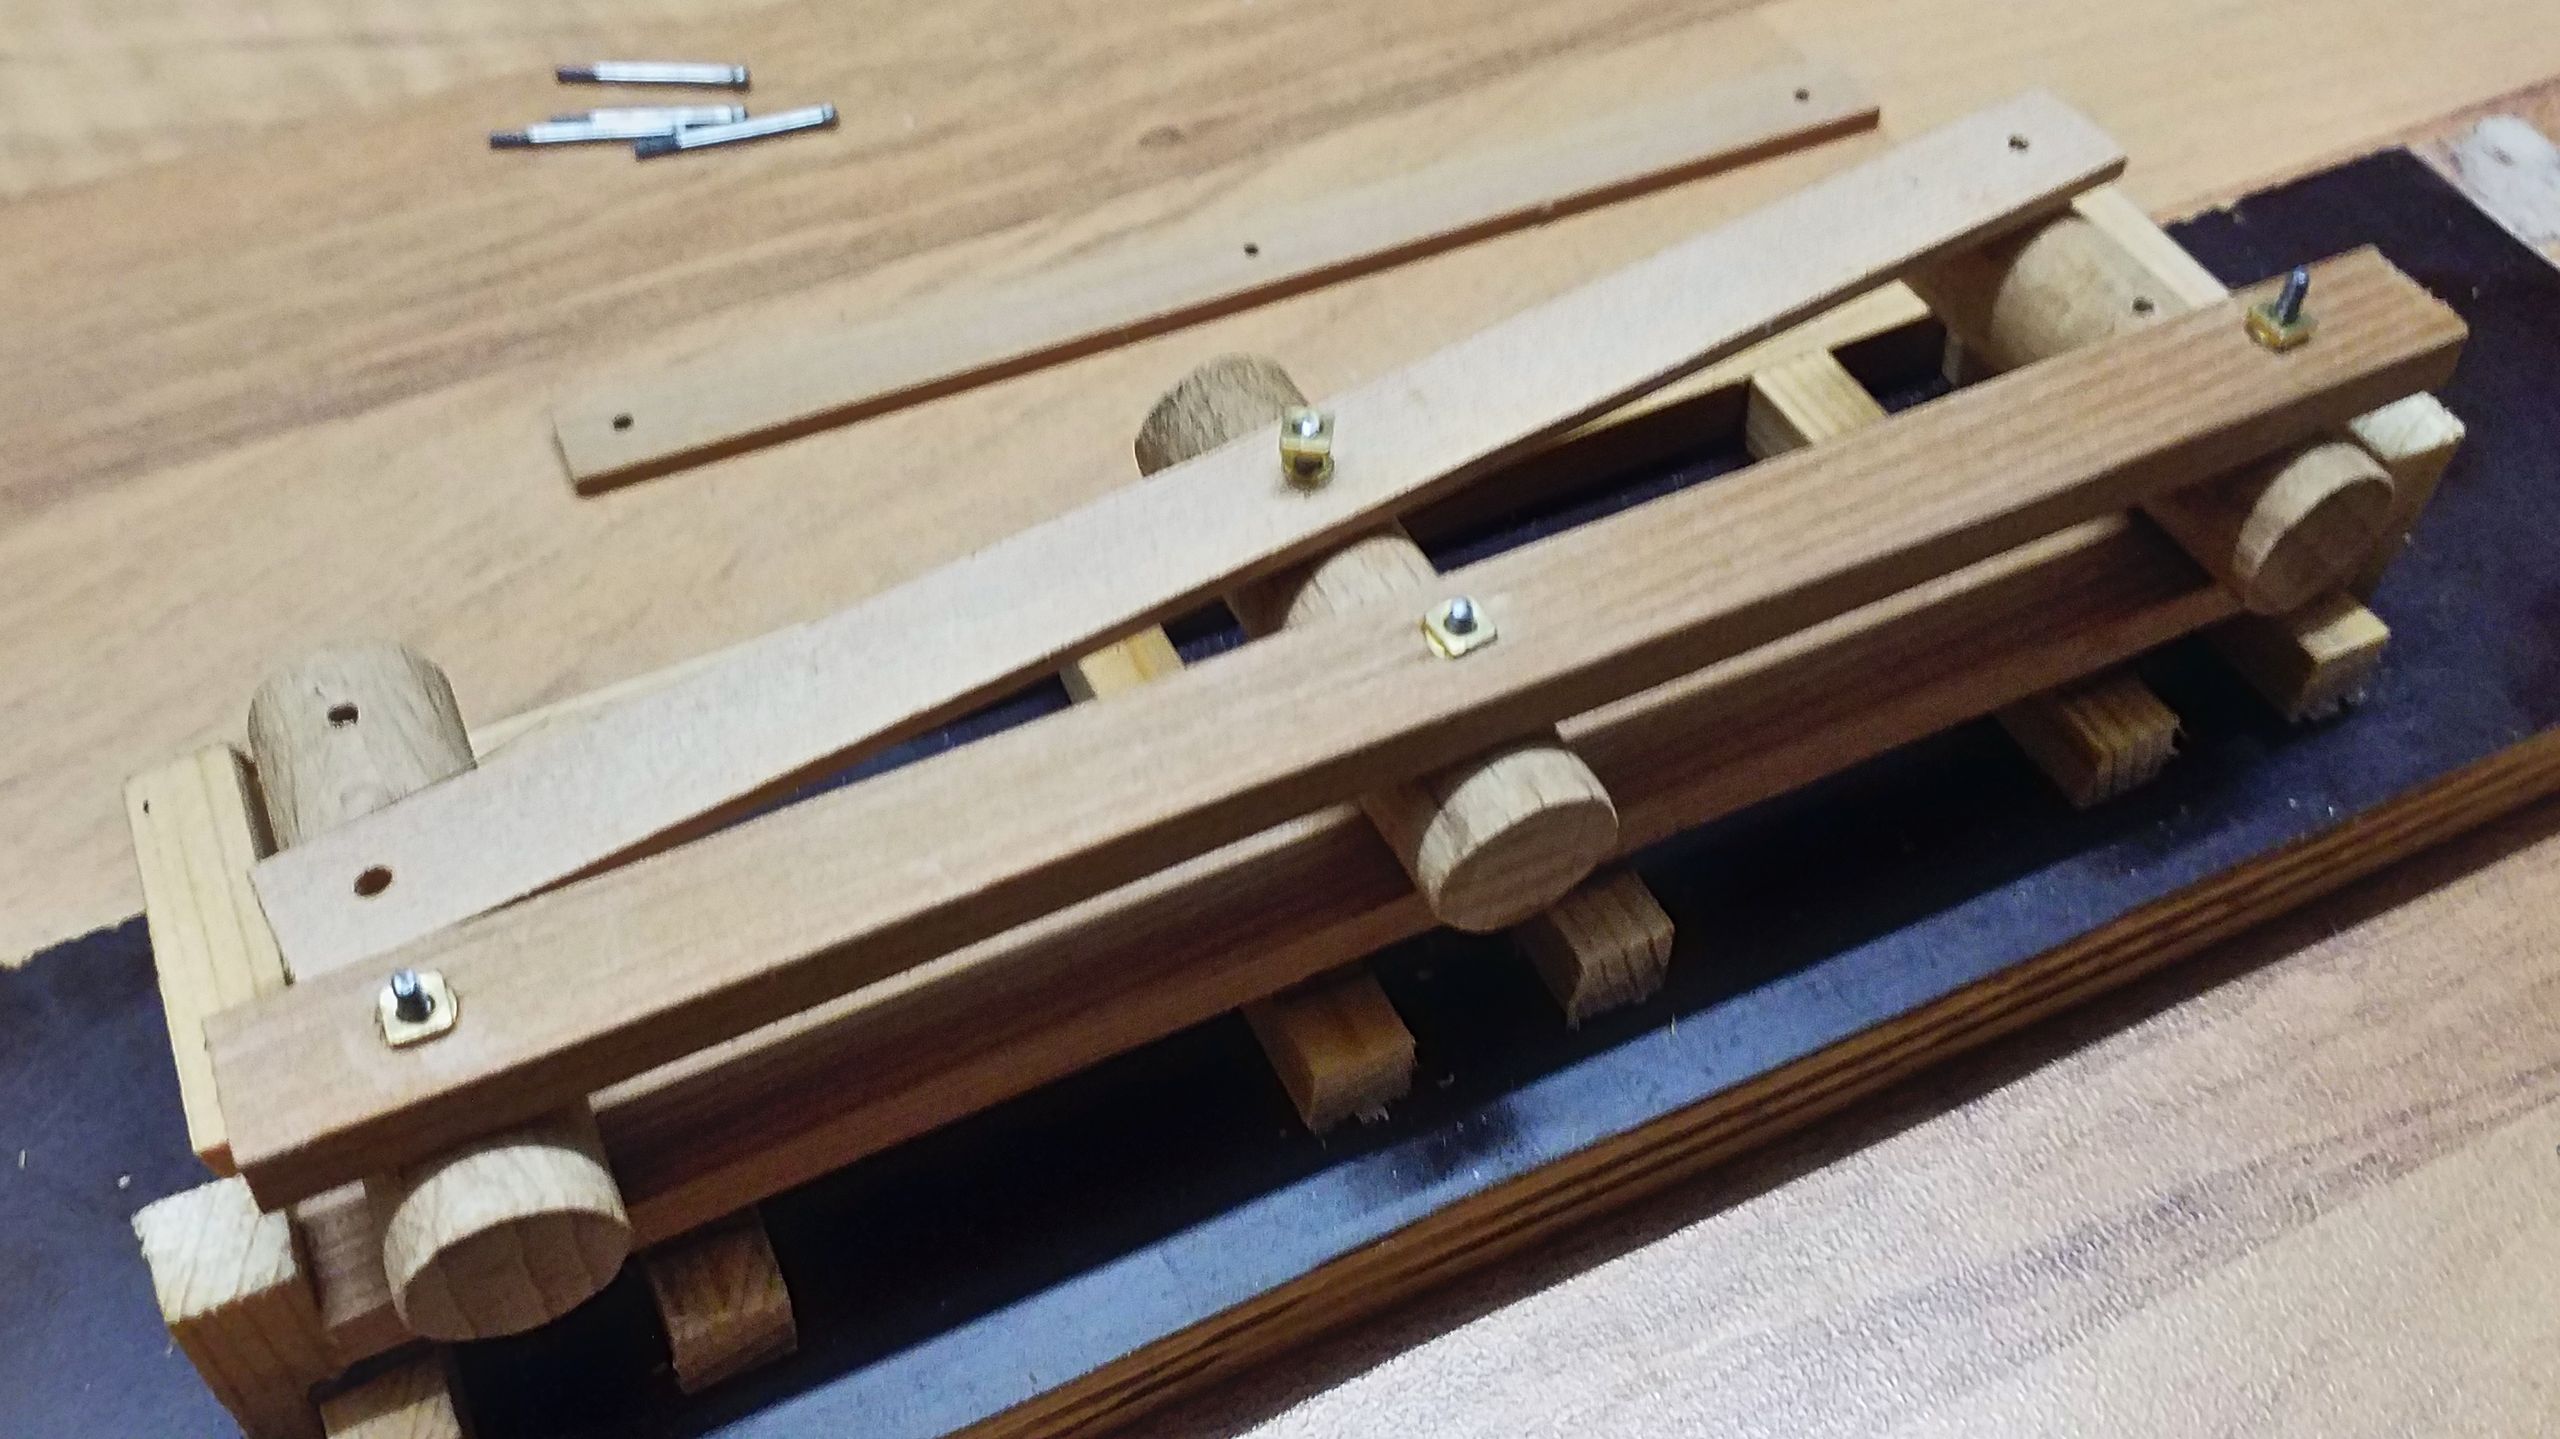
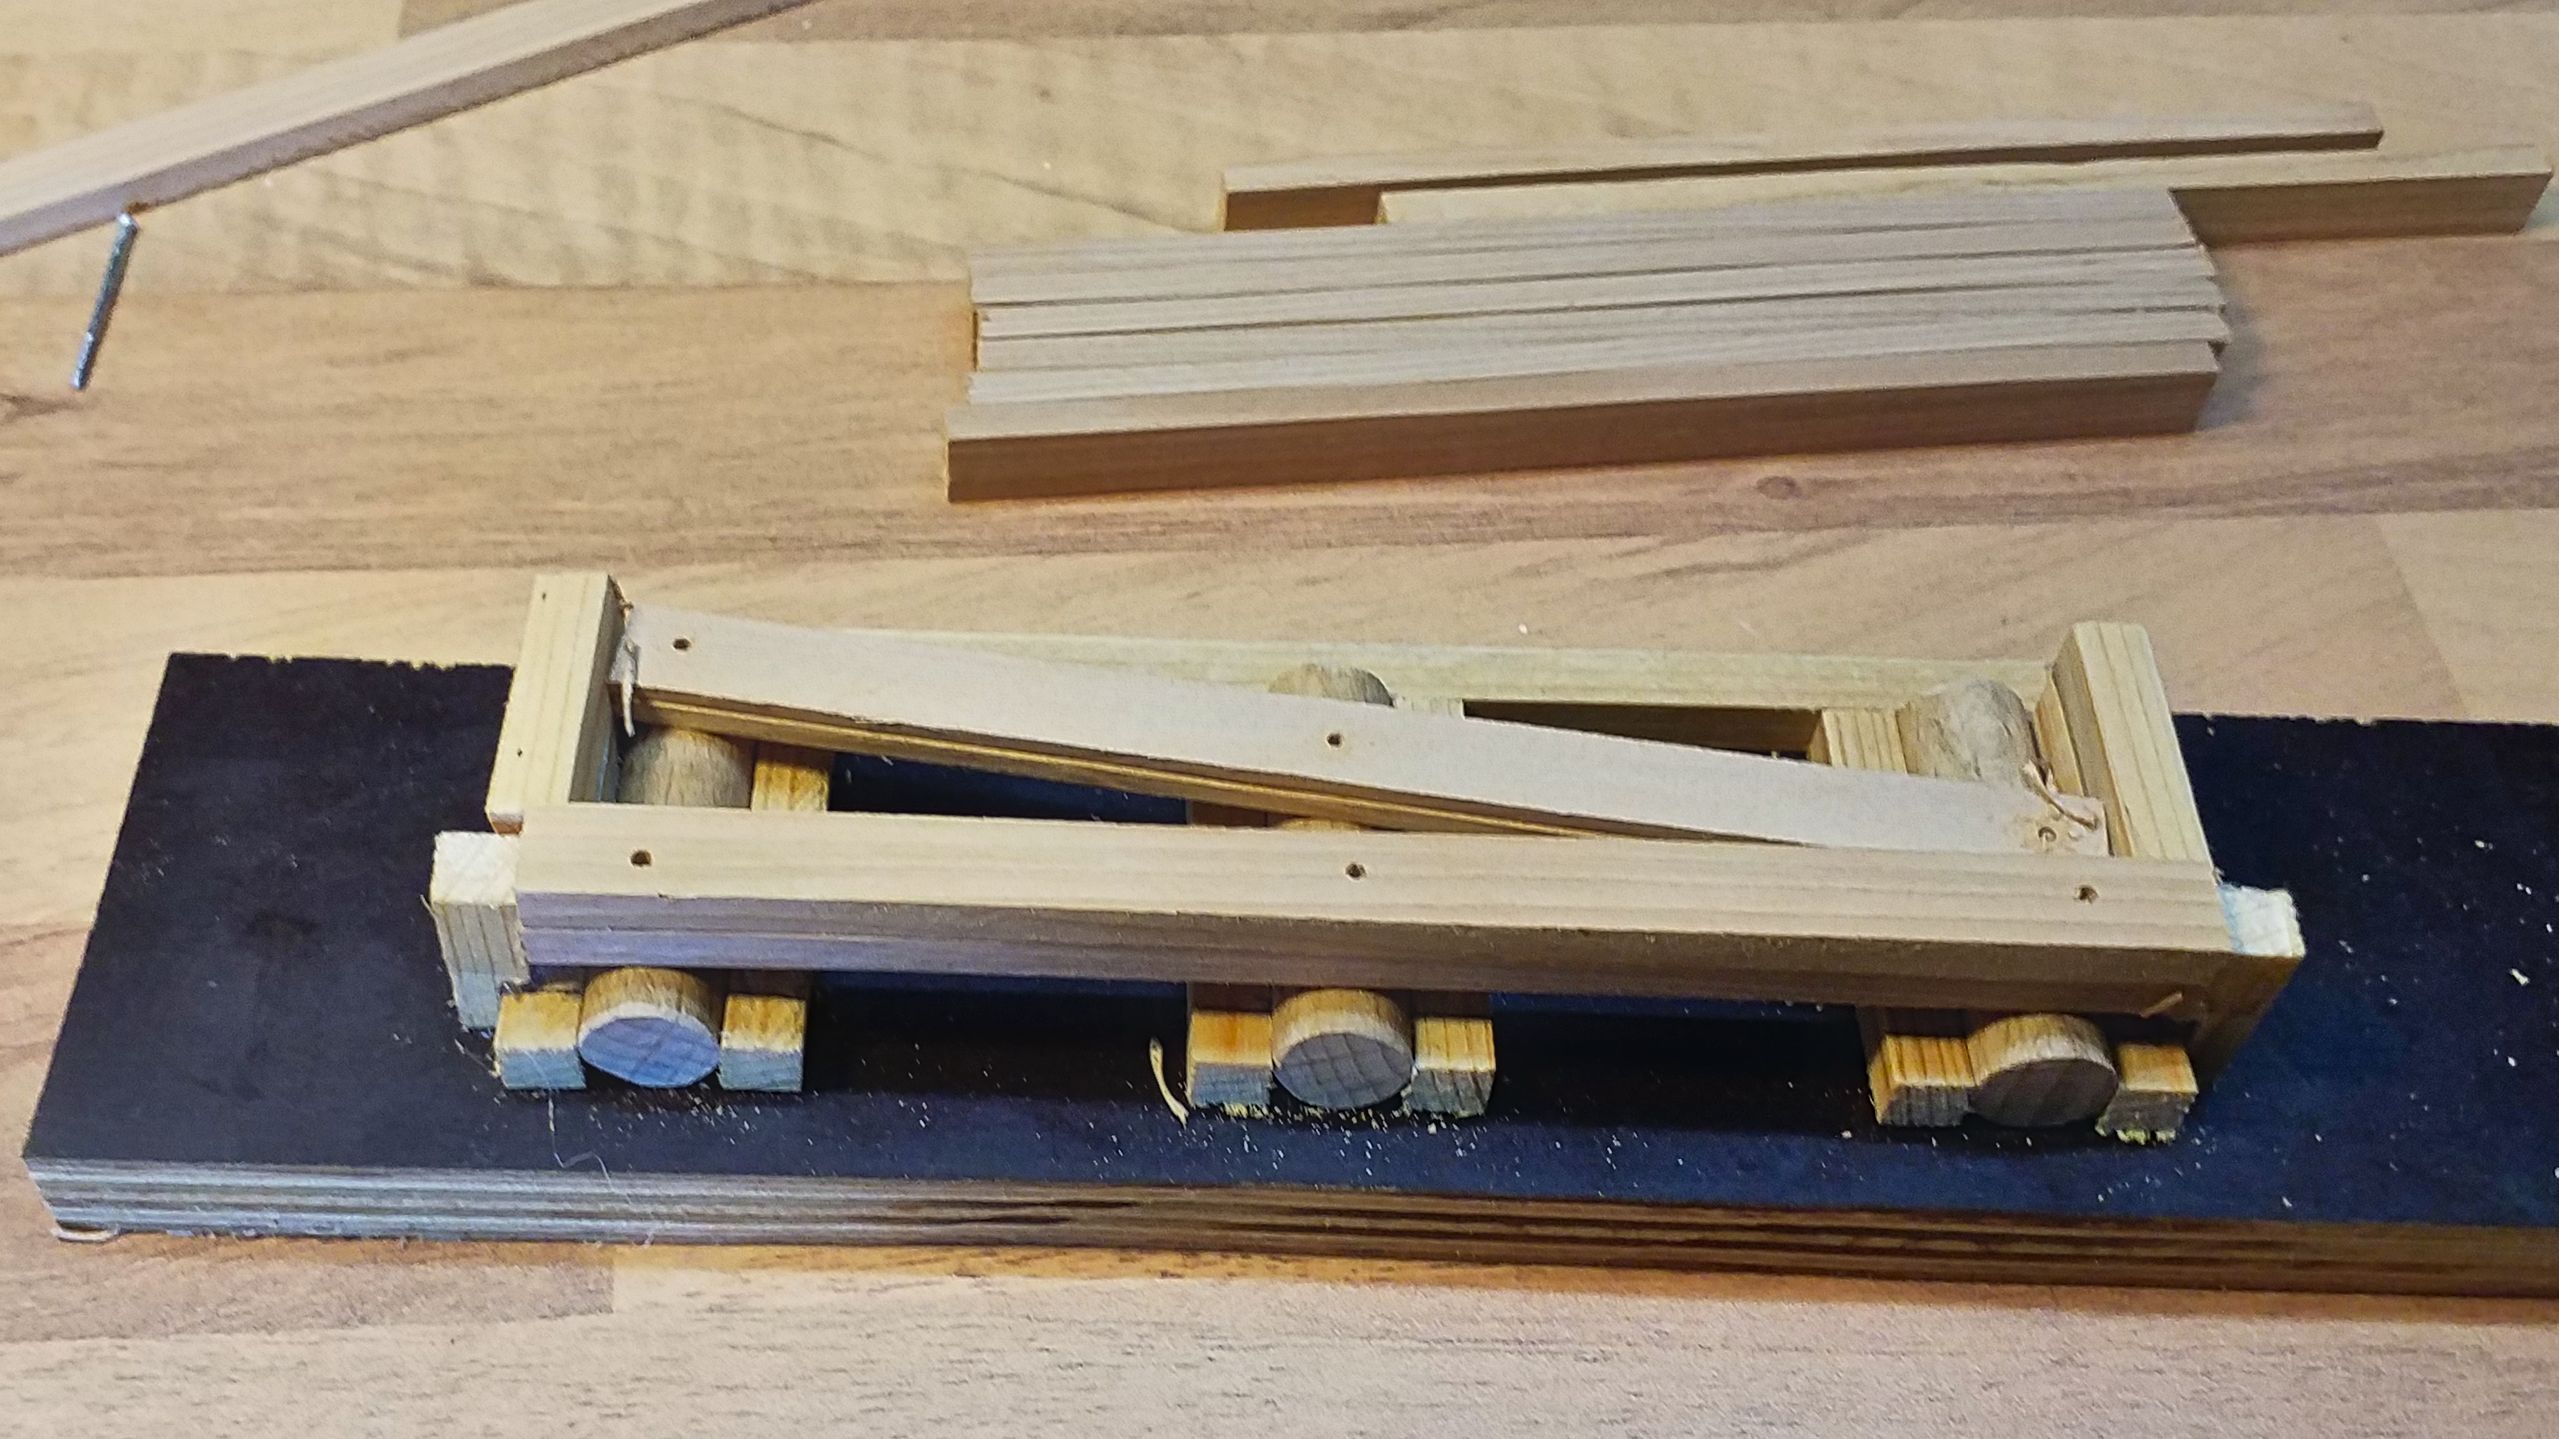
This is the result of the first afternoon of tinkering. Two bents are finished, three to go. The wood is stained with off-the-shelve outdoor protective, walnut-coloured stain, since I’m looking for an unobstruive, yet weather-proof finish.
Up next (omitting the missing bents) is constructing the platform.