
With the fuselage finished it’s time to focus on the undercarriage. I’ve got two major objectives concerning my model: I want to have the capability to take off from smooth runways and I need a suspended undercarriage in order to dampen jolts during landings.
That’s quite an order on such a small model. Since I don’t want to put tundra wheels on a biplane, I probably won’t even be able to take off from mowed grass runways, but tarmacs should do. As a principle I don’t want to omit the undercarriage because on the one hand it offers some protection to the propeller and on the other hand it’s just part of a prototypical look. In fact I only know of one biplane with retractable gear, that being the Polikarpov I-153 “Chaika”.
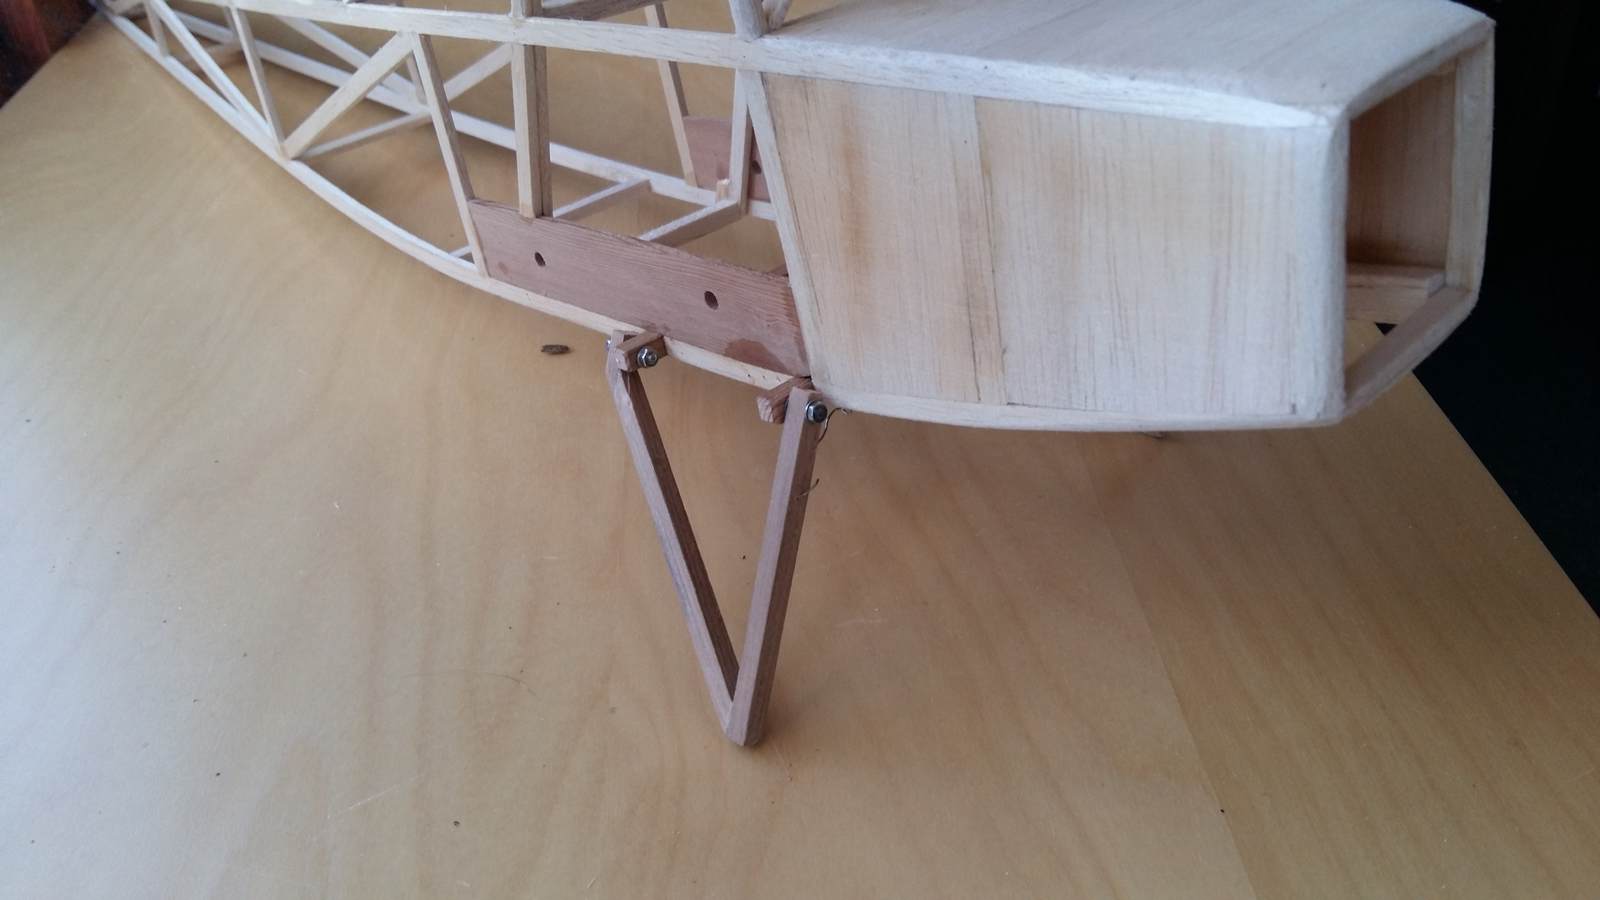
Most model aircraft use steel wire for the undercarriage, which provides in itself some suspension. I do not like the look of such landing gears, so I chose a wooden design. Naturally the suspension now had to be provided with hinges and springs.
The landing gear’s legs and their mounting are completely made from red cedar in order to deal with the foreseeable stress. The hinges consist of M2 threaded rods, nuts and washers made from stainless steel. Fortunately, it doesn’t add a lot of weight. The nuts will be fixated with super glue, but only after covering and painting is done.

The undercarriage is spring suspended by one central coil spring, which I made myself. The coil is two-parted and fastened to the mounting’s center line. That also provides a centering for the landing gear legs. I chose to attach the suspension at the upper end of the legs in order to gain more ground clearance. A transverse connection further down the legs would catch every blade of grass and thus provoke somersaults.
It’s to be expected that the model’s total mass will be too much for the current coild spring to handle. Because of that the spring is fixated in such a way that it’s easily replacable. I’m probably going to need several tries before I will find the proper level of suspension.
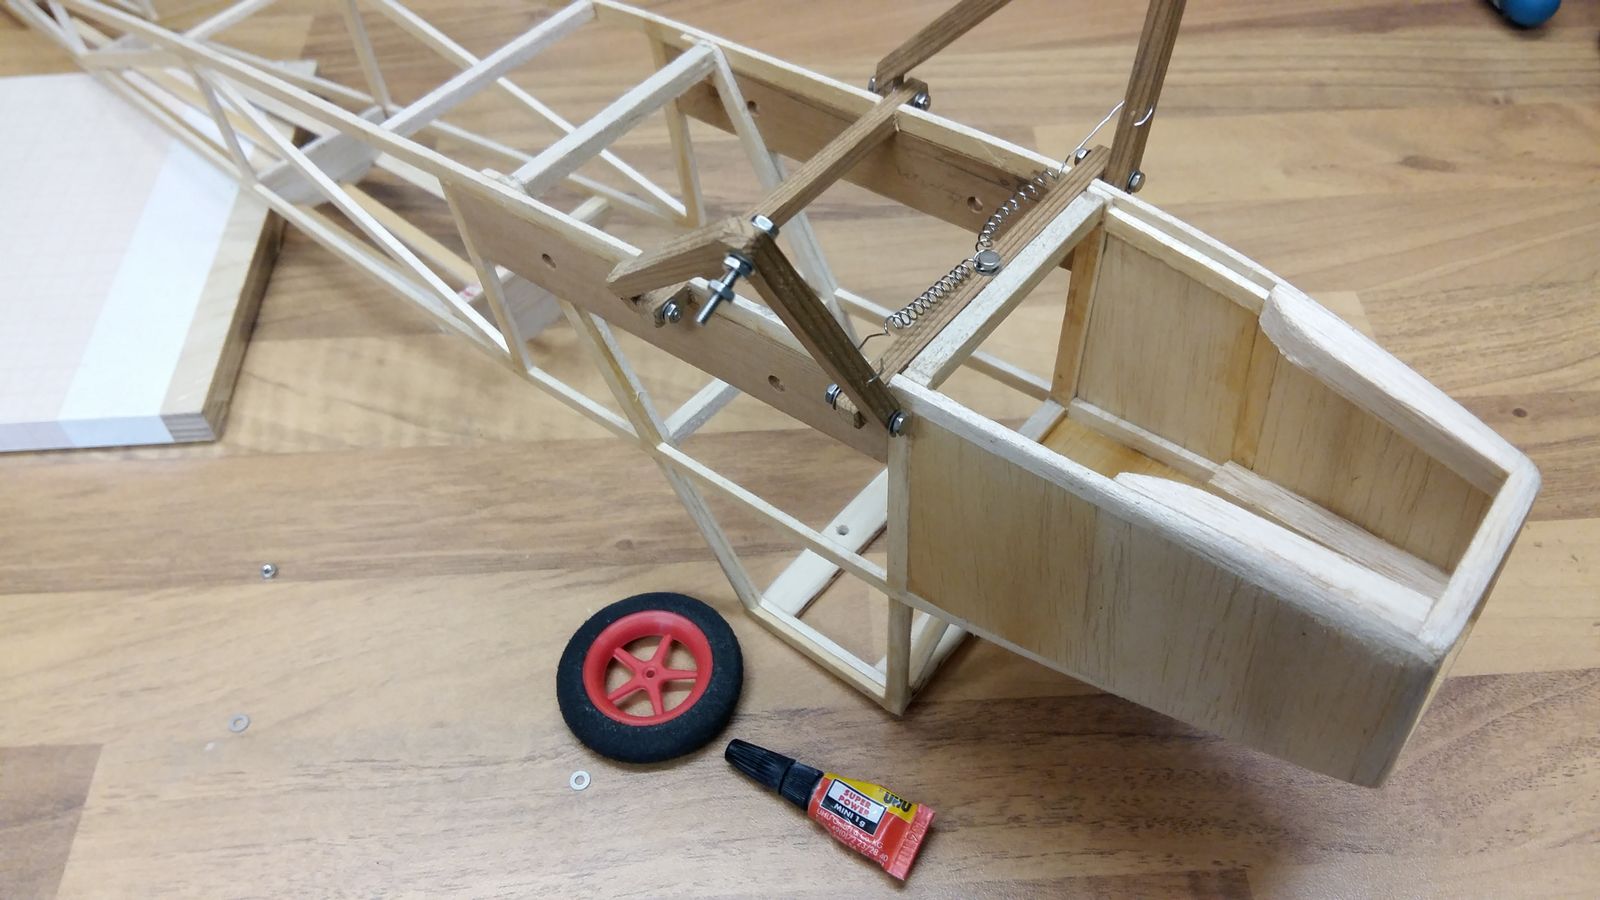
Finally I equipped the landing gear legs with short axles, made from M2 threaded rods. Nothing much to say about it, the legs were drilled and the rods with nuts and washers, to protect the wood, fixated. The wheels are attached in similar fashion, again with nuts and washers. Again, the nuts are only loosely fixated, so I can disassemble the model for covering and painting.
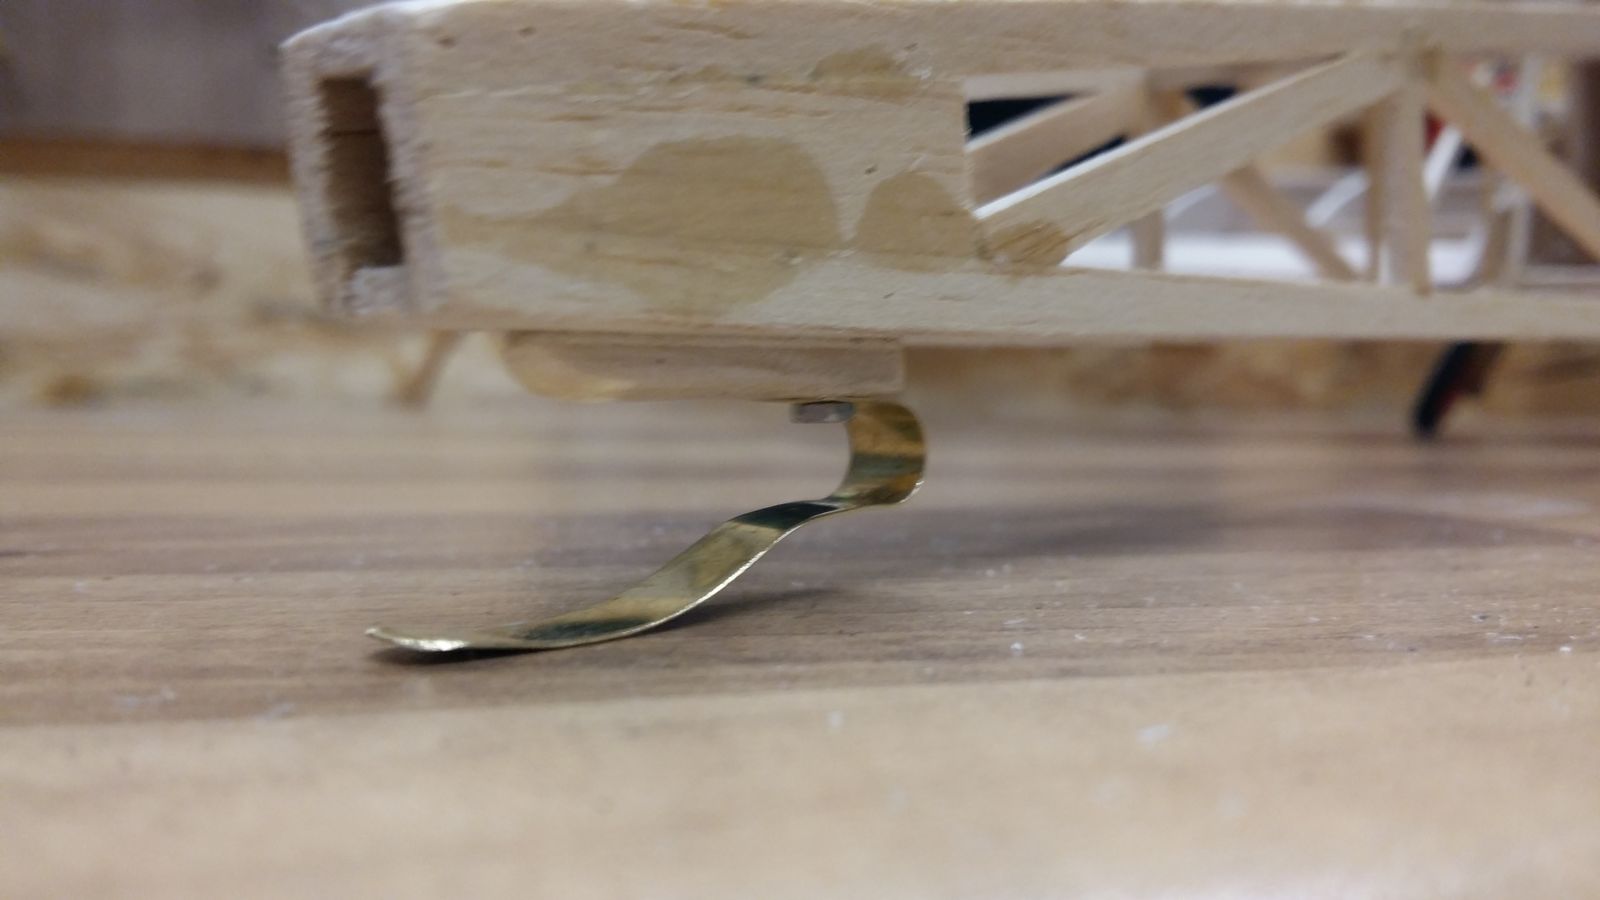
The tail’s got a tail skid, which I made out of 0.3mm brass sheet. I put up with the extra weight because the skid delivers a strong suspension and thus hopefully will mitigate the landing stress. Whether or not it will facilitate somersaults, I will only be able to learn in the old-fashioned way.
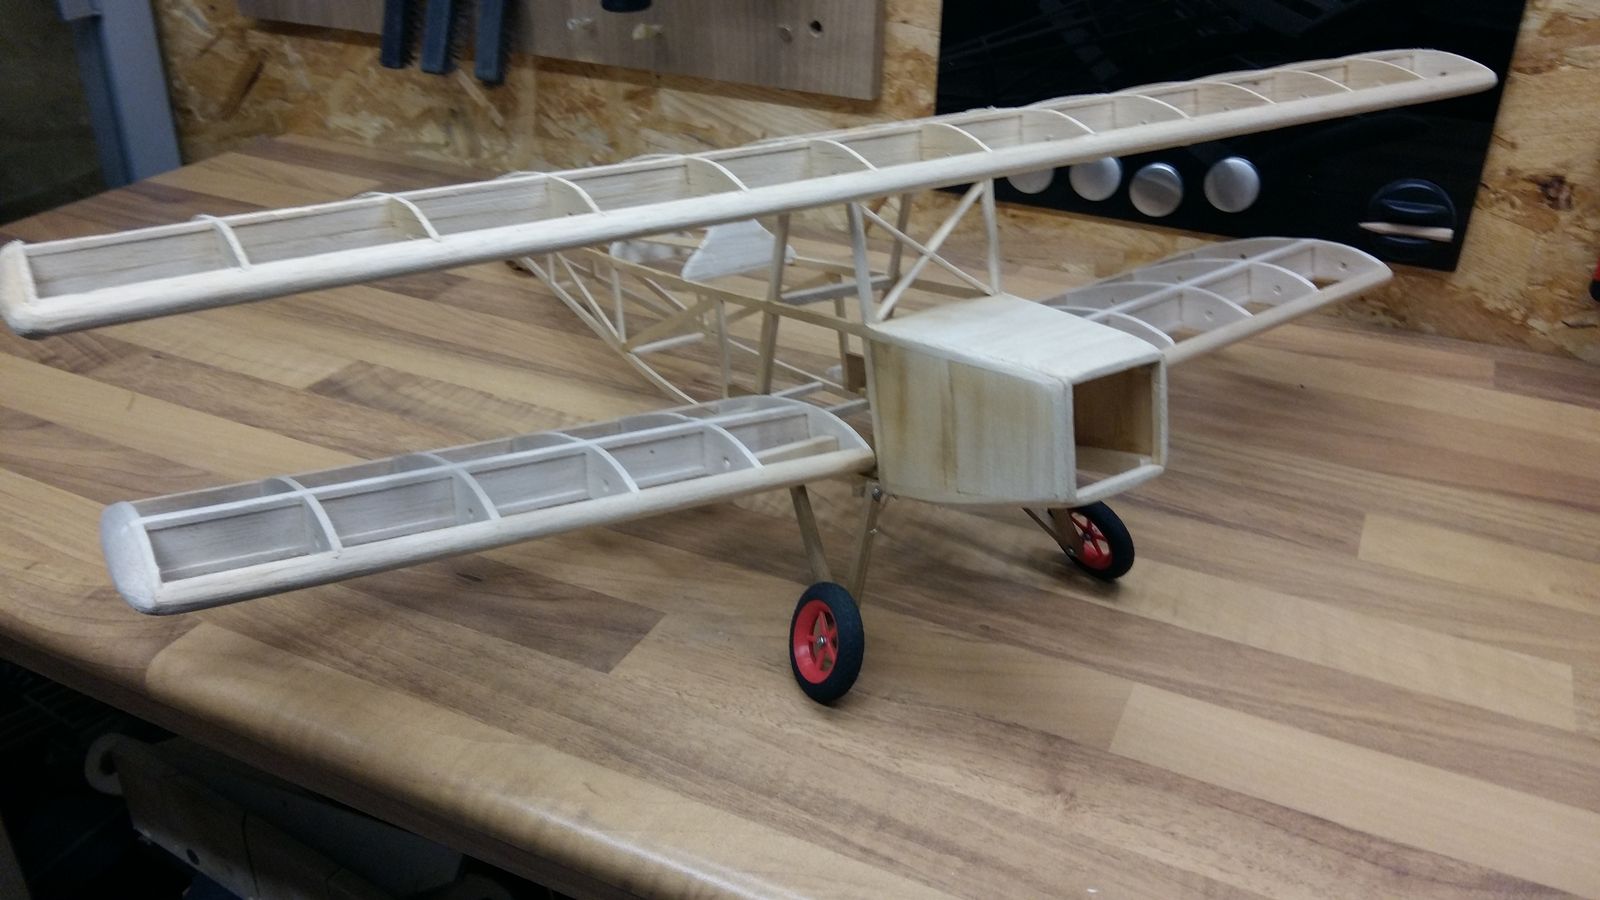
One is starting to recognize what all this is supposed to become. 🙂 And next time it’s going to be the tailplane.