
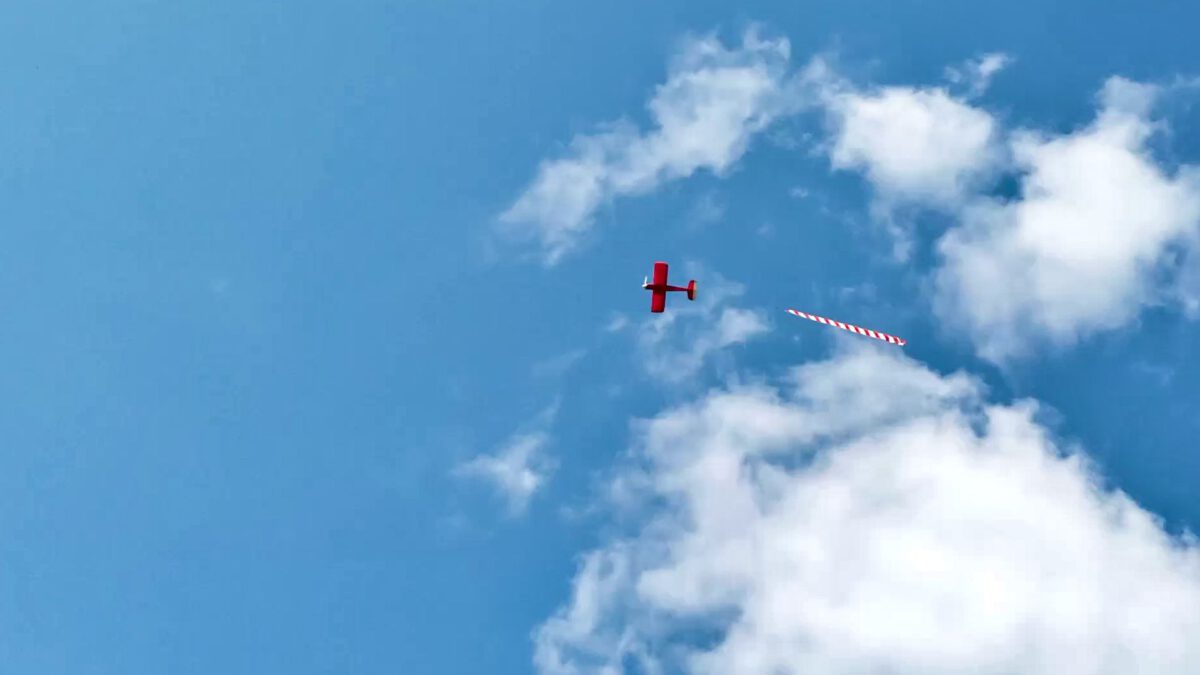
A friend of mine visited on the weekend to get an opportunity for his son and himself to practice some R/C aircraft piloting. Needless to say, the prospect of having some interested folks around spurred me into getting the Joyrider into tip-top shape… and it gave me the opportunity to try and fulfil one of those wishes left over, as mentioned in my post about taking stock. That is: banner towing.
Building a tow coupler is quite a simple affair. The principle is based on a releasable hook, which holds a loop spliced into the towing line. When it comes to towing sailplanes the hook needs to be constructed in such a way that no strain is put on the servo, but in this case I saw no such necessity. Given that there’s not much space left in the Joyrider’s fuselage, I simple filed a servo lever down into a simple hook and threw together some mounting.
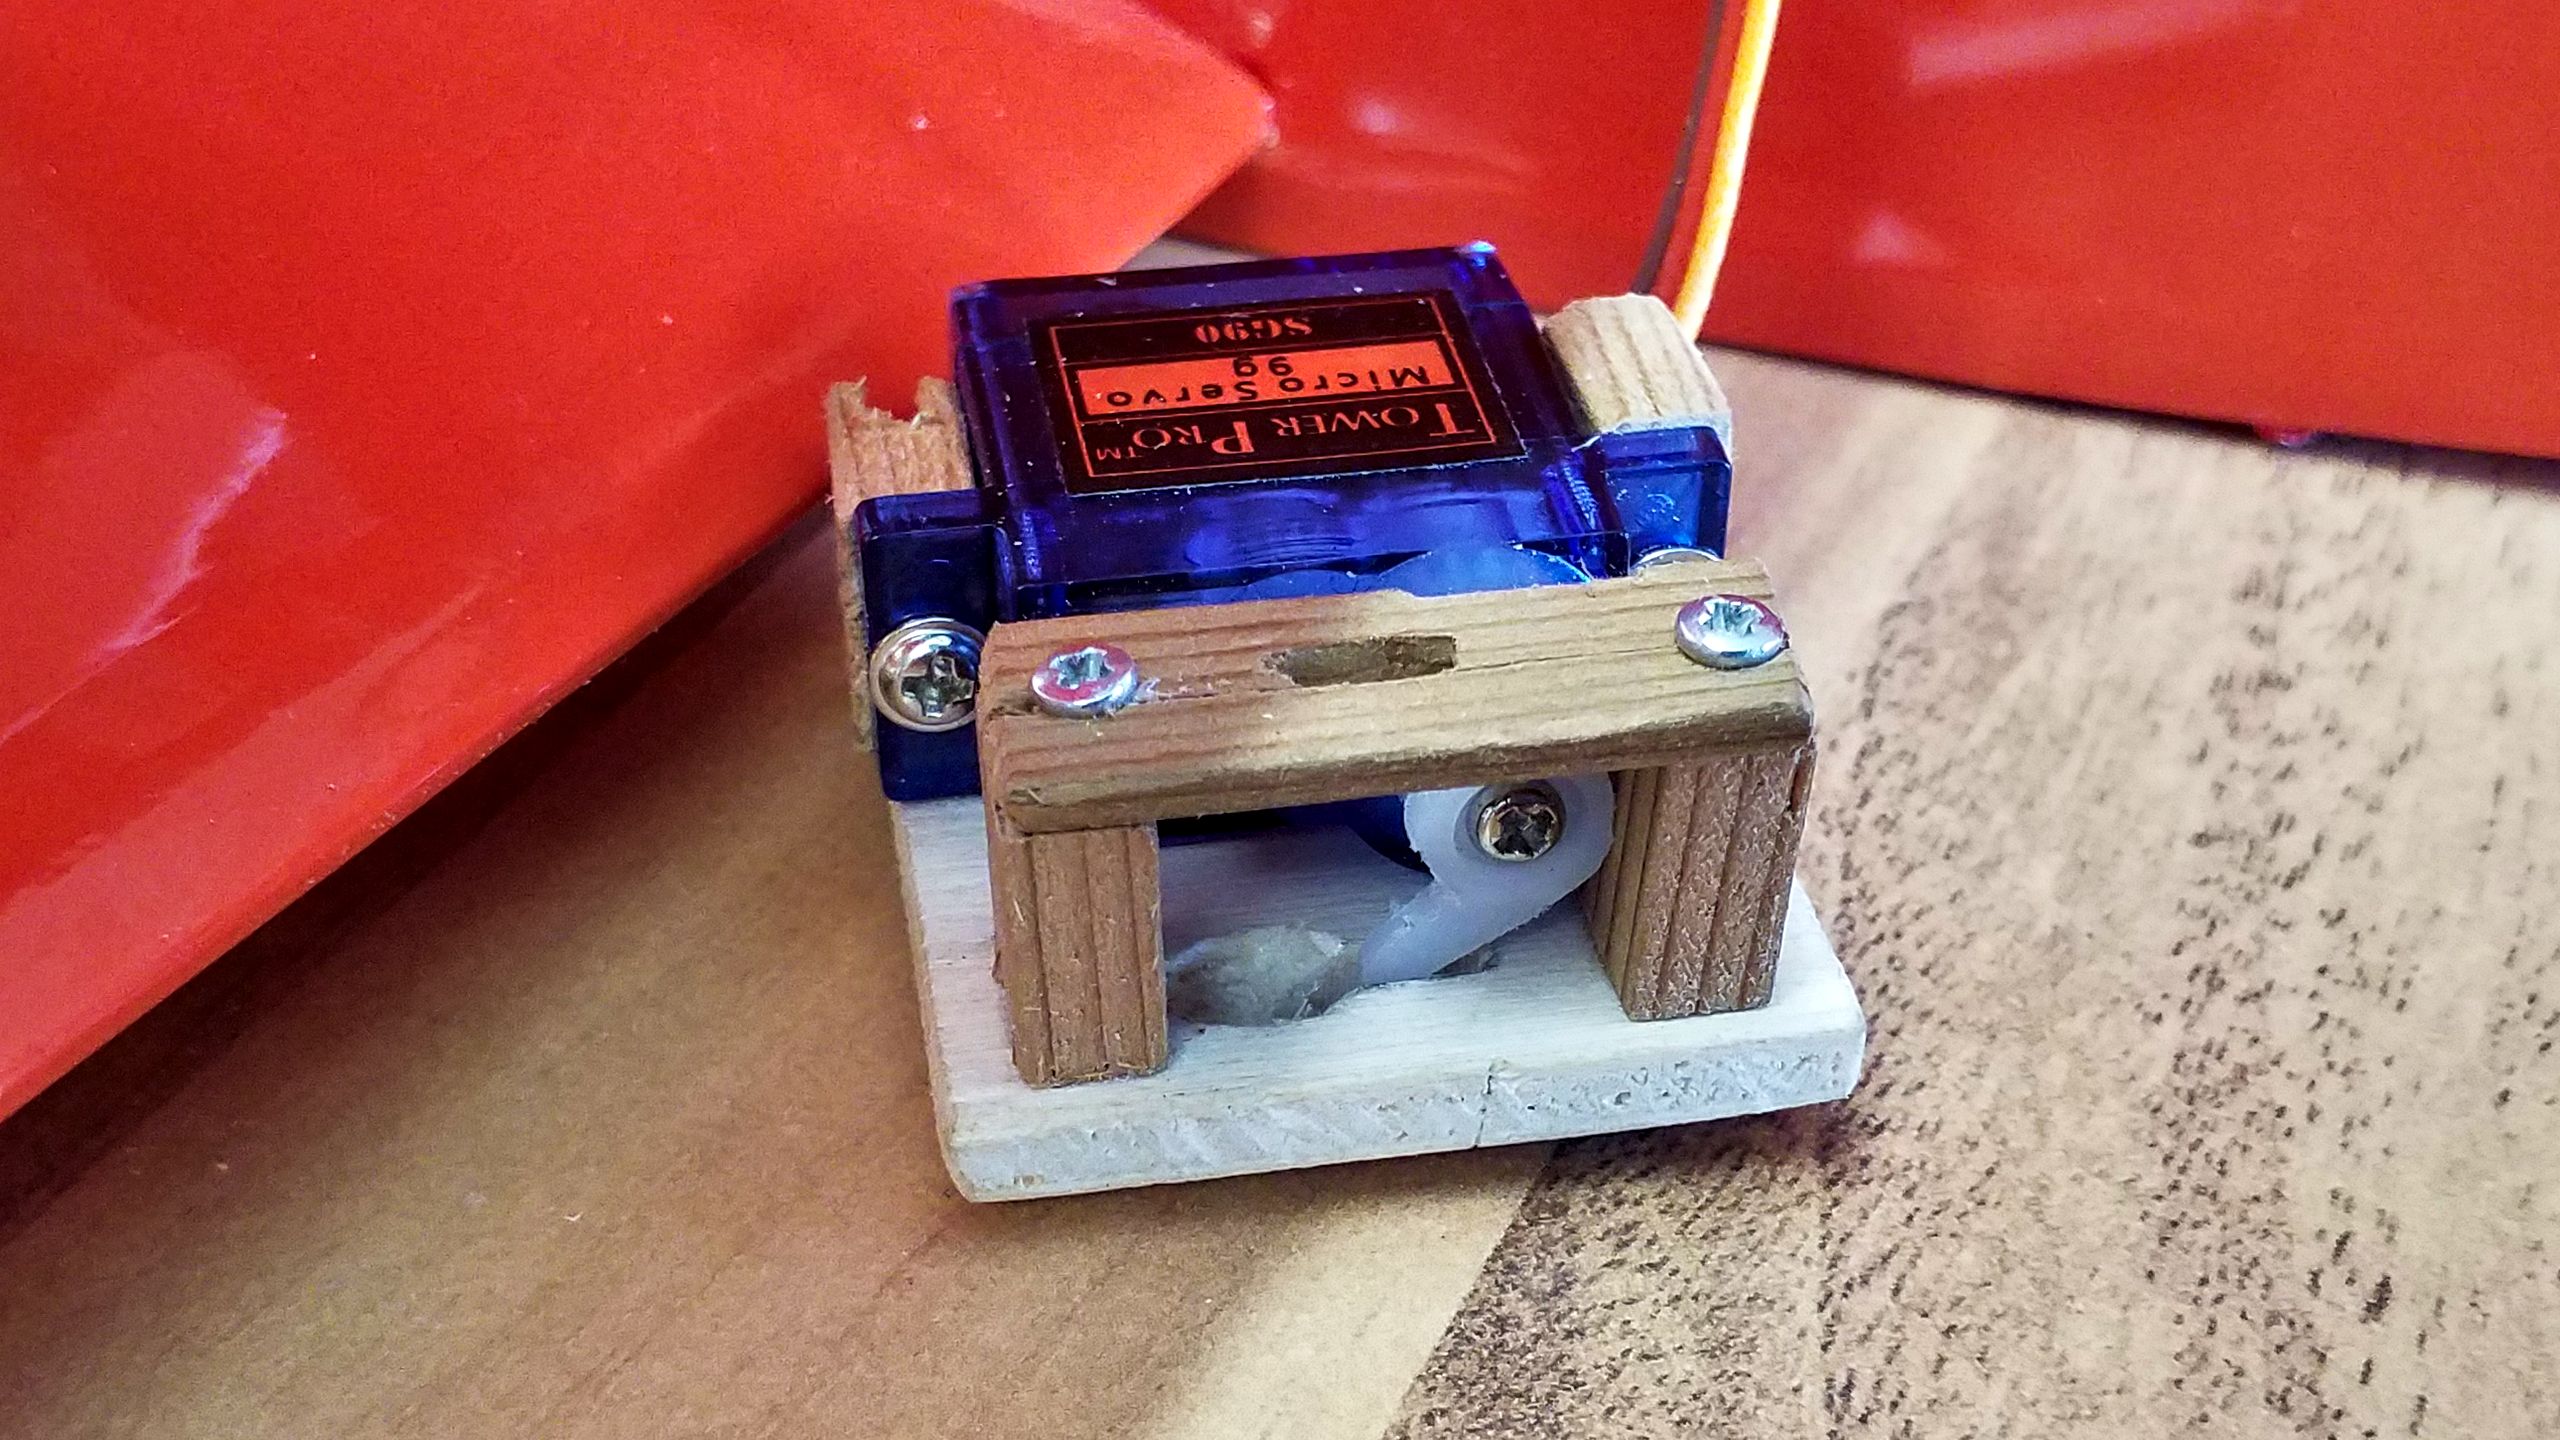
Traditionally, R/C tow planes have their towing equipment mounted near the centre of gravity on the ridge, while prototypical planes have the tow rope attached to the tail. The former method adds to safety for the R/C plane because it can’t be yanked out of its attitude by the towed glider. In my case, I will only tow light-weighed banners and I don’t want the tow line to interfere with the vertical stabilizer. So one hole is bored into the belly and the tow coupler placed directly above.
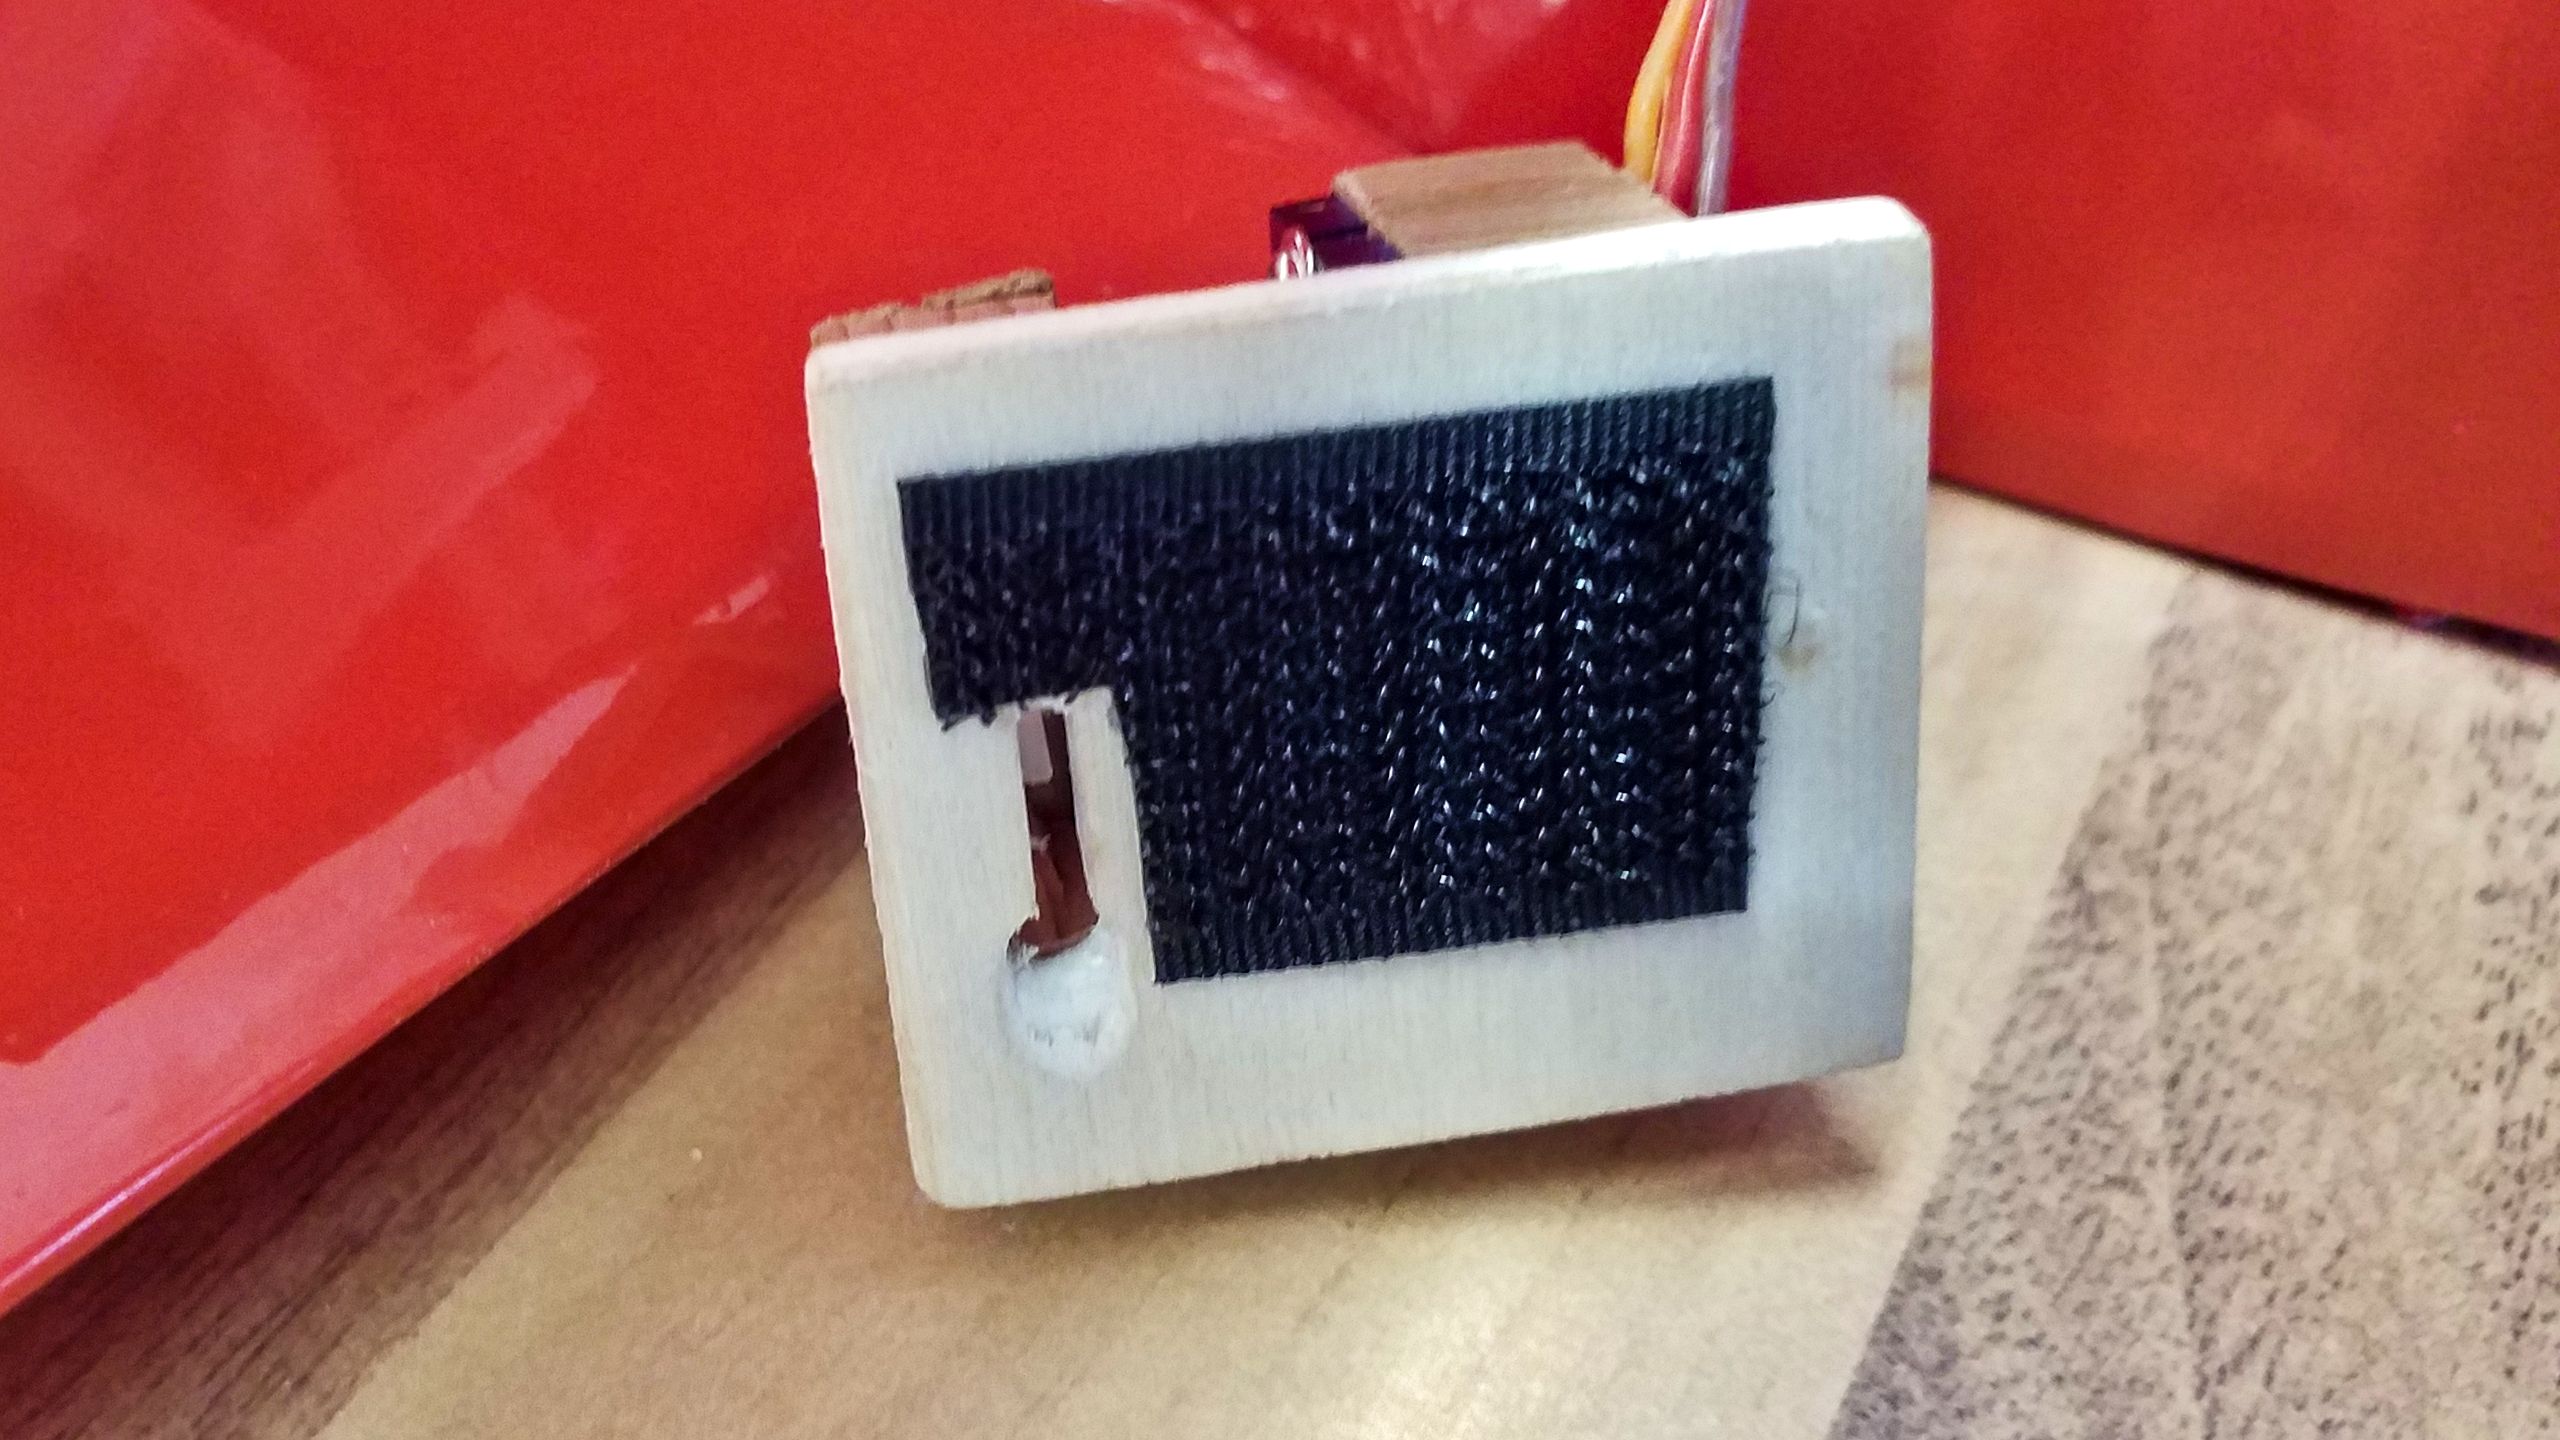
I want to have the option to easily remove the tow coupler. And since there won’t be lateral forces, I simply velcro the mounting inside the fuselage.
The banner is made from a length of barrier tape, which is light and sturdy at the same time. The front has a slat to keep it spread, which is connected to the tow line on both ends. I’m not sure whether or not ballast is necessary, so I attach a small clamp to the lower end.
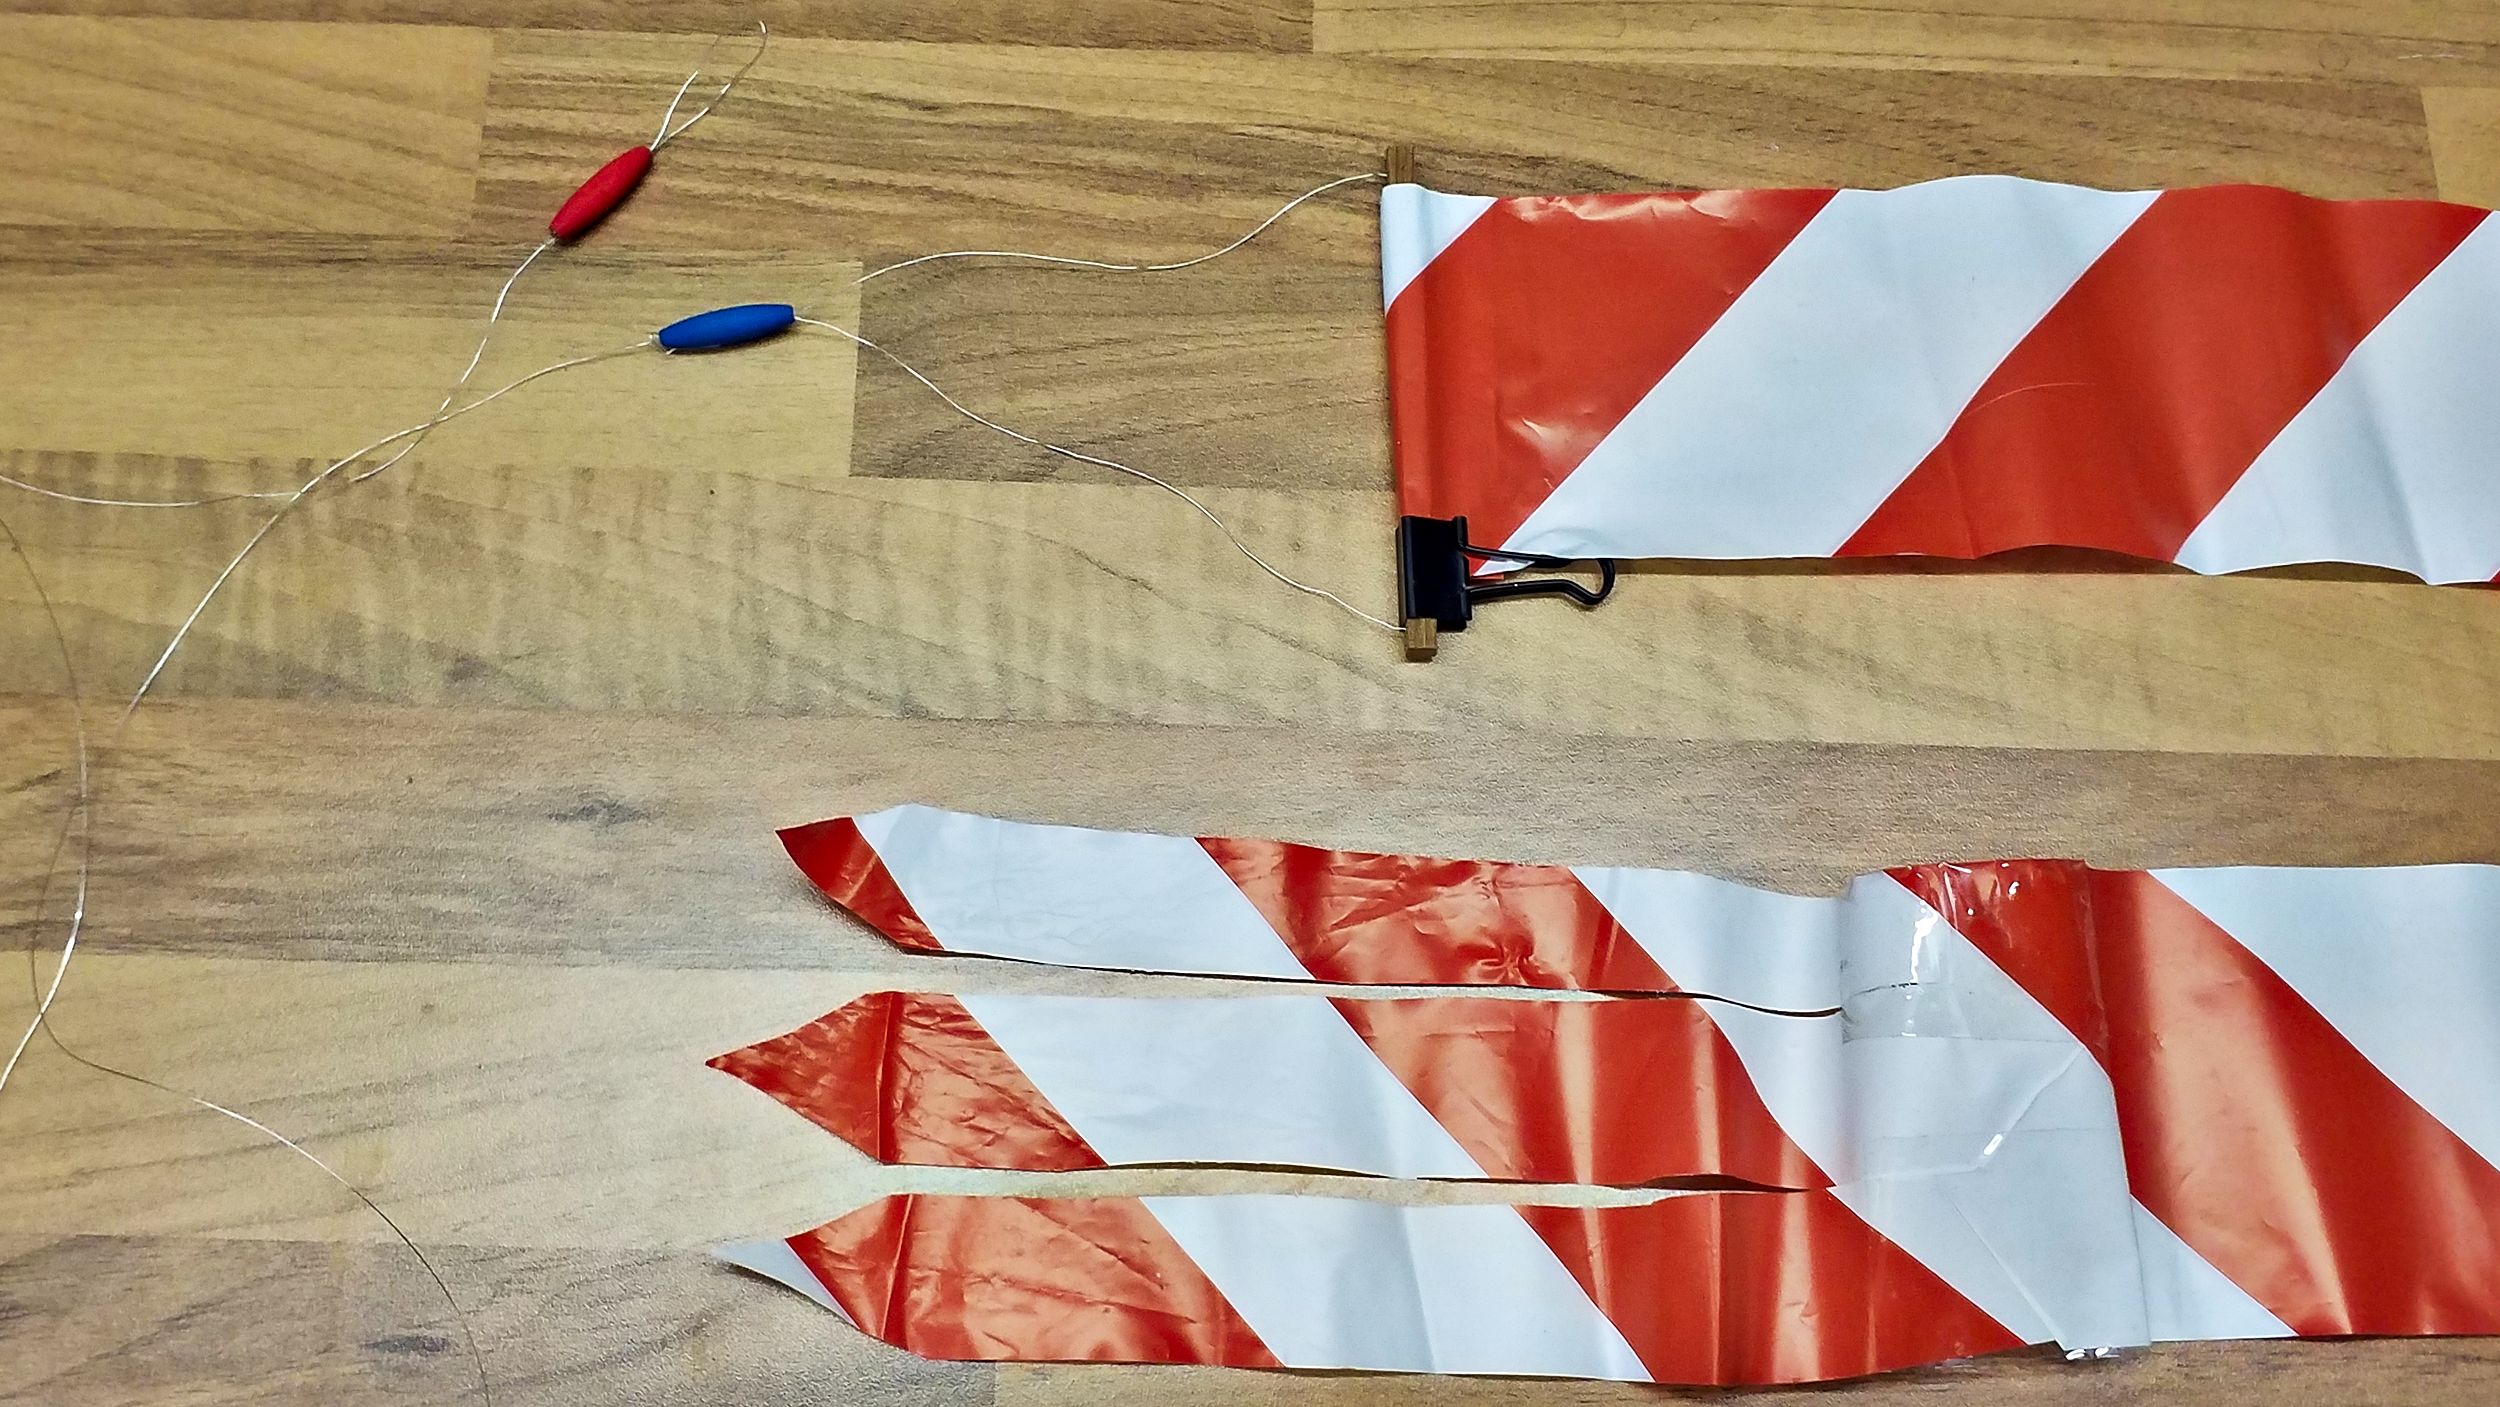
The other end is ripped to about one fifth of the banner’s length. I know from past experience that the banner is altogether stabilised by a sliced tail.
Since I’ve had quite a few crashes with the Joyrider, I didn’t want to make a test flight beforehand which might have ruined the weekend’s planning. So the first banner tow was a complete unknown. I particularly worried about the plane’s behaviour with the low mounting point and half expected the Joyrider to be forced into a dive right at the takeoff. Turned out, that wasn’t the problem at all.
So what went wrong? First, I was so focused on the release that my eyes locked onto the falling banner for close to one second. That’s all it took for the Joyrider to roll into a dive. Second, I was flying low because I didn’t want to have the banner floating around and get lost in the nearby field. That took away too much space for error, so to speak.
Anyway, I took it very lightly. As I explained to my somewhat anxious spectators, flying models means risking to brake them.
Now, I’m left with the wreckage to clean up. And this time, there’s plenty of that:
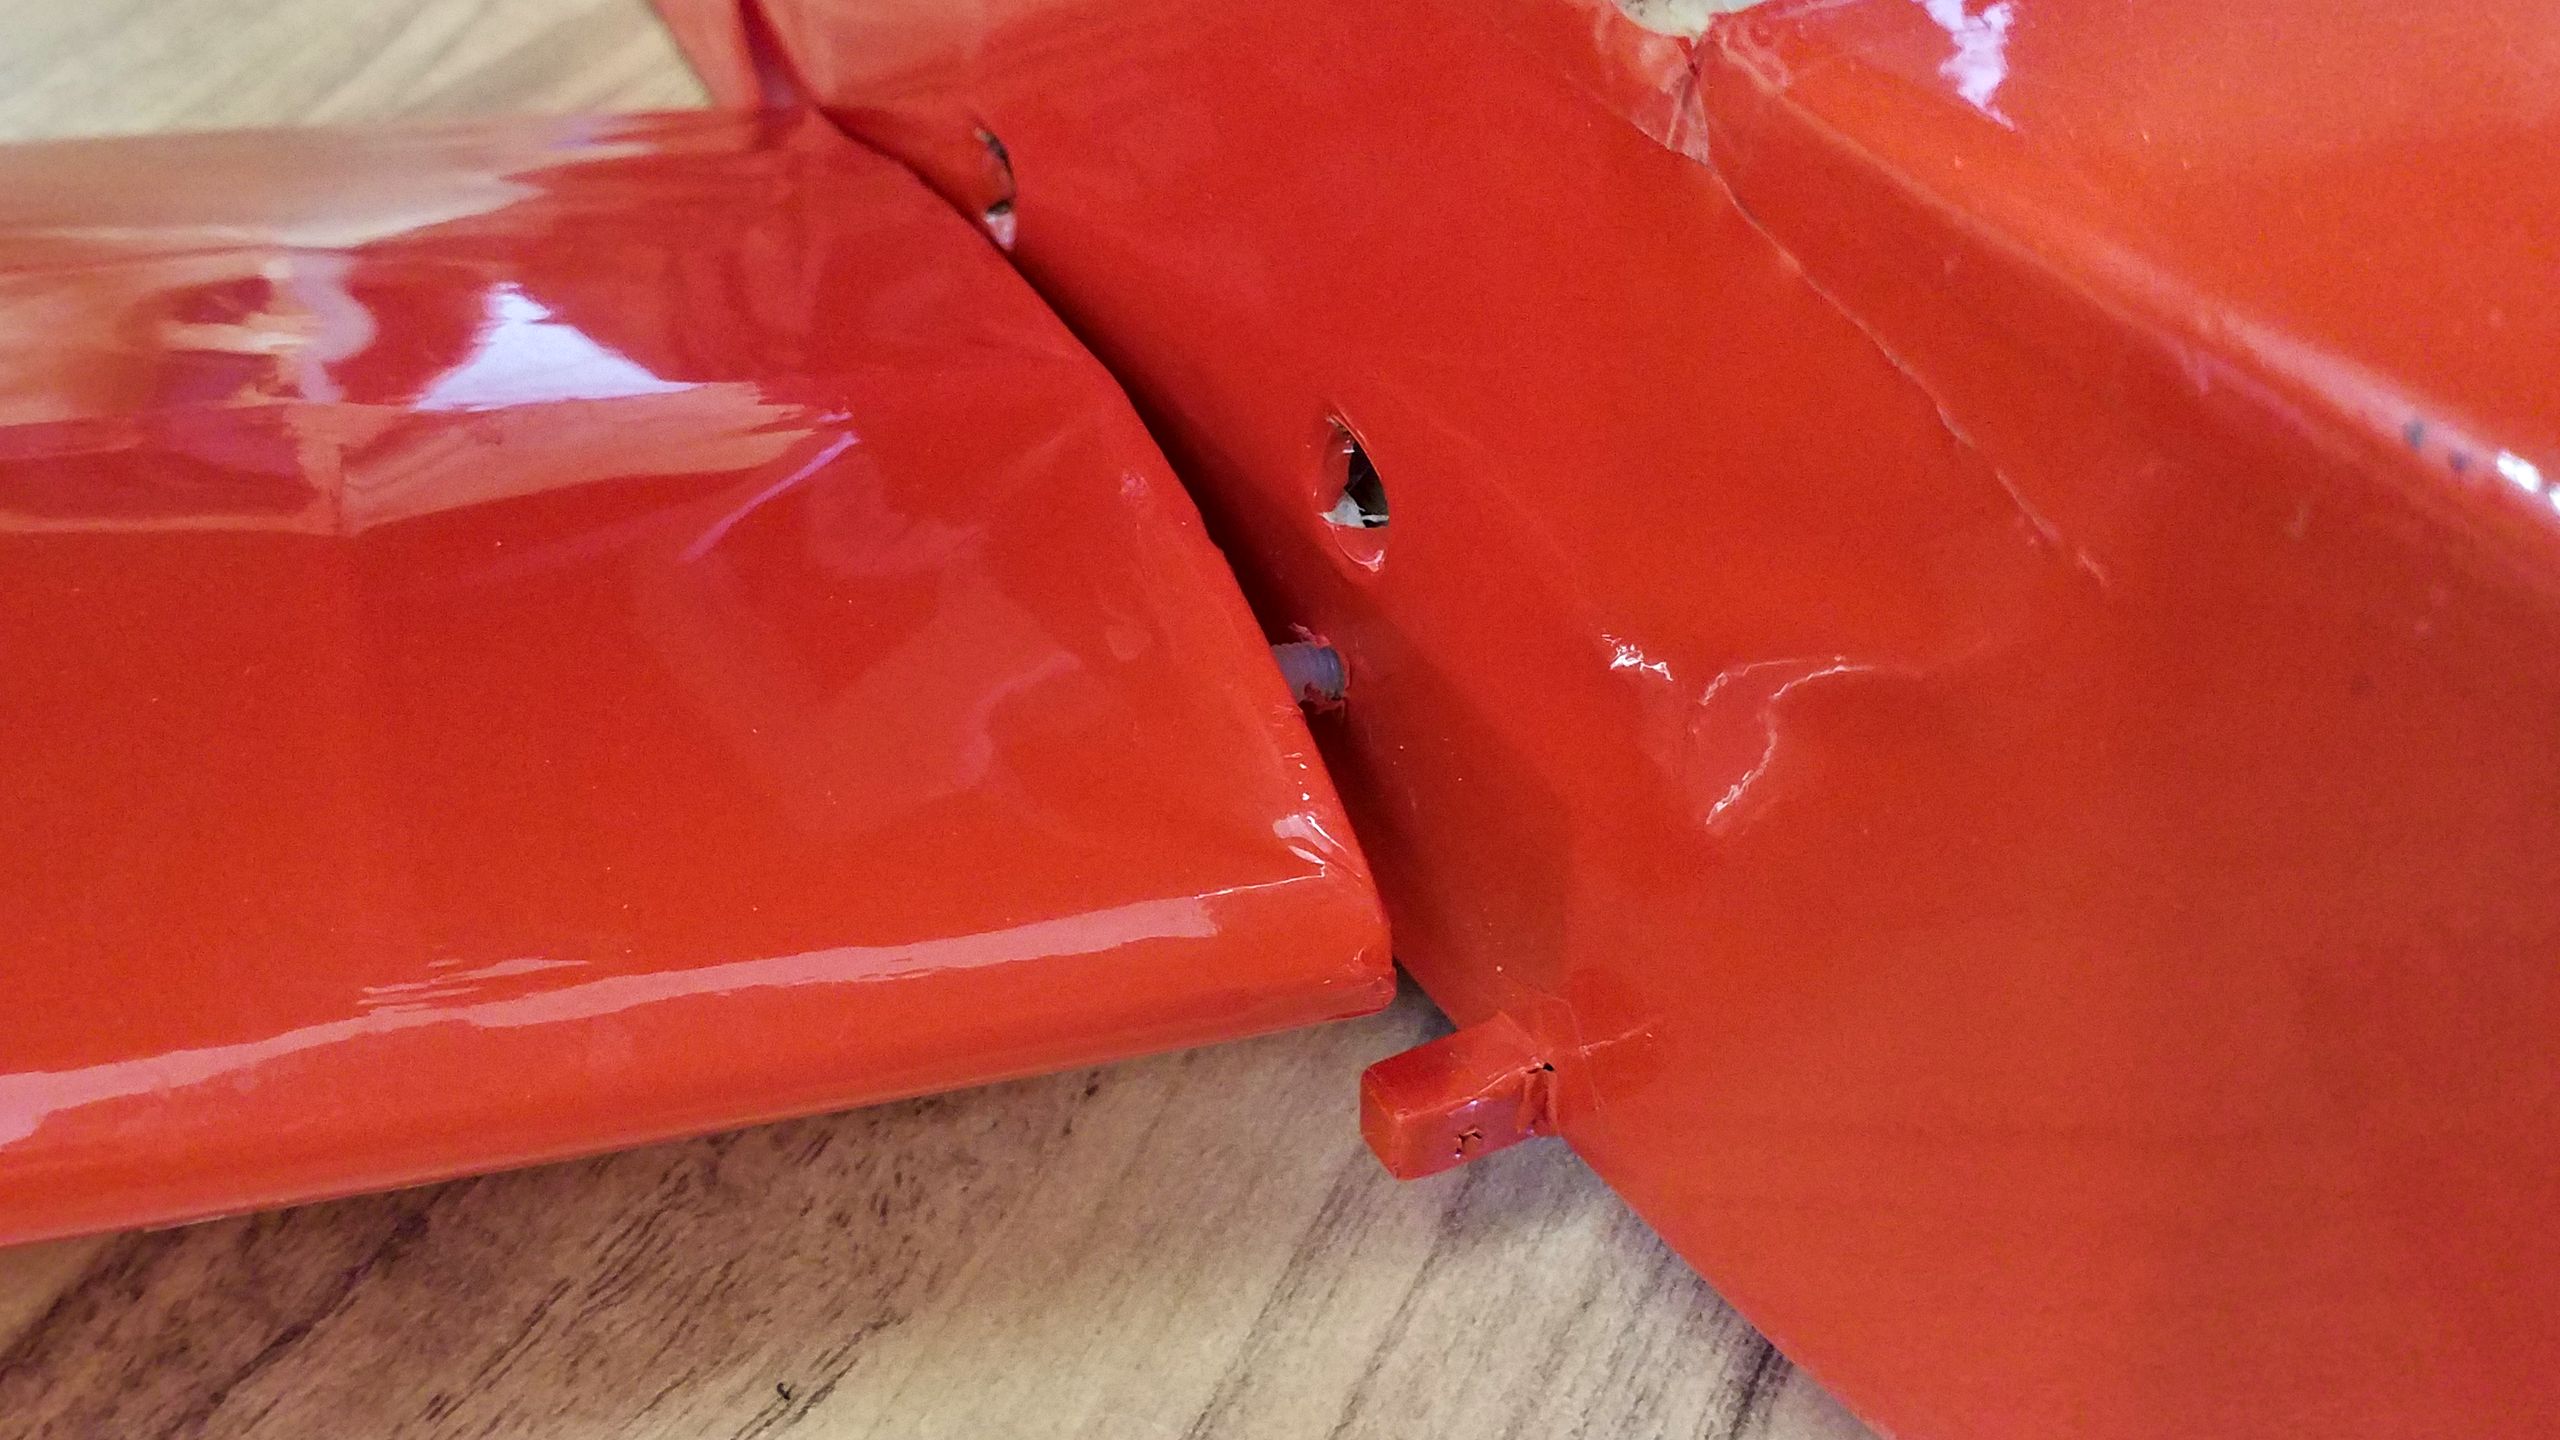
The lower right wing was ripped right off the fastening screws. At first glance that didn’t look too dramatic because the vertical stabiliser suffered the same and apart from that looked unscathed.
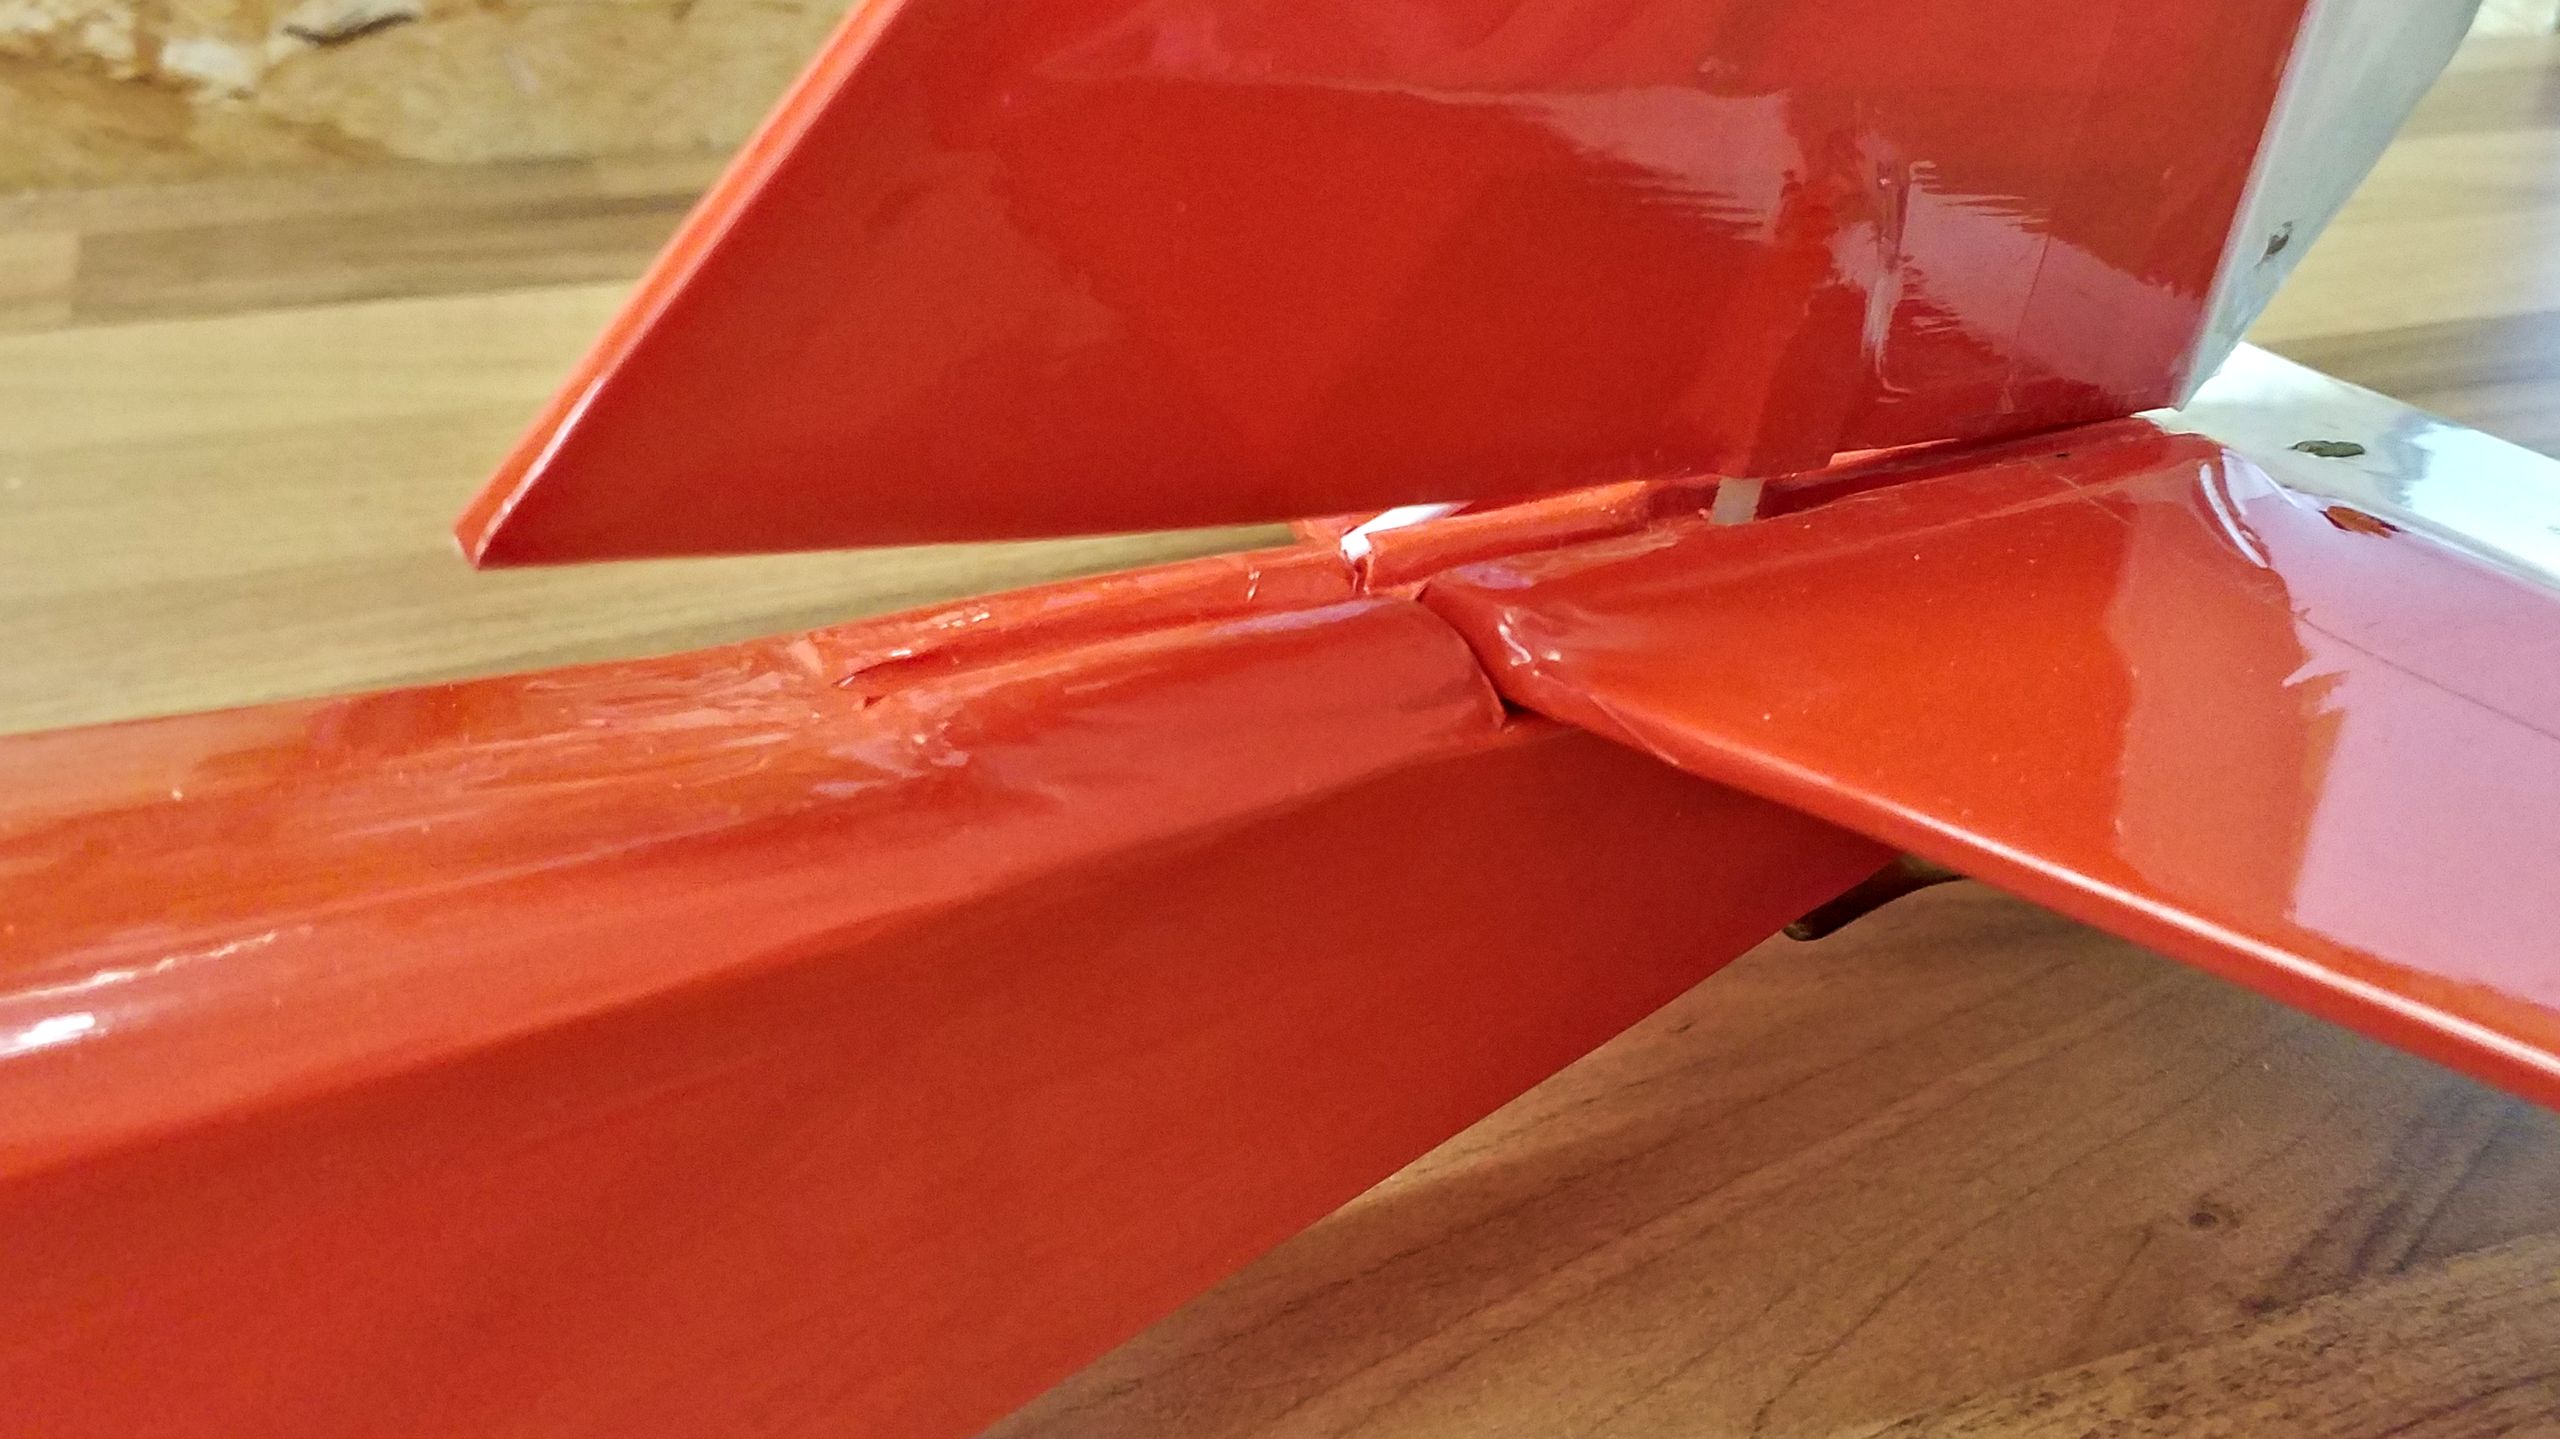
The fuselage took the brunt of the impact, it split on the starbord side. That killed most of the momentum and while it looks severe, it should be easy to patch up.

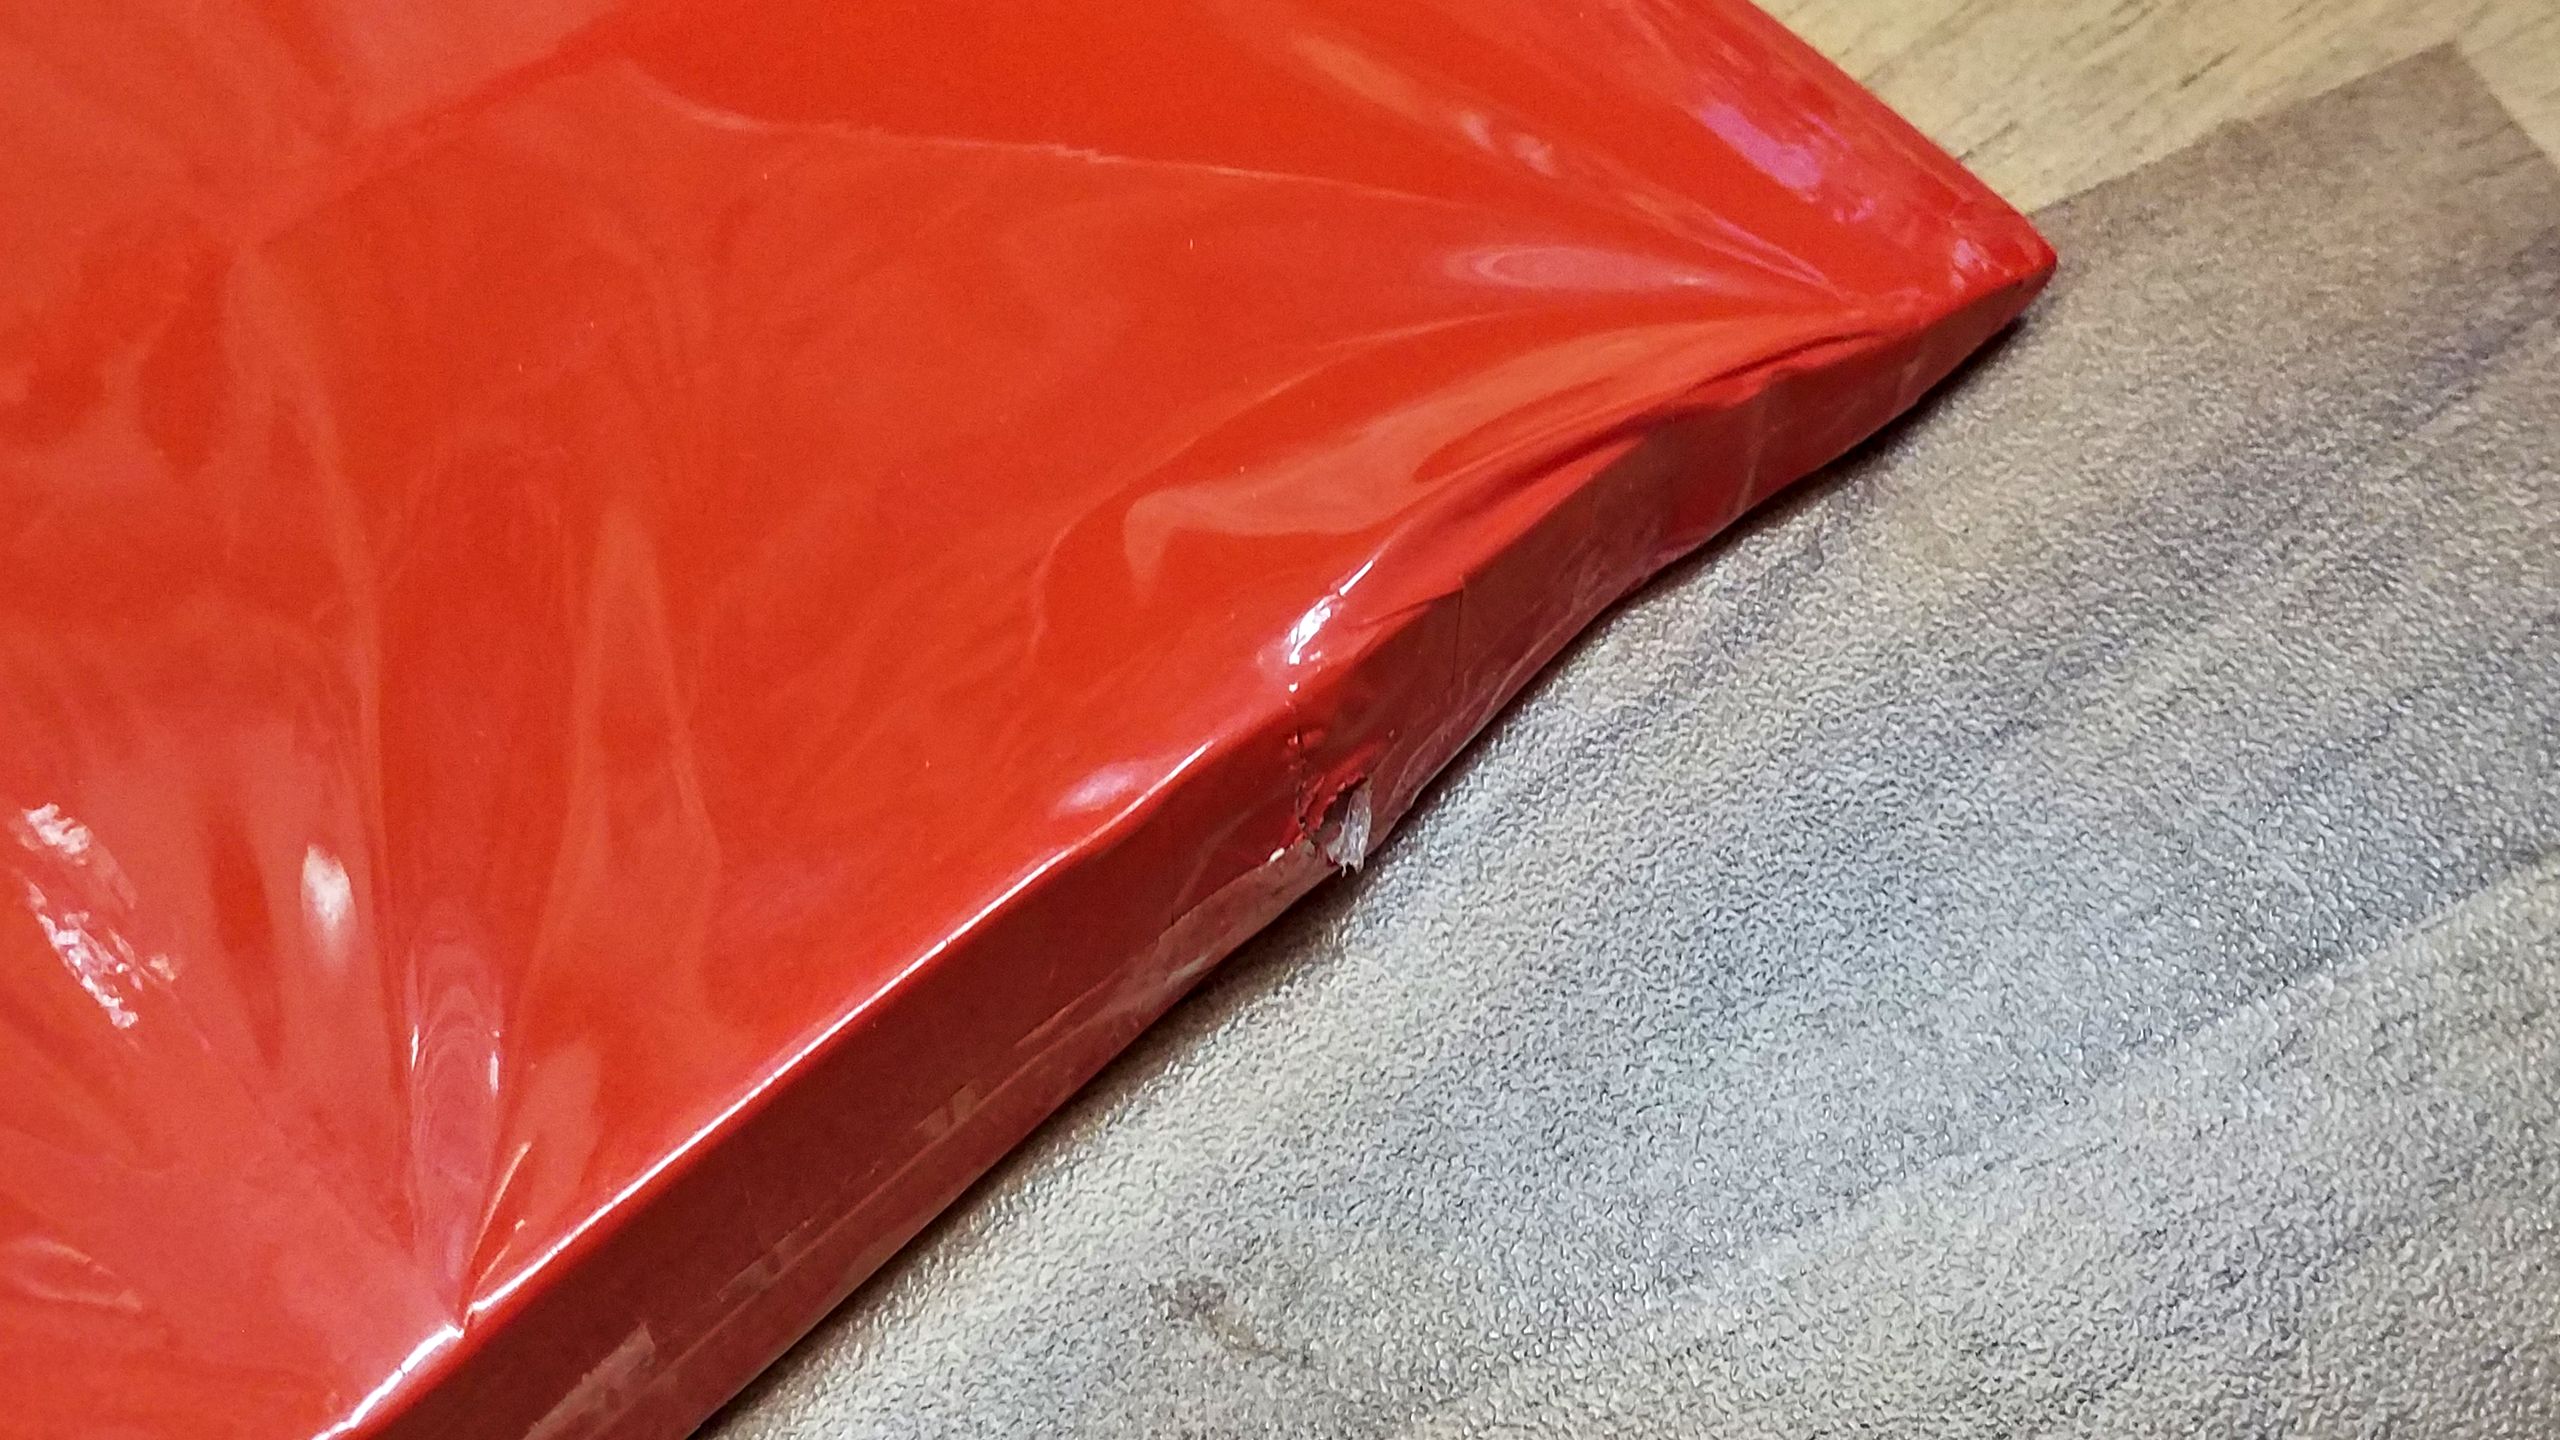
A more thorough examination of the wing revealed a dent in the wing’s first rib. That’s bad news because it indicates a broken rib.
So off comes the covering to reveal the full extent of the damage. Both ribs are shattered in several places. They need to be replaced.
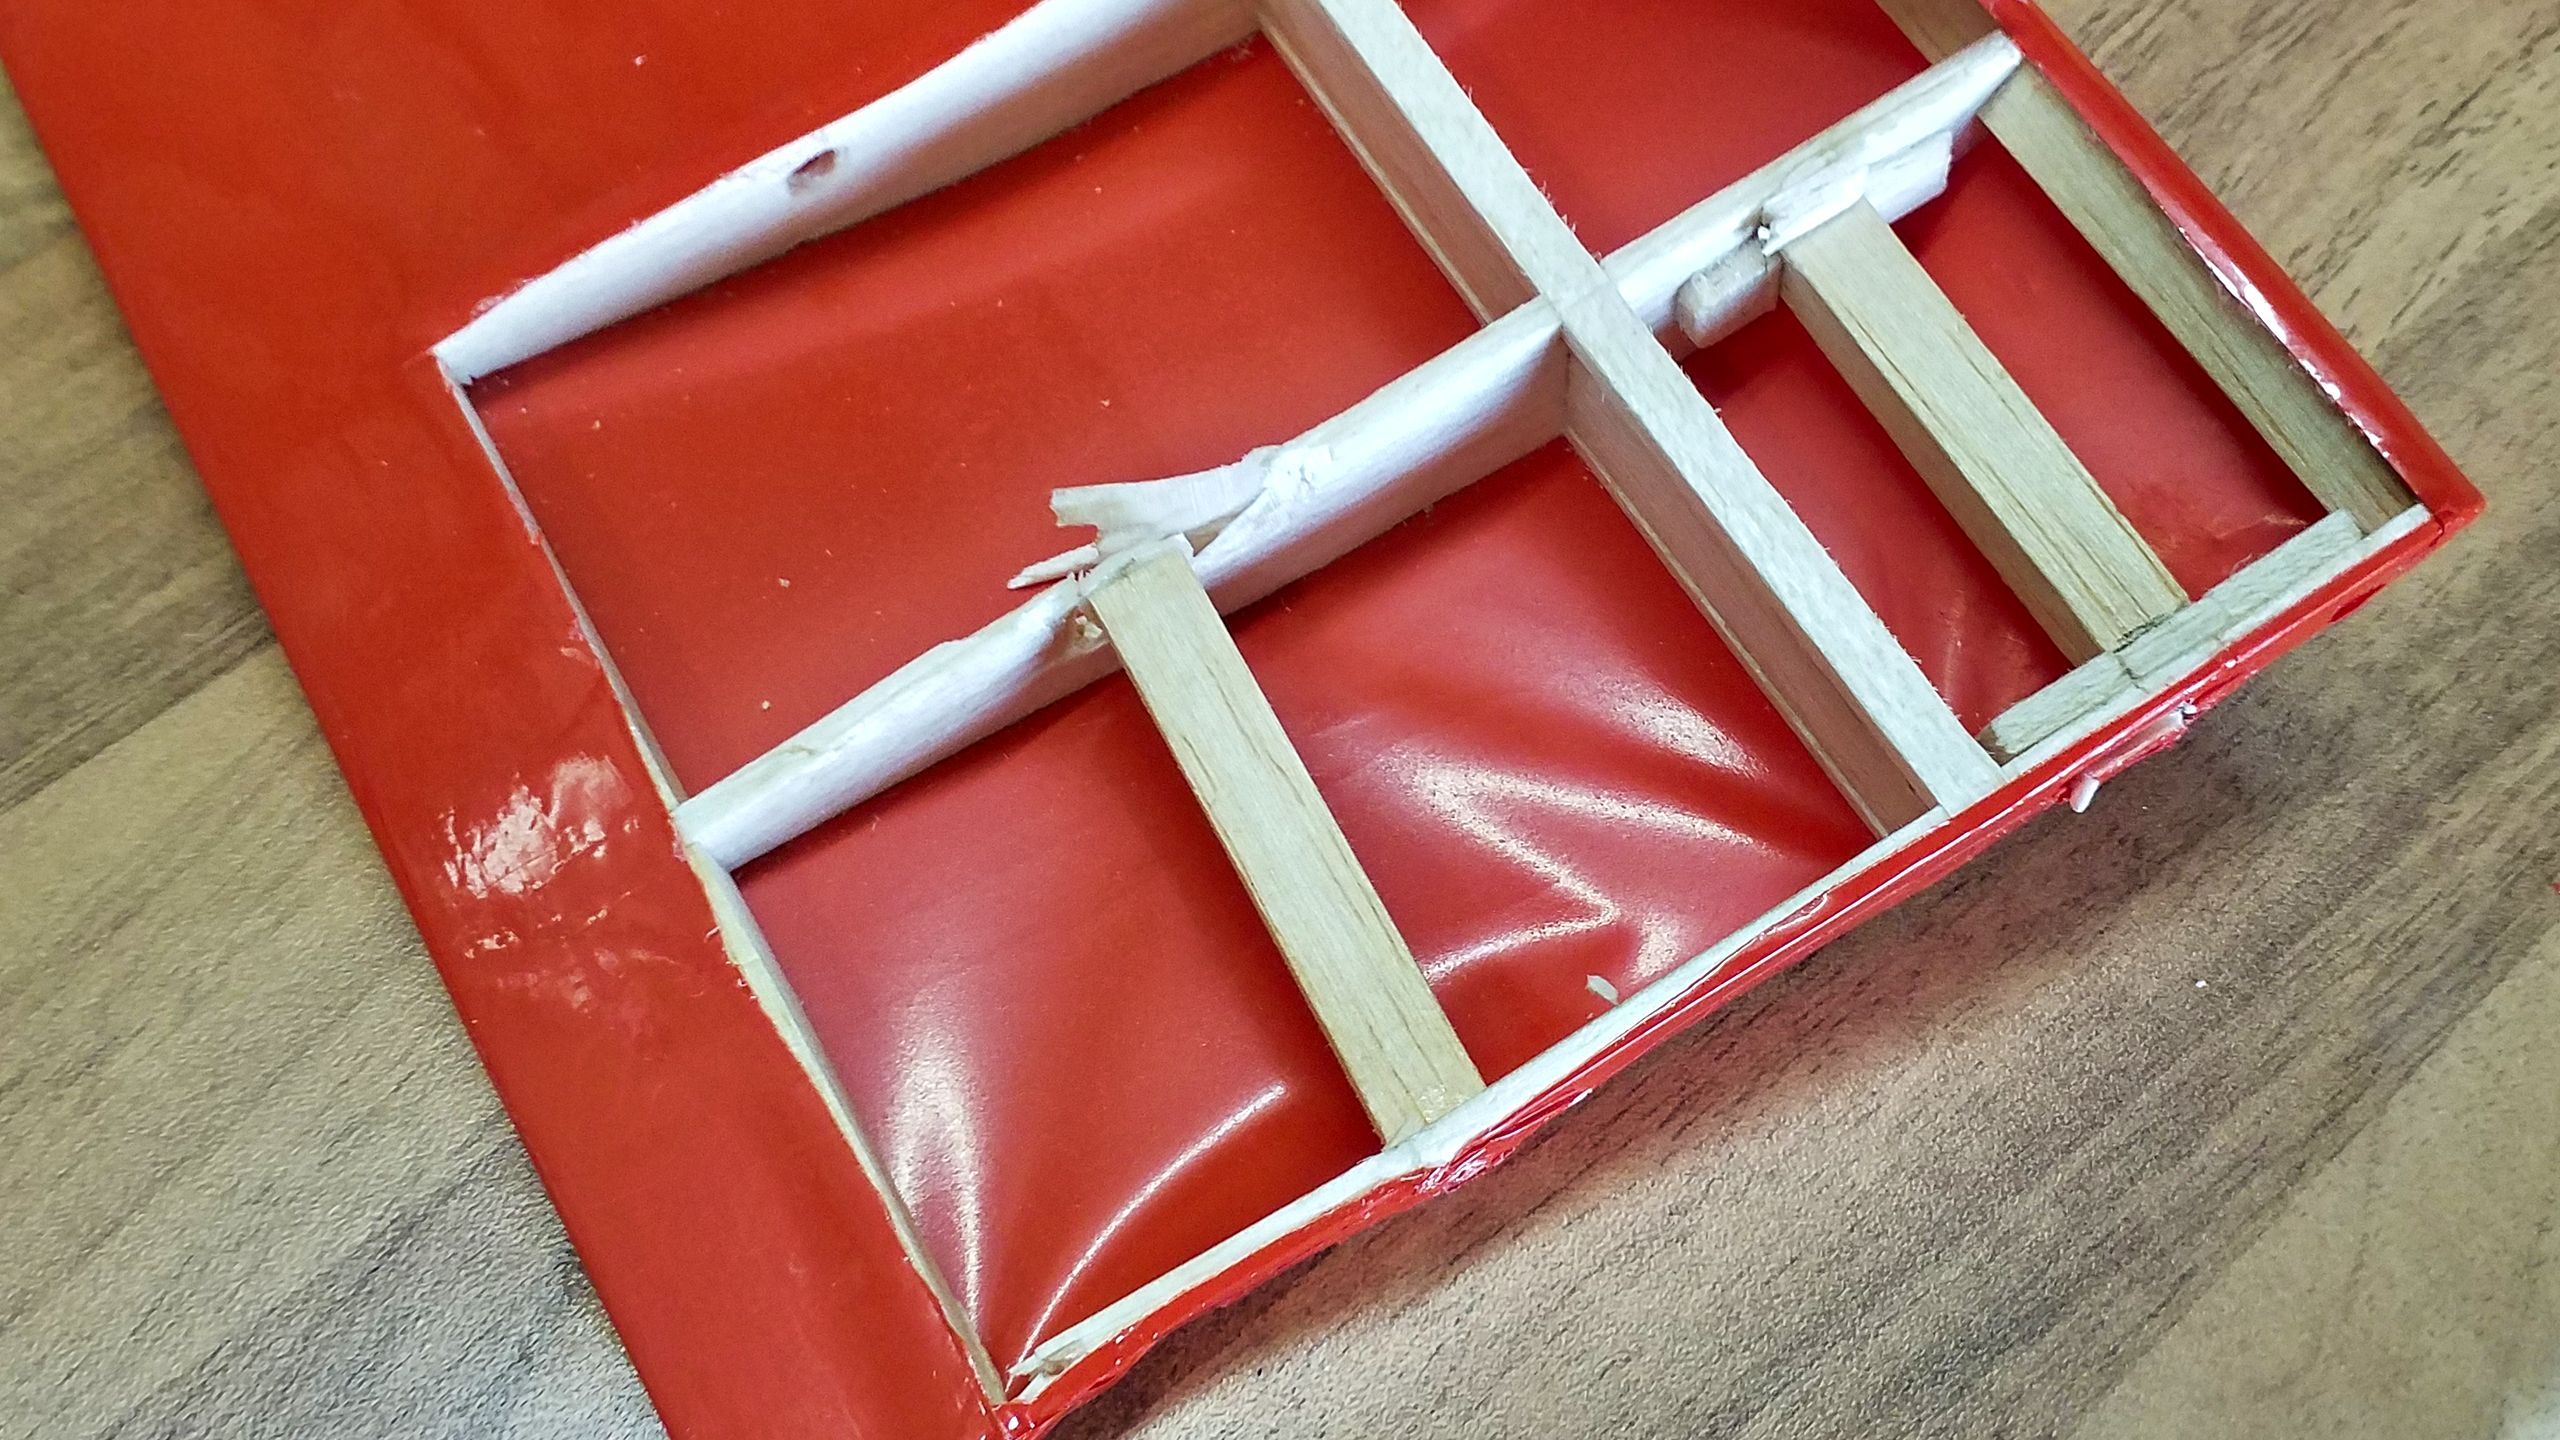
Exactly how I’m going to do that I’m not sure yet. I might be able to build two rib halves and glue them into the spar, or maybe I will rip the spar and scarf it back together. Time will tell.
So all in all the test flight was a success and I’ve learnt quite a lot. Having the banner towed from the fuselage’s belly works fine, release is reliable. And one rule for the tow pilot: Eyes on the plane! 🙂