Timber Cargo for Bulkhead

Loaded and secured.

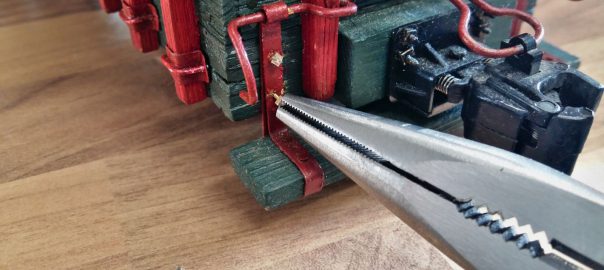
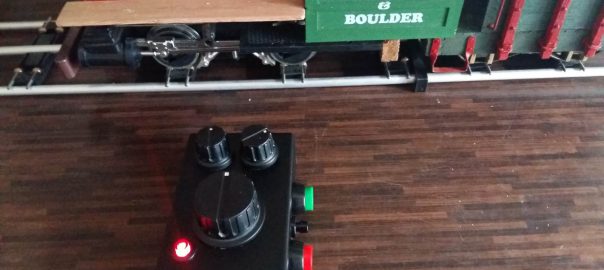
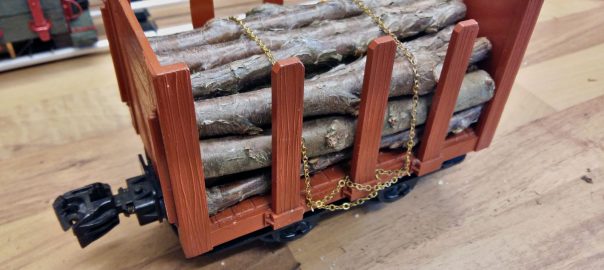
In preparation for the next driving session at a friend’s of mine, I focused on Bulkhead #101. (By default, which other waggons do I possess right now?)

The little darling is supposed to serve as a coupling adapter (knuckle coupling at the front, LGB’s “bottle opener” at the rear). So that it can excel in the task, the waggon needs some additional weight, which I provided by means of a timber load. And in order to keep the latter in place, some fastening had to be added.

Porter and Tender: Coupling-Maintenance

Threaded rods are screwed into the wood.

My faithful Porter had some work to do during this winter, for which it was transported to different places: Into the garden, at my parents-in-law’s, even at work. Of course, these transports always entail boxing and unboxing into transport crates, which lead to considerable wear regarding the coupling between loco and tender on the one hand, and the conductor’s platform at the tender’s rear end on the other hand. Thus, we’re going to focus today on ever-occuring maintenance and possible improvements.

Joyrider: Undercarriage

With the fuselage finished it’s time to focus on the undercarriage. I’ve got two major objectives concerning my model: I want to have the capability to take off from smooth runways and I need a suspended undercarriage in order to dampen jolts during landings.

That’s quite an order on such a small model. Since I don’t want to put tundra wheels on a biplane, I probably won’t even be able to take off from mowed grass runways, but tarmacs should do. As a principle I don’t want to omit the undercarriage because on the one hand it offers some protection to the propeller and on the other hand it’s just part of a prototypical look. In fact I only know of one biplane with retractable gear, that being the Polikarpov I-153 “Chaika”.

Deltang Tx22 Completion

Wiring the ground first.

After assembling the transmitter, I proceeded with soldering the parts. This turned out to be a fiddly affair, which kept me from taking pictures. In return, there’s a video of the final testing! 🙂

Overall one can say that the manufacturer’s documentation works very well. Once you’ve found your way around the diagrams and schemas, the assembly is easily done in a few hours’ worth of time.

It is really helpful to plan the wiring in levels or layers. At the bottom, I placed the ground connectors. There I connected the potentionmeters, the main switch, its LED and the bind switch. The two function switches remain untouched for the moment because after soldering they will partly block access to the potentiometer.

Joyrider: Nose

After framing the fuselage, the nose had to be tackled. This was the first time my skills got stretched to their limits and I had to rebuild repeatedly.

The main challenge was the quite accentuated curve that I expected the stringers to follow. I did manage to bend them accordingly on the fuselage’s halves while they were fixed to the construction board and the fixtures seemed to be stable. However, while trying to join the two halves I overtaxed the wood glue.

DelTang Tx22 Assembly

As I have already mentioned in my post on powering my porter loco with Li-Ion accus, I’d like to experiment with the DelTang system. There’s a lot of positive feedback from other model railroaders and all my requirements seem to be met – with further room for improvements.

Unfortunately, with the upcoming Brexit the demand for DelTang components has skyrocketed at the moment (meaining autumn 2019). I was lucky to get my hands on one Tx22 transmitter and two Rx65c receivers. It will suffice for the moment, but I will need further components, especially spares.

New Construction Report: Biplane “Joyrider”

About half a year after I started flying with my EasyGlider the desire for another model aircraft grew stronger.

I soon realized that I’d have to build my own models rather than buy premade ones. Especially larger models would quickly overtax my financial abilities. However, scratch building can consume a lot of money, too. So I decided to test my will: Do I really want to build a model aircraft from scratch?

Thus an old cardboard filled with balsa wood was ravaged, following the old saying: it only costs time. Taking stock, I realized that the materials wouldn’t quite suffice to build a whole plane. However, it would suffice to put my endurance under proper scrutiny.

Garden Railway: Removal

It’s been more than one and a half years, since I last posted on the garden railway. In the meantime I decided to remove it. The reasons are simple: no time, no money, too many ambitions.

Garden railways are expensive on both accounts. Paul Race recently published a very good article on his wonderful website: Which Comes First, the Garden or the Train? One of his core arguments is:

Initially you should plan to spend over twice as much on track as you do on trains. And over twice as much on your garden and landscaping as you do on the trains and track put together.

I concur. Besides the financial aspect I didn’t (couldn’t?) take enough time to work on the railway. And so it came during spring that my wife mentioned the perpetual construction site, which really was no pretty sight to see.